> ## Documentation Index
> Fetch the complete documentation index at: https://docs.quickblox.com/llms.txt
> Use this file to discover all available pages before exploring further.
# Building a workflow
> Create, configure, publish, and activate a workflow in the visual editor
The workflow editor lets you build a conversation flow by dragging nodes onto a canvas, connecting them, and configuring each step in a side panel. Changes are saved automatically as you work.
## Create a workflow
1. Go to ***Dashboard => YOUR\_APP => AI Agent***.
2. Open the Workflow Agent you want to add a workflow to.
3. Click the **Chat Workflows** tab.
4. Click **Create** (the button reads **Create Workflow** on the empty state).
5. Enter a name for the workflow and confirm.
The workflow is created in draft state and appears in the workflows list. Click **Edit** next to it to open it in the editor.
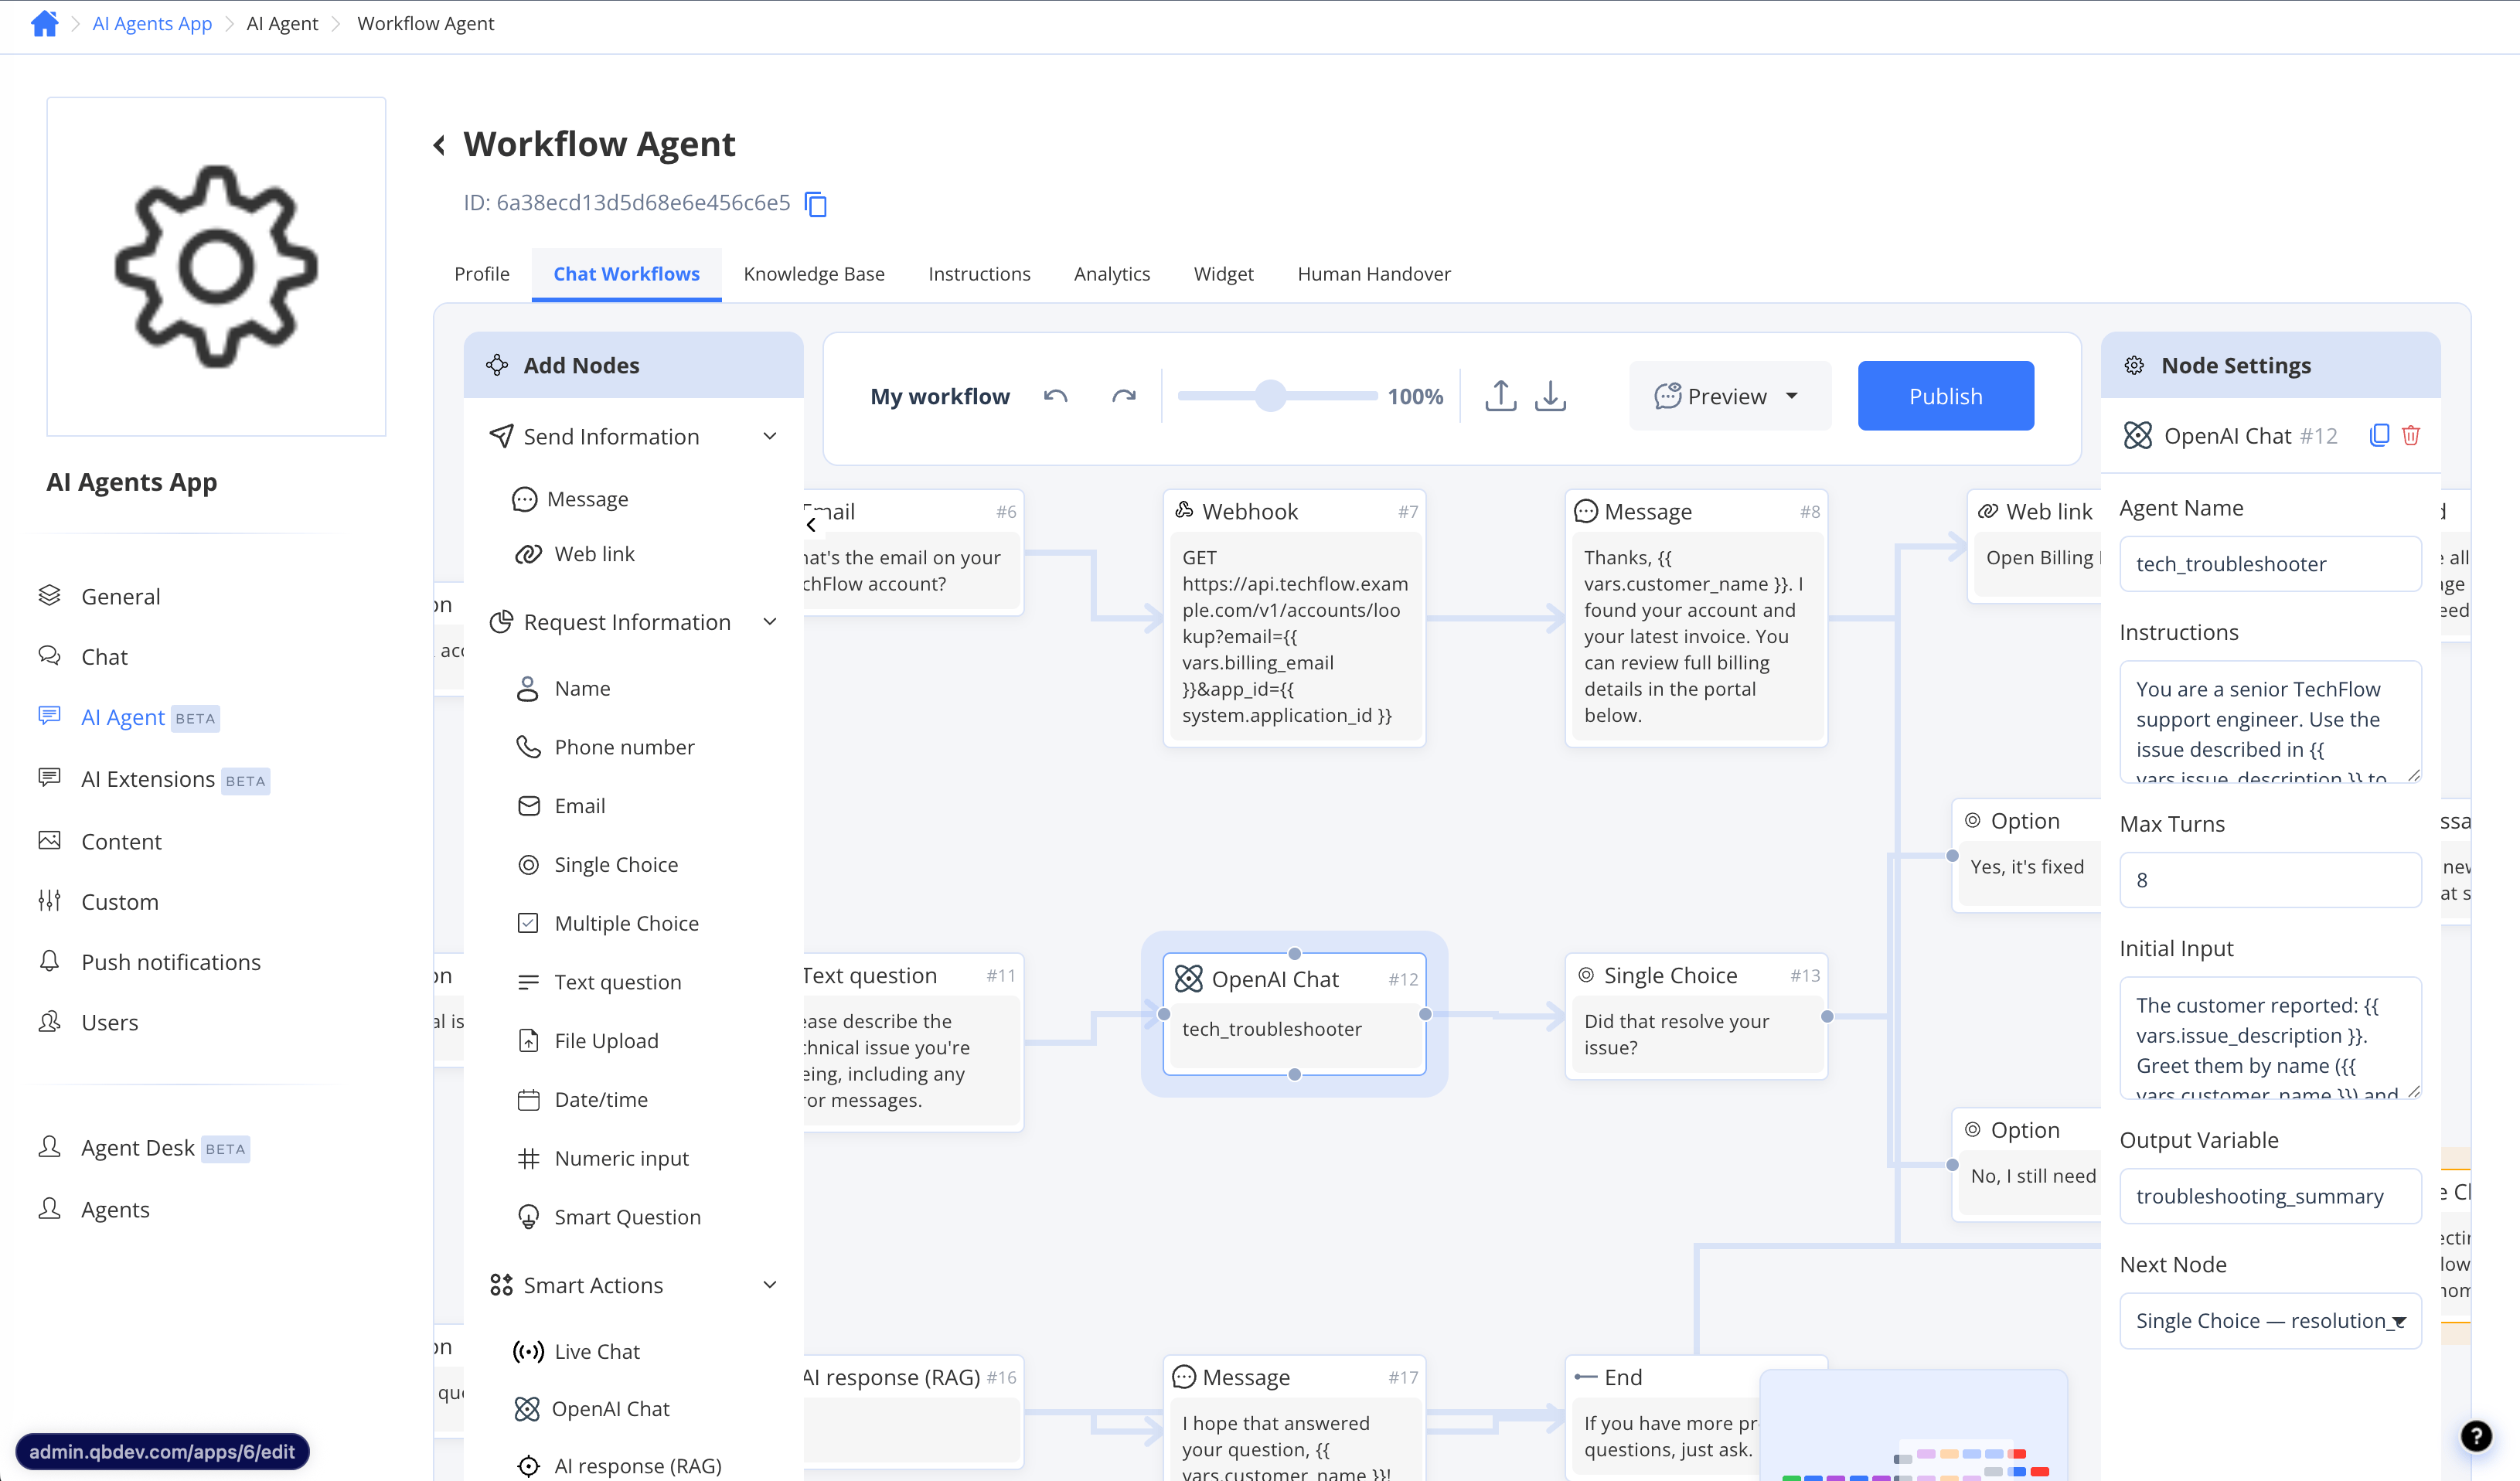
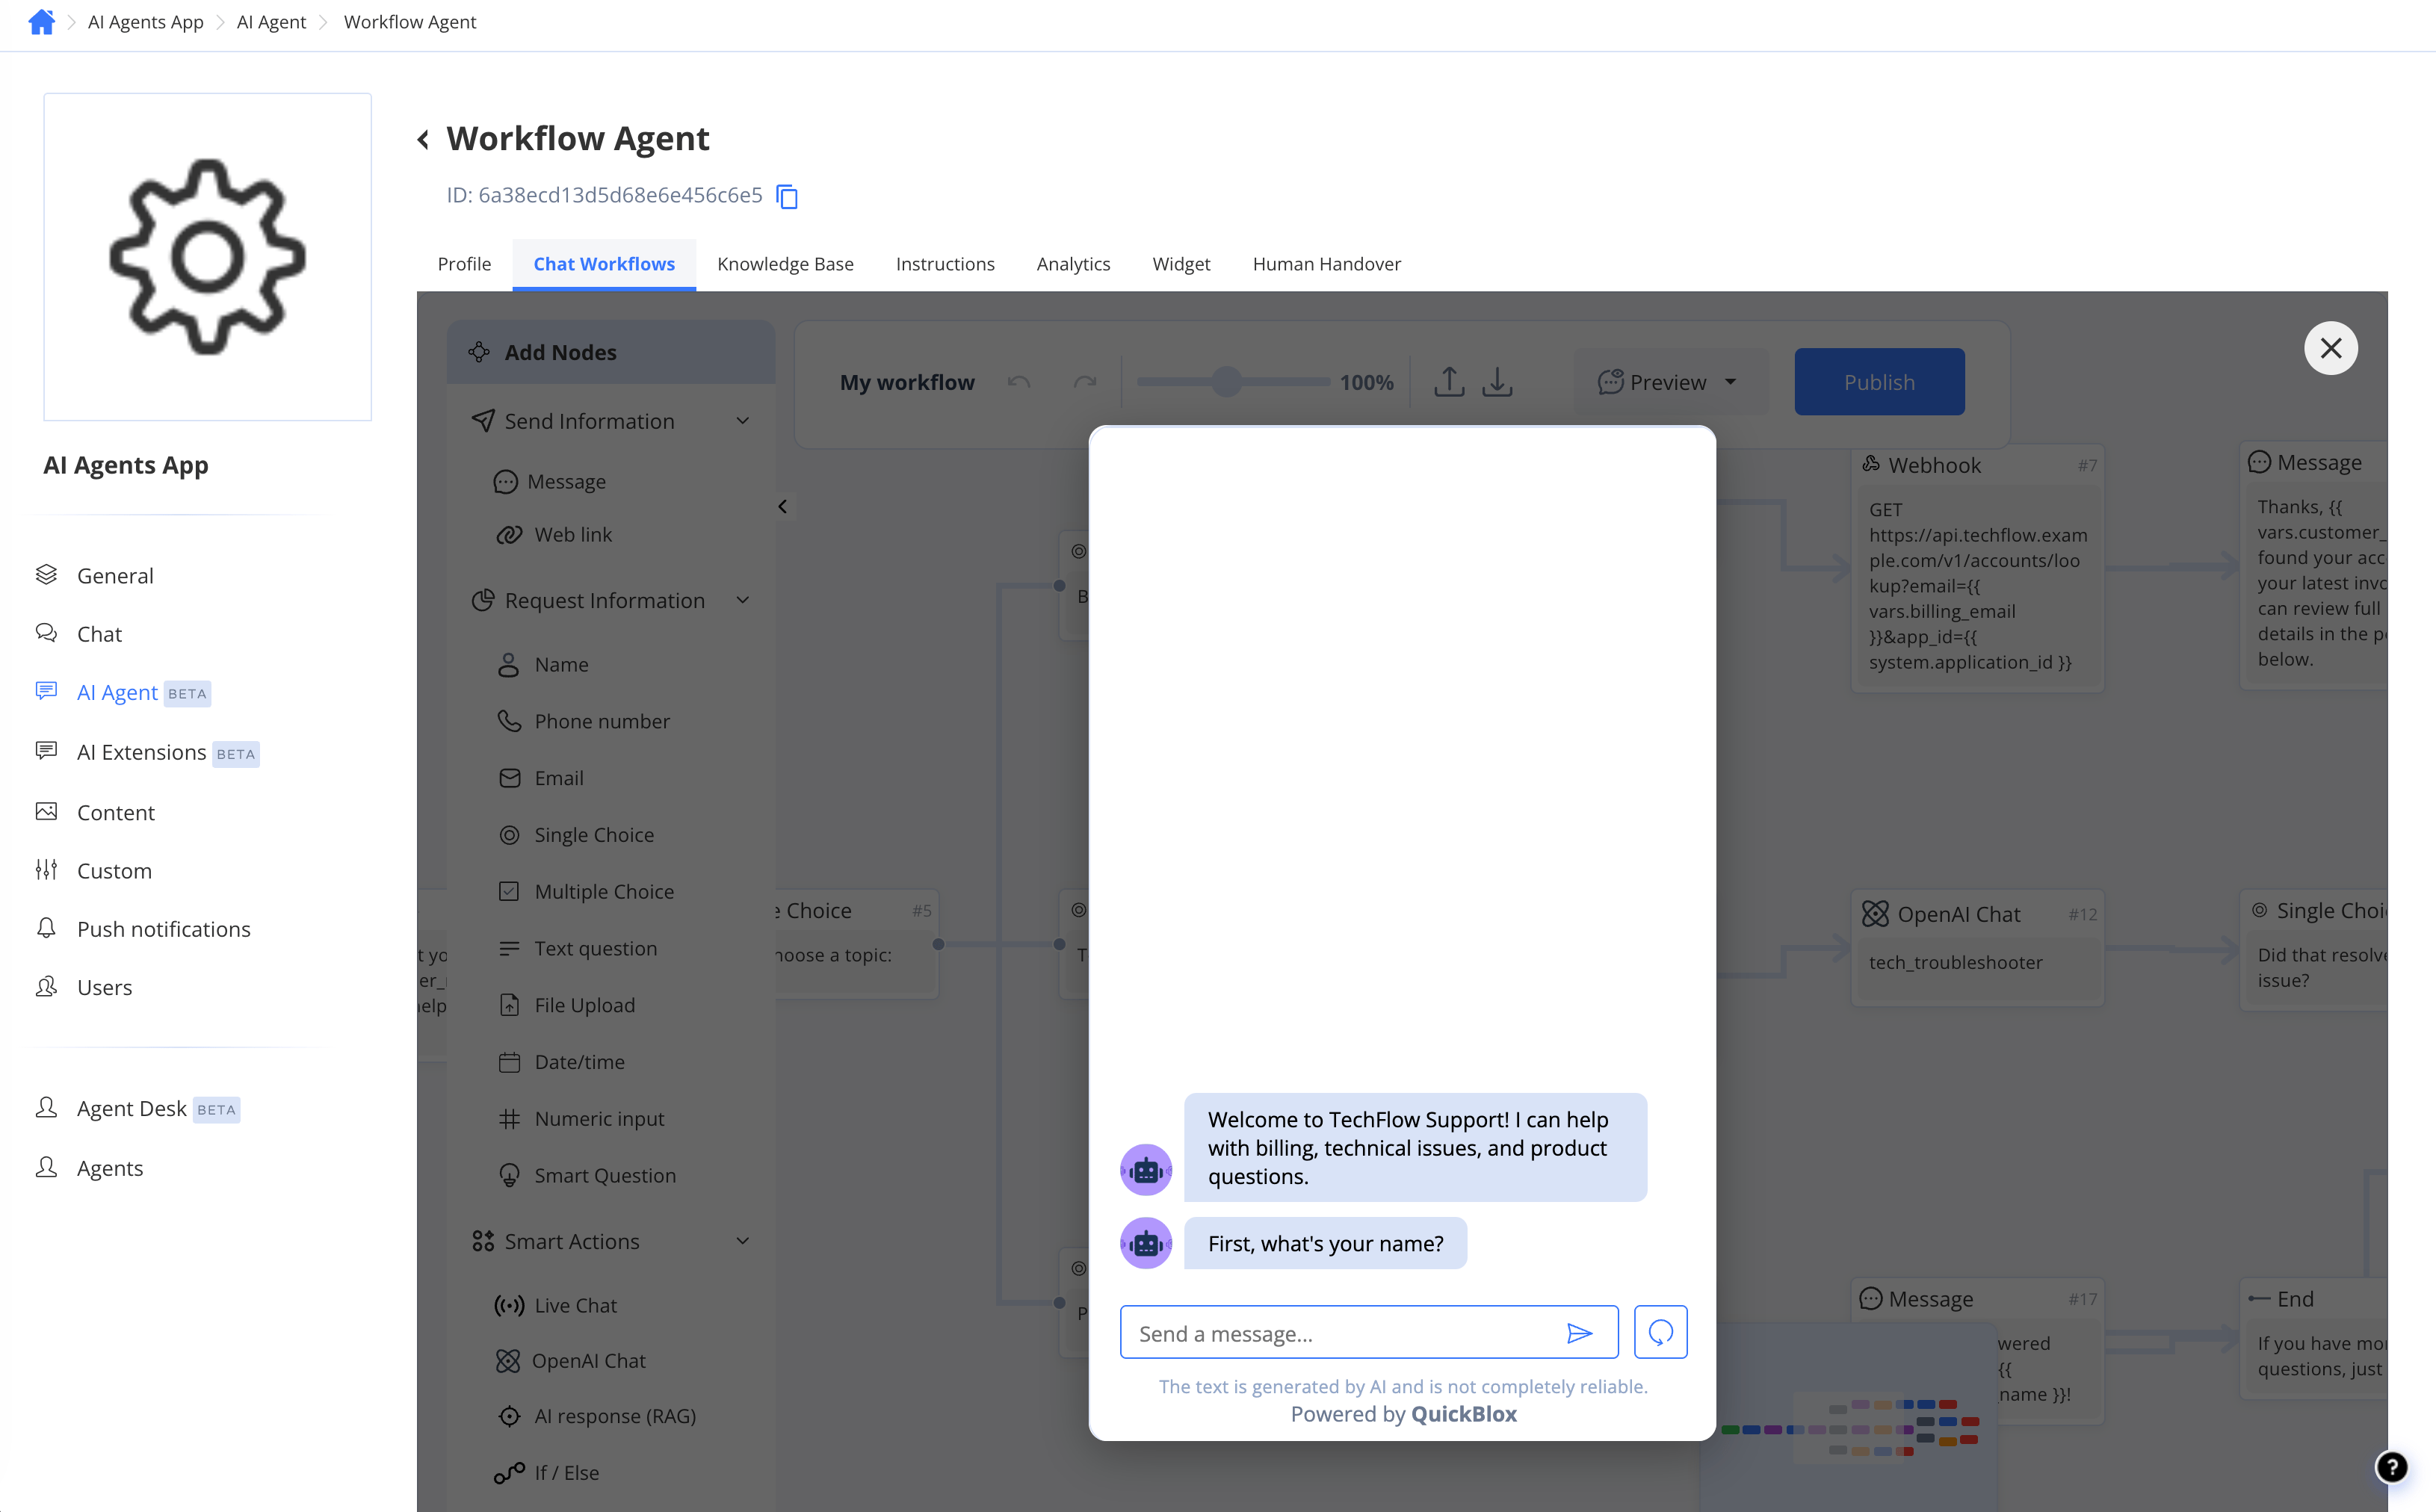
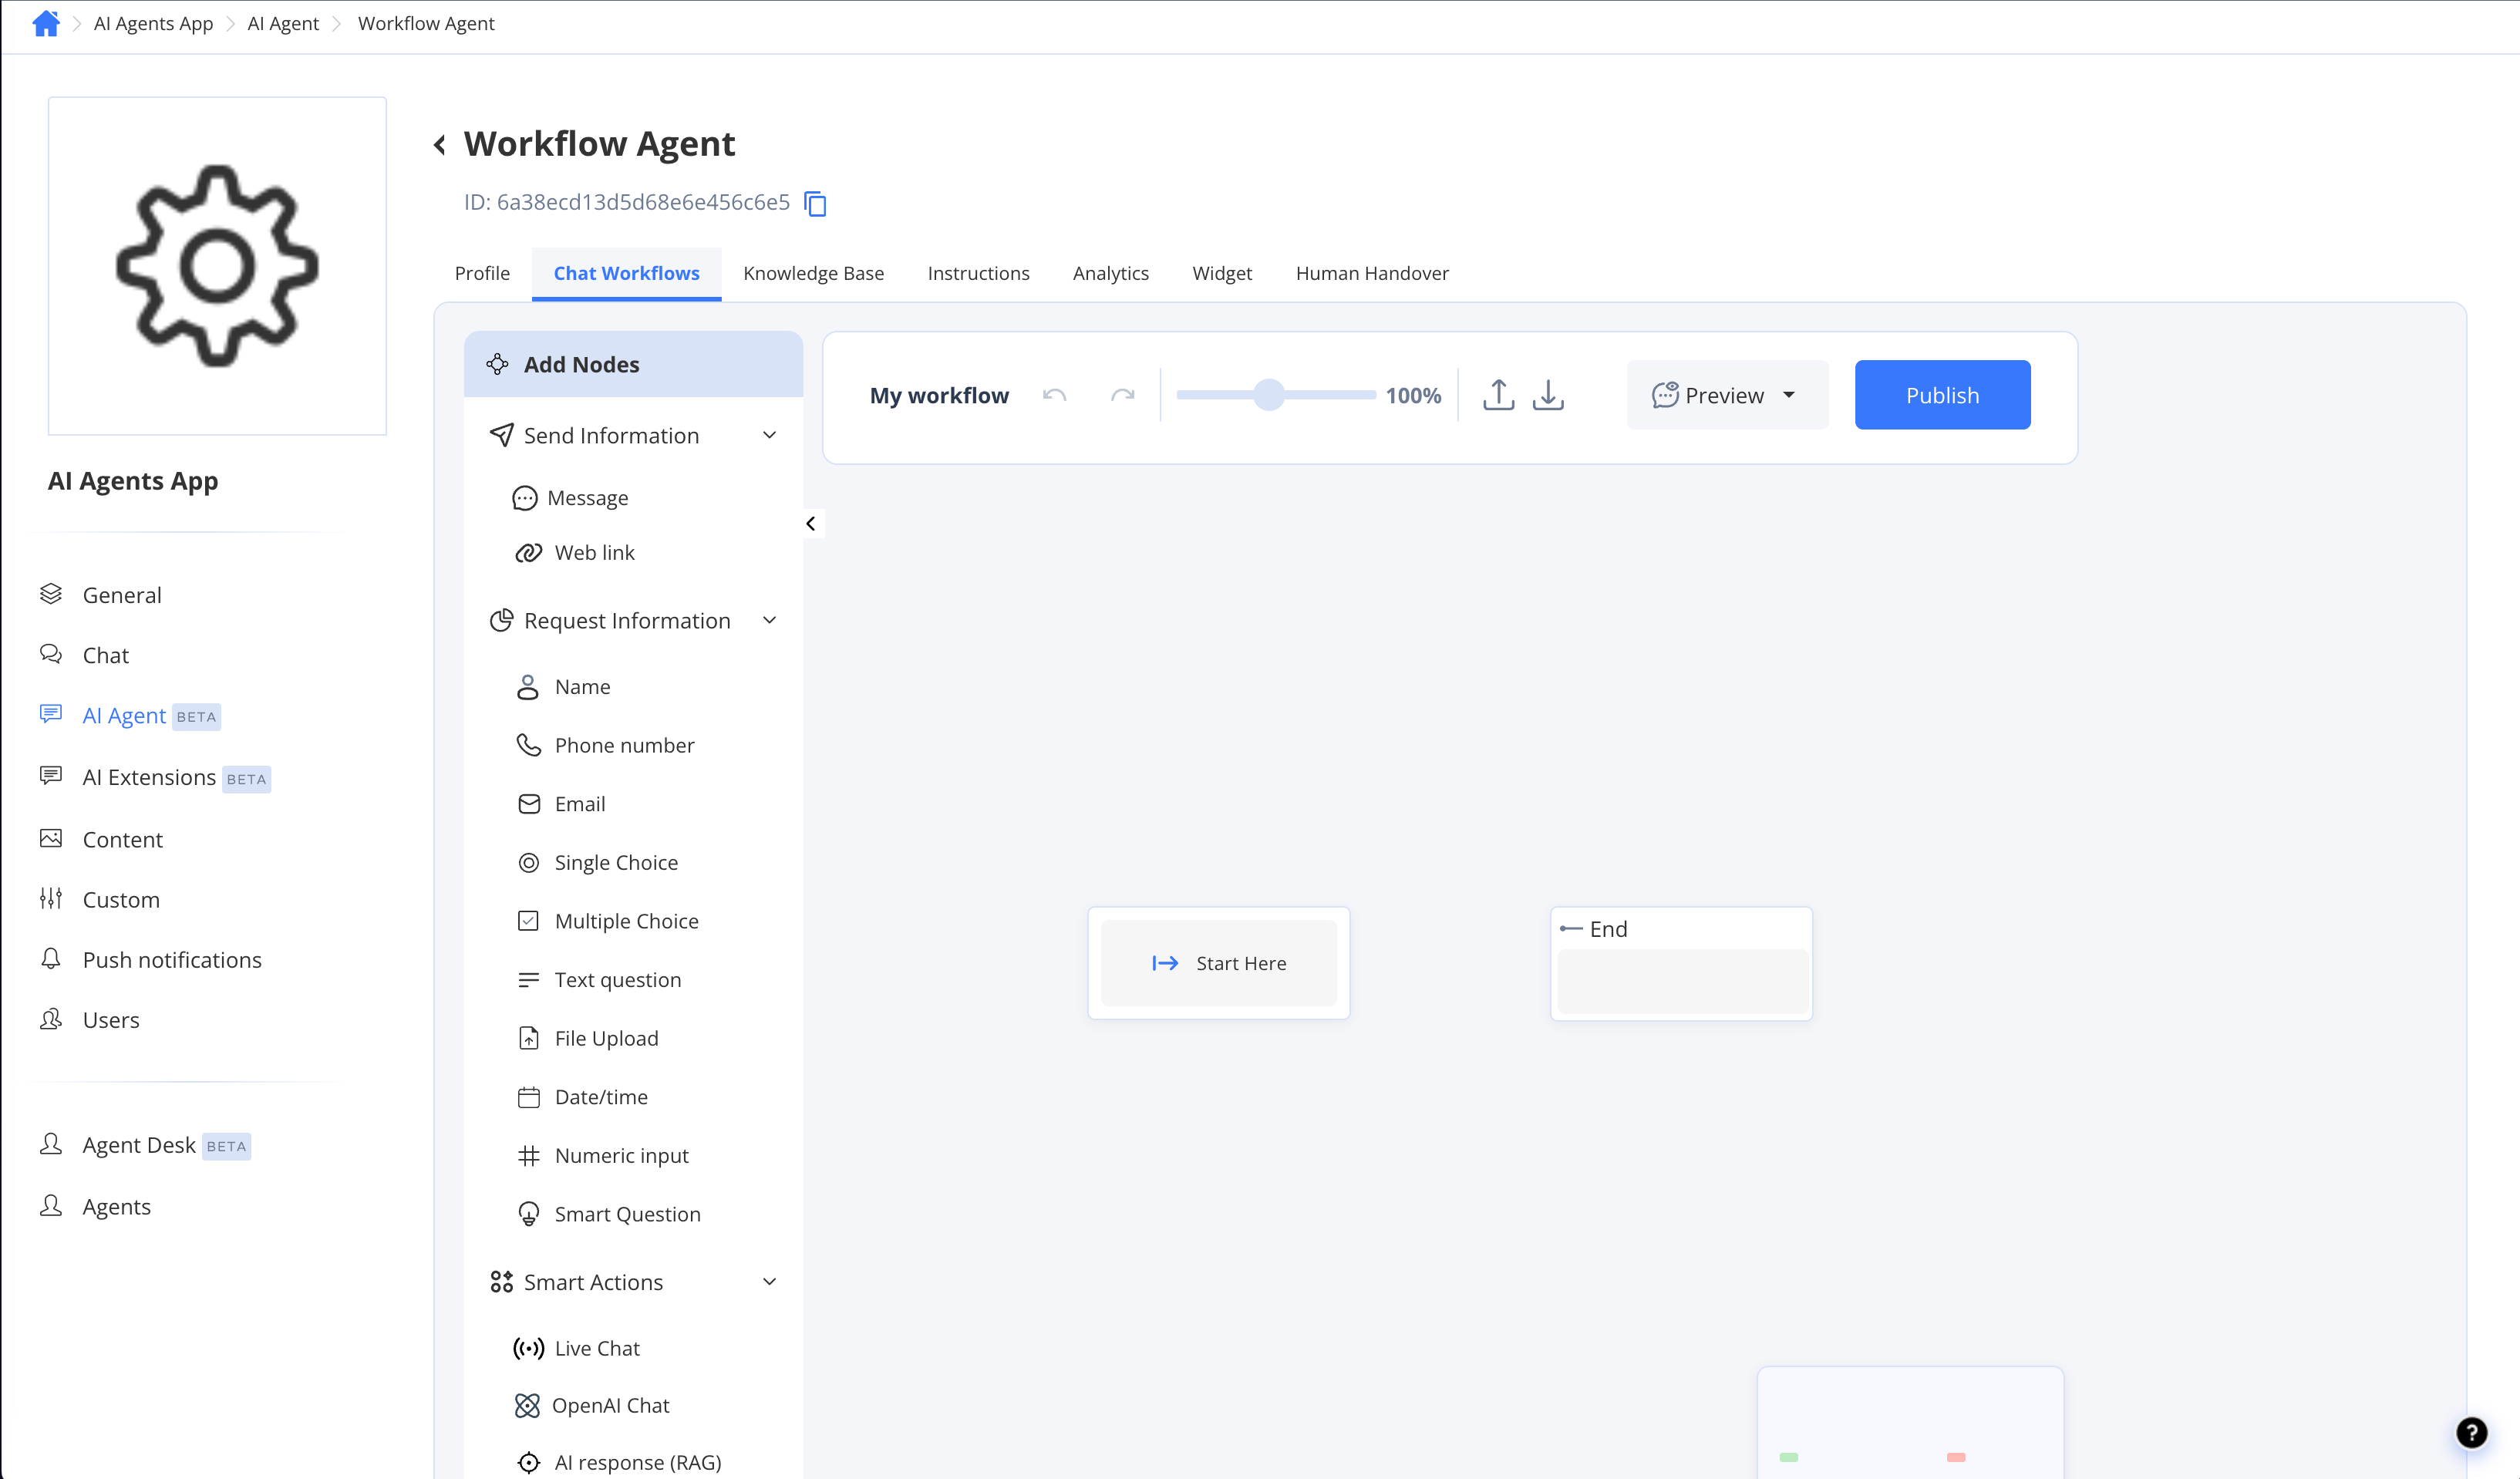 ## Editor layout
The editor has three main areas:
| Area | What it does |
| ------------------------- | ----------------------------------------------------------------------------------------------------------------------------------- |
| **Canvas** (centre) | Your workflow graph. Drag nodes here, click a node to select it, and drag from a node's output port to connect it to the next node. |
| **Node palette** (left) | All available node types organised into groups. Drag any node onto the canvas to add it. |
| **Node Settings** (right) | Configuration panel for the currently selected node. Configure its message, options, variables, and behaviour here. |
The editor auto-saves your changes. You do not need to click a Save button while editing — focus on building the flow.
## Editor layout
The editor has three main areas:
| Area | What it does |
| ------------------------- | ----------------------------------------------------------------------------------------------------------------------------------- |
| **Canvas** (centre) | Your workflow graph. Drag nodes here, click a node to select it, and drag from a node's output port to connect it to the next node. |
| **Node palette** (left) | All available node types organised into groups. Drag any node onto the canvas to add it. |
| **Node Settings** (right) | Configuration panel for the currently selected node. Configure its message, options, variables, and behaviour here. |
The editor auto-saves your changes. You do not need to click a Save button while editing — focus on building the flow.
 ## Import and export
You can share or back up a workflow as a JSON file. Both actions live in the editor toolbar, so open a workflow first.
* To **export**: open the workflow and click the **Export** icon in the editor toolbar. The JSON file is downloaded to your device.
* To **import**: open a workflow, click the **Import** icon in the editor toolbar, and select a previously exported JSON file. The imported graph replaces the canvas of the currently open workflow.
Importing overwrites the currently open workflow's canvas. The change is auto-saved as the draft working copy — review and publish it before activating.
## Publish a workflow
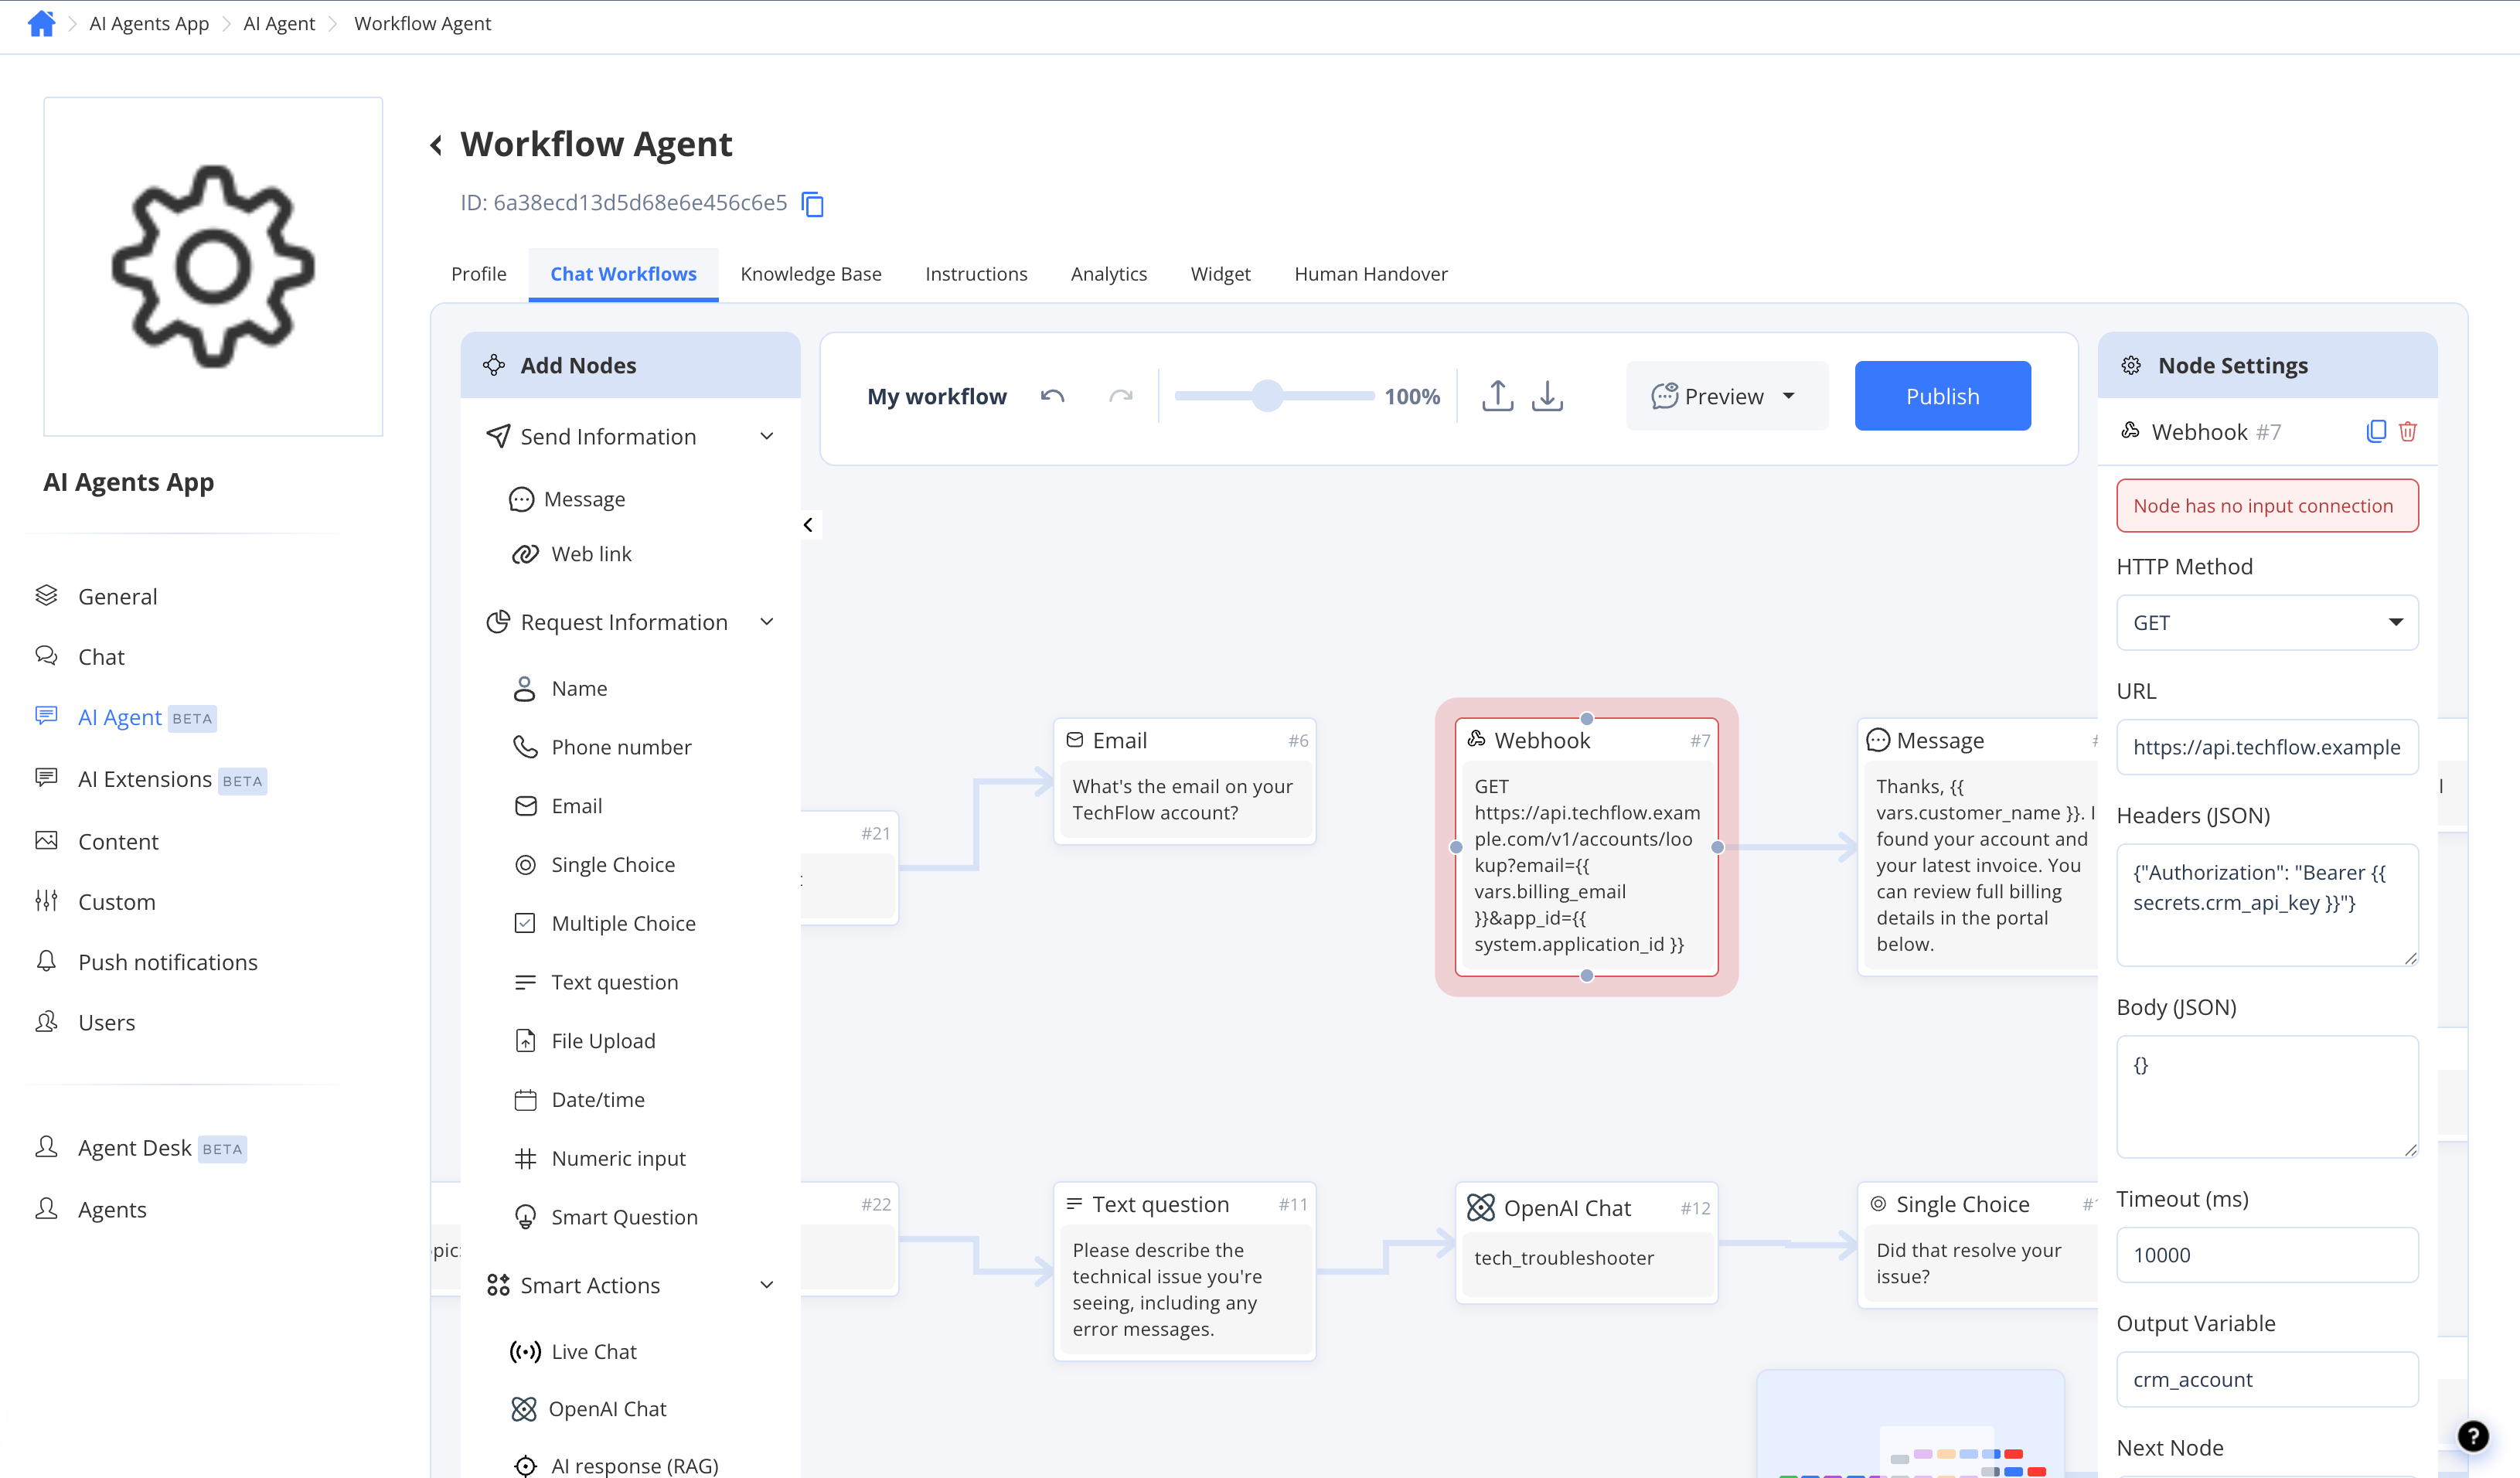
Publishing makes a workflow available to be activated for live conversations. Before you can publish, every node must meet the following requirements:
* Every node must be **connected** — no isolated nodes on the canvas.
* Every node must be **reachable** — each node needs an incoming connection, with no orphaned nodes that nothing links to.
* Every path must ultimately reach an **End** node — no open output ports.
If any requirement is not met, the editor highlights the problem and prevents publishing.
To publish a workflow:
1. Finish building and configuring all nodes.
2. Click **Publish** in the editor toolbar.
3. Resolve any validation errors shown, then click **Publish** again.
## Import and export
You can share or back up a workflow as a JSON file. Both actions live in the editor toolbar, so open a workflow first.
* To **export**: open the workflow and click the **Export** icon in the editor toolbar. The JSON file is downloaded to your device.
* To **import**: open a workflow, click the **Import** icon in the editor toolbar, and select a previously exported JSON file. The imported graph replaces the canvas of the currently open workflow.
Importing overwrites the currently open workflow's canvas. The change is auto-saved as the draft working copy — review and publish it before activating.
## Publish a workflow
Publishing makes a workflow available to be activated for live conversations. Before you can publish, every node must meet the following requirements:
* Every node must be **connected** — no isolated nodes on the canvas.
* Every node must be **reachable** — each node needs an incoming connection, with no orphaned nodes that nothing links to.
* Every path must ultimately reach an **End** node — no open output ports.
If any requirement is not met, the editor highlights the problem and prevents publishing.
To publish a workflow:
1. Finish building and configuring all nodes.
2. Click **Publish** in the editor toolbar.
3. Resolve any validation errors shown, then click **Publish** again.
 When you edit a published workflow, your changes are auto-saved to a draft working copy. Your live agent keeps using the previously published version until you click **Publish** again. If the workflow is already active, you do not need to reactivate it after re-publishing.
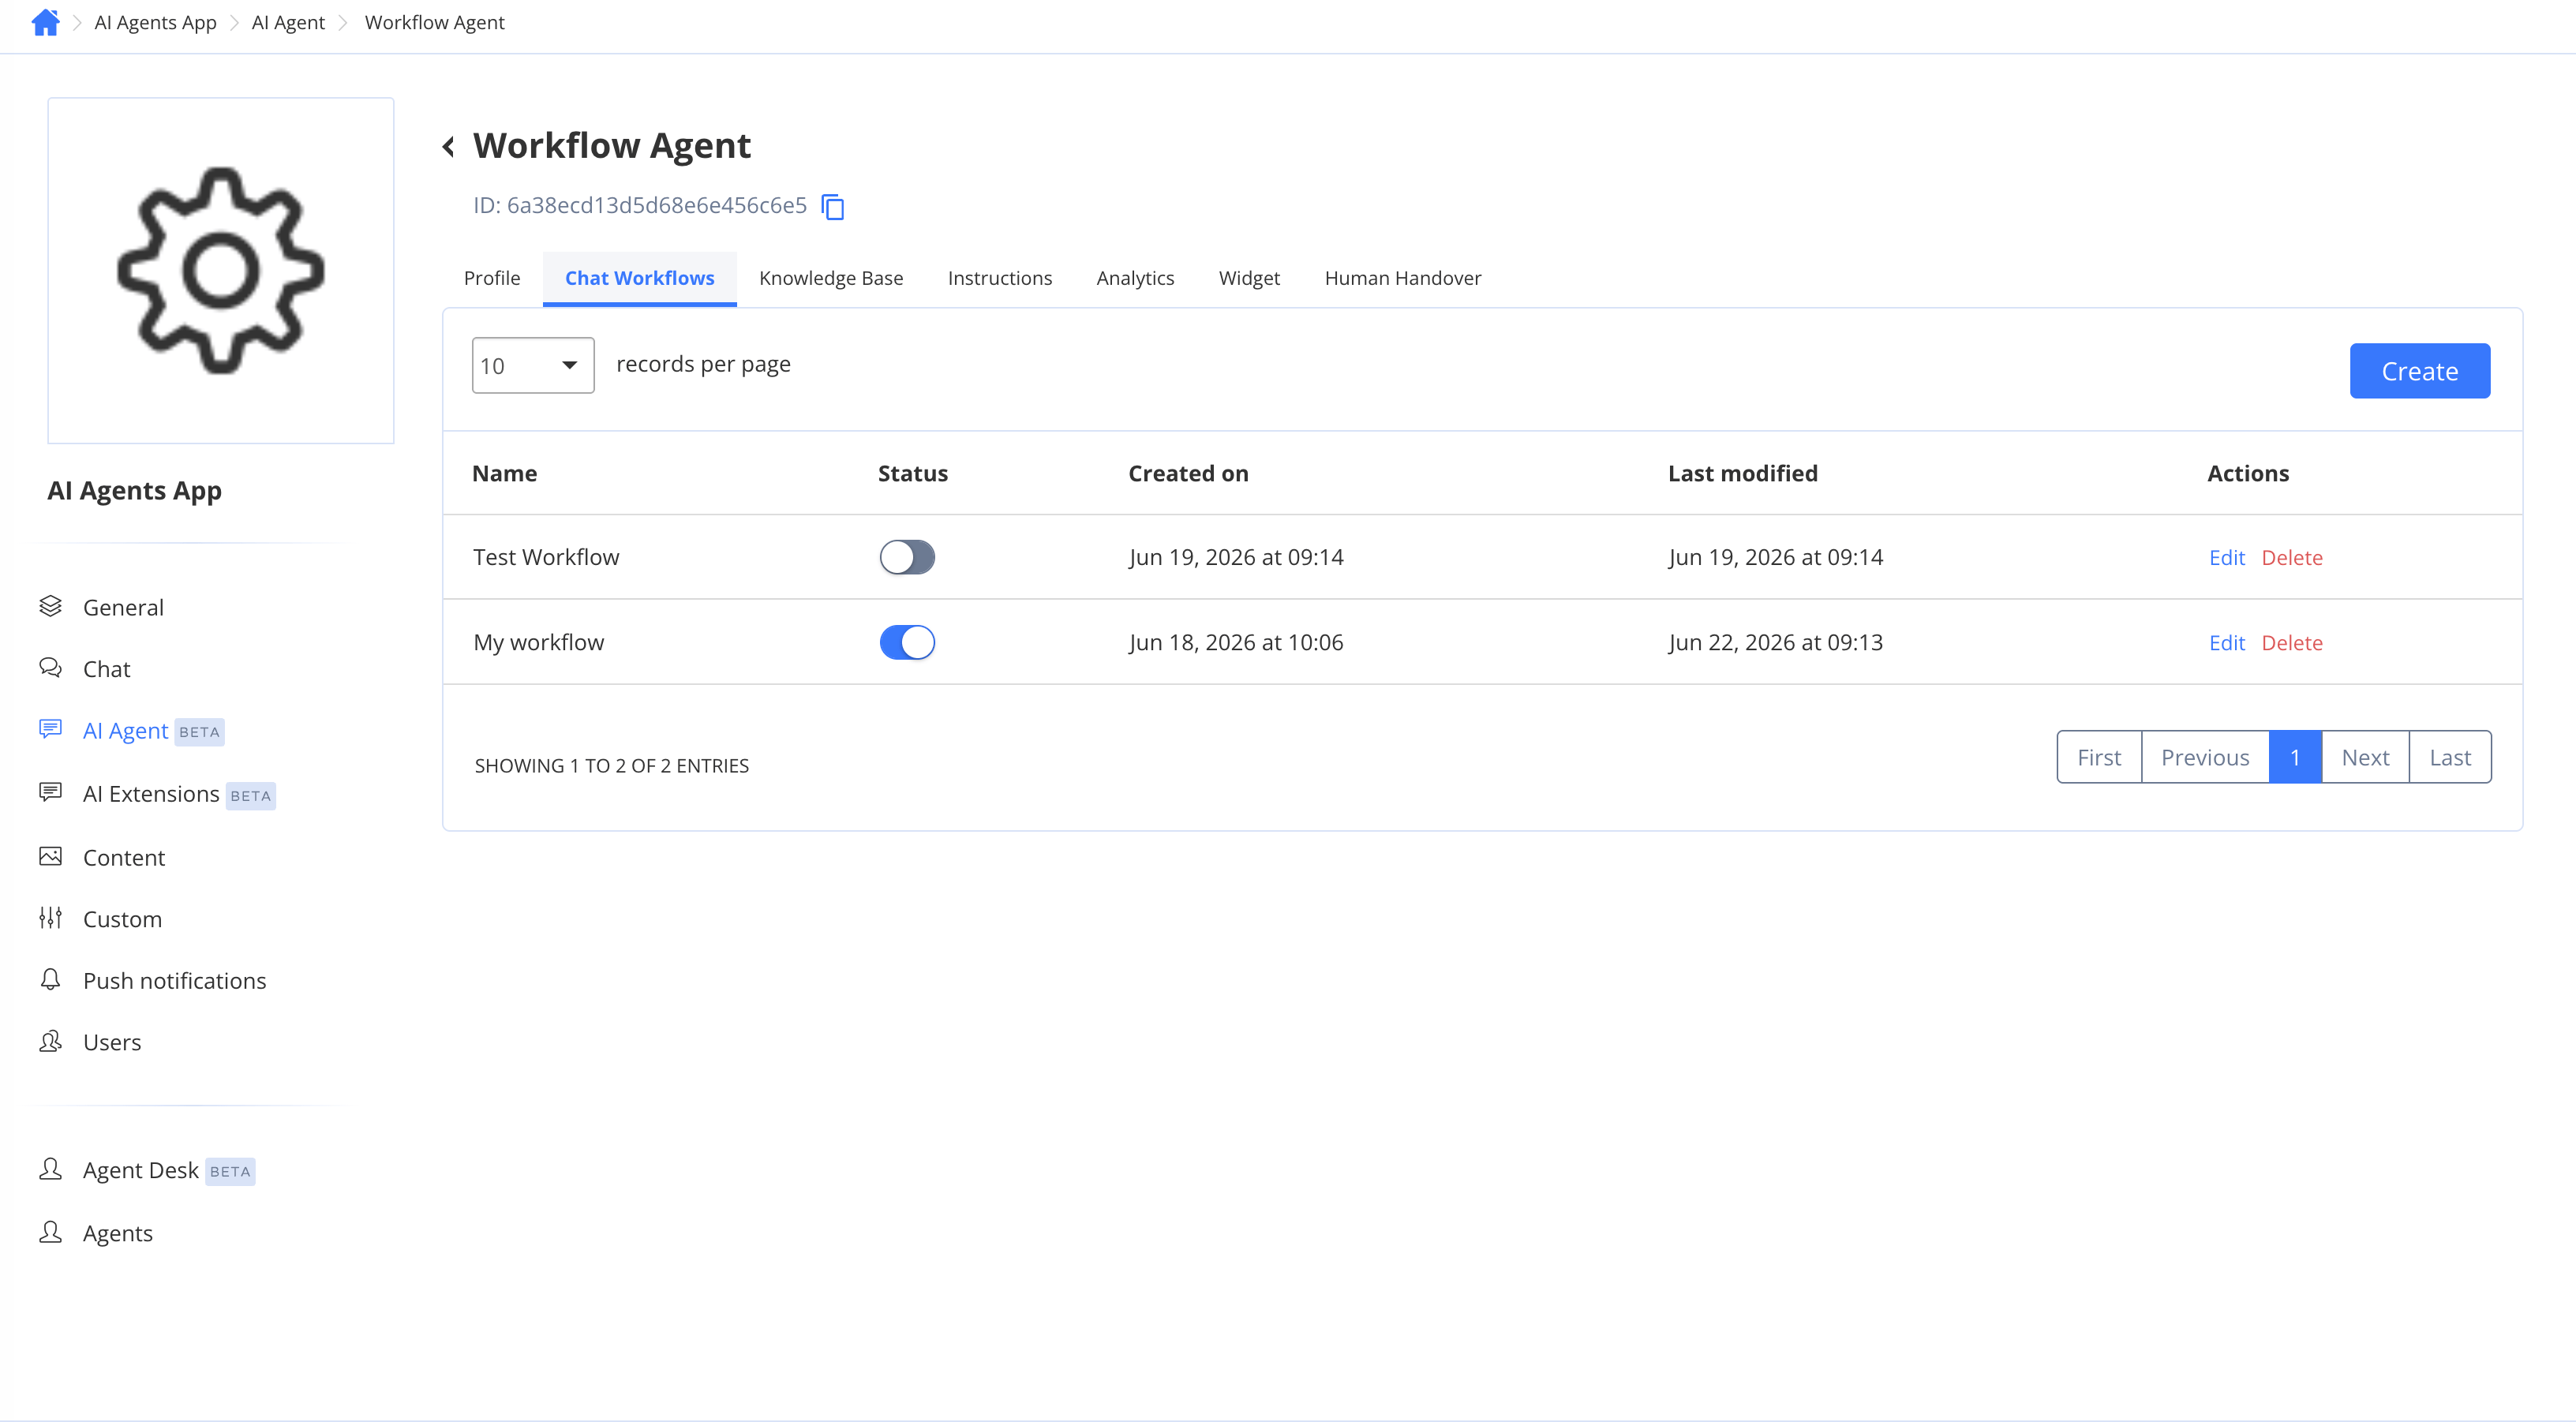
## Activate a workflow
Only one workflow per agent can be active at a time. Activating a workflow makes it the one that runs for all new conversations on that agent.
1. Go to the **Chat Workflows** tab of the Workflow Agent.
2. Find the published workflow you want to make live.
3. Toggle the **Status** switch to **Active**.
The previously active workflow (if any) is automatically deactivated.
When you edit a published workflow, your changes are auto-saved to a draft working copy. Your live agent keeps using the previously published version until you click **Publish** again. If the workflow is already active, you do not need to reactivate it after re-publishing.
## Activate a workflow
Only one workflow per agent can be active at a time. Activating a workflow makes it the one that runs for all new conversations on that agent.
1. Go to the **Chat Workflows** tab of the Workflow Agent.
2. Find the published workflow you want to make live.
3. Toggle the **Status** switch to **Active**.
The previously active workflow (if any) is automatically deactivated.
 Publish your workflow before activating it. Activating a workflow that has never been published leaves live conversations with no flow to run.
## Preview and test
You can test your workflow without affecting live users.
* Click **Preview** in the editor toolbar to open the embedded chat widget and interact with the workflow as a user would.
* Use the **AI Agent Tester** (available from the agent's main settings) to run through the flow and inspect how each node responds.
Publish your workflow before activating it. Activating a workflow that has never been published leaves live conversations with no flow to run.
## Preview and test
You can test your workflow without affecting live users.
* Click **Preview** in the editor toolbar to open the embedded chat widget and interact with the workflow as a user would.
* Use the **AI Agent Tester** (available from the agent's main settings) to run through the flow and inspect how each node responds.
 Live Chat handover nodes are simulated in preview — no real agent is notified. See [Variables, branching & testing](/ai-agent/workflows/variables-and-testing) for full testing guidance.