> ## Documentation Index
> Fetch the complete documentation index at: https://docs.quickblox.com/llms.txt
> Use this file to discover all available pages before exploring further.
# Application
> Learn how to create and manage your app.
Before starting to build your chat app for a particular platform, it's important to understand that your QuickBlox application has many functionalities to keep the chat service running along with basic features to provide proper application management.
You can integrate only one QuickBlox application into your app, regardless of the platform. Thus, if you develop an app for Android, iOS, or web platform, you require only one QuickBlox application.
Visit [Key Concepts](/docs/key-concepts) page to learn the most important QuickBlox concepts.
## Create your first application
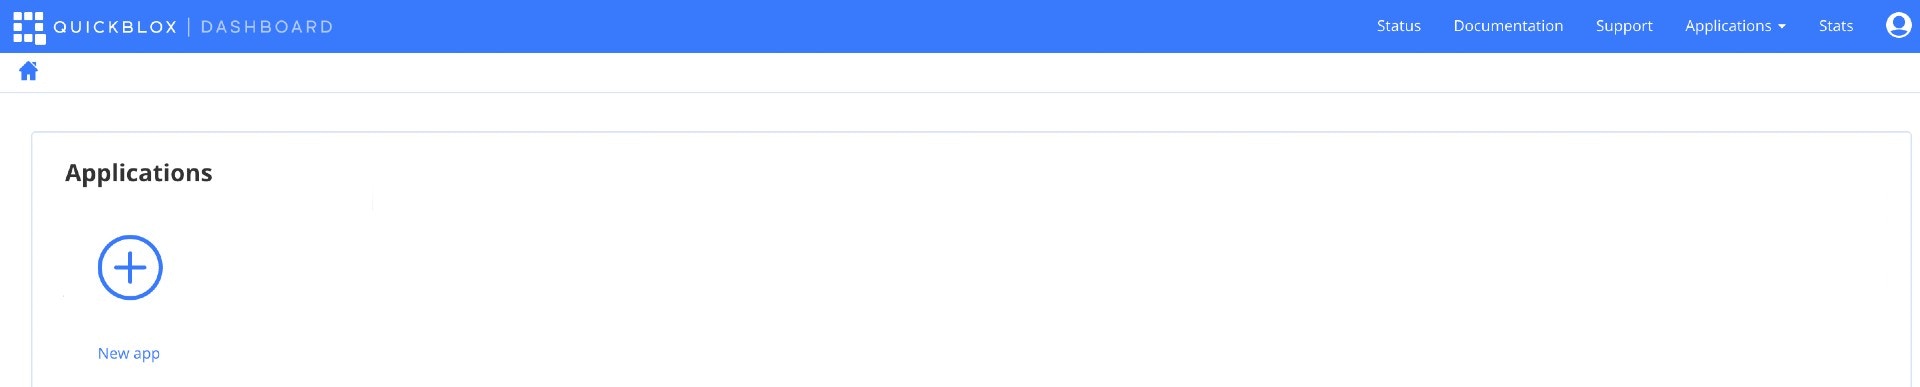
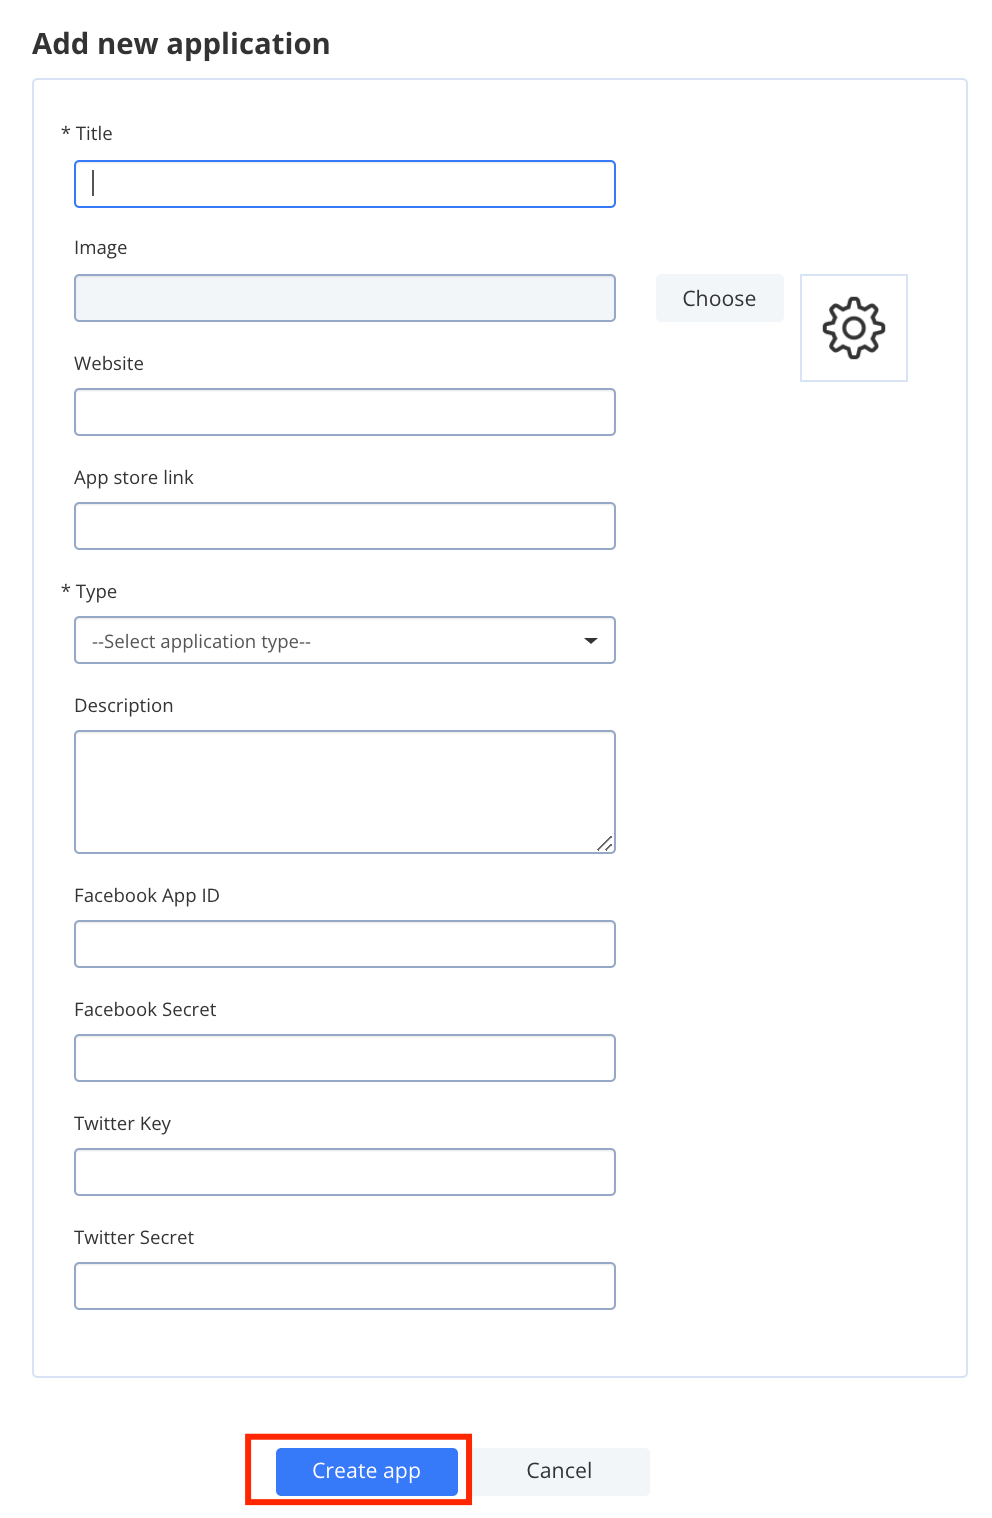
After signing up, you can start creating your first QuickBlox application.
 ## Get application credentials
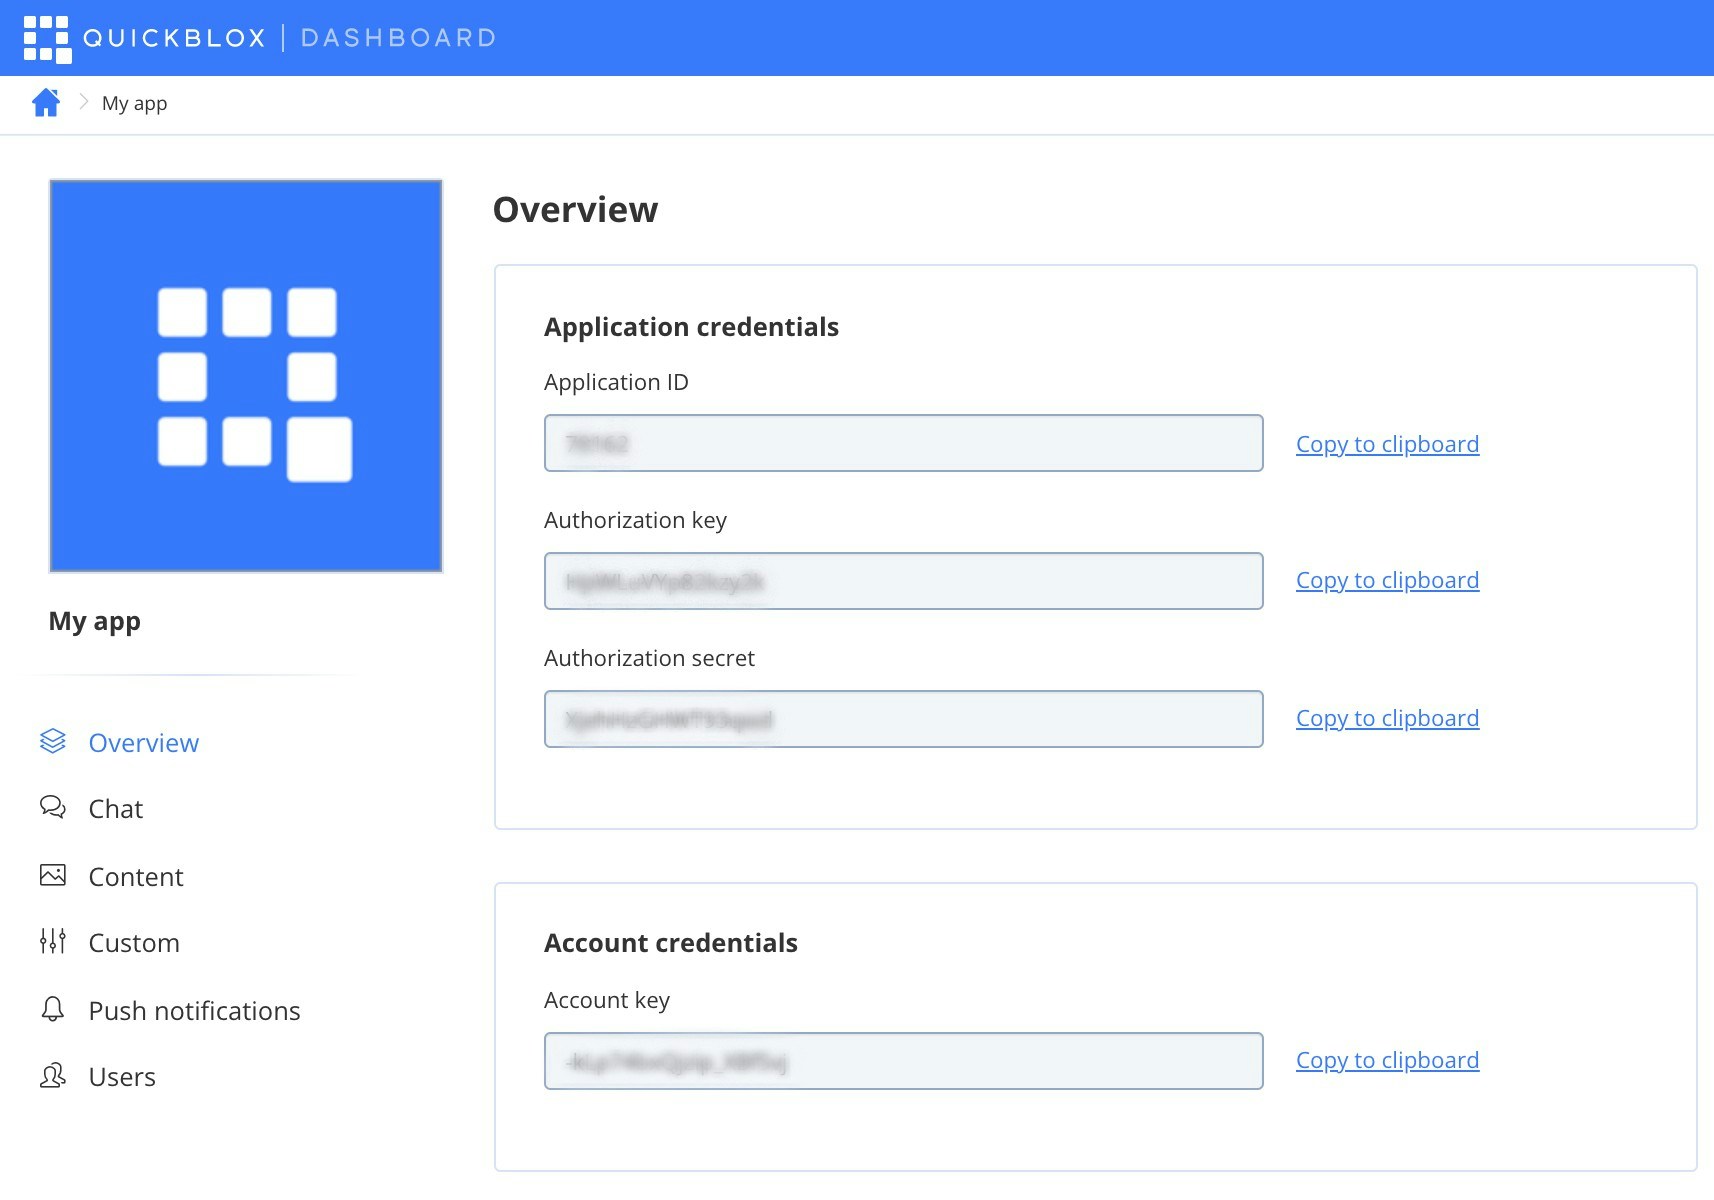
Each QuickBlox application has application credentials required for initialization. To get application credentials, follow the steps below:
## Get application credentials
Each QuickBlox application has application credentials required for initialization. To get application credentials, follow the steps below:
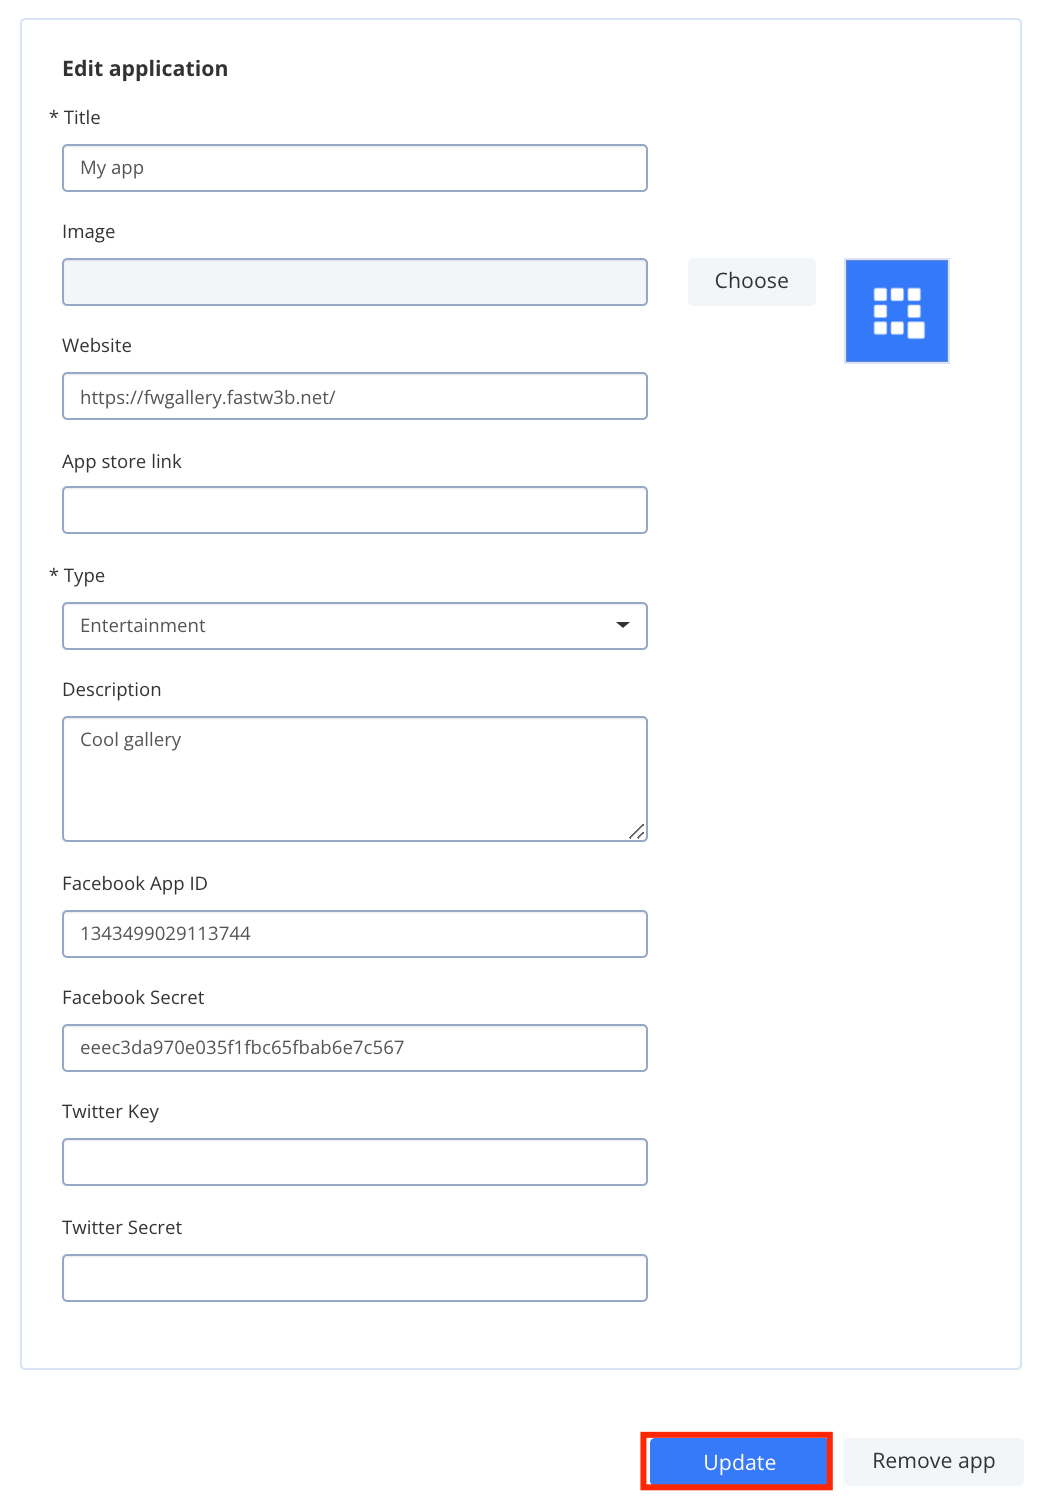
 ## Edit application
You can edit your application details. To edit the application details, follow the steps below:
## Edit application
You can edit your application details. To edit the application details, follow the steps below:
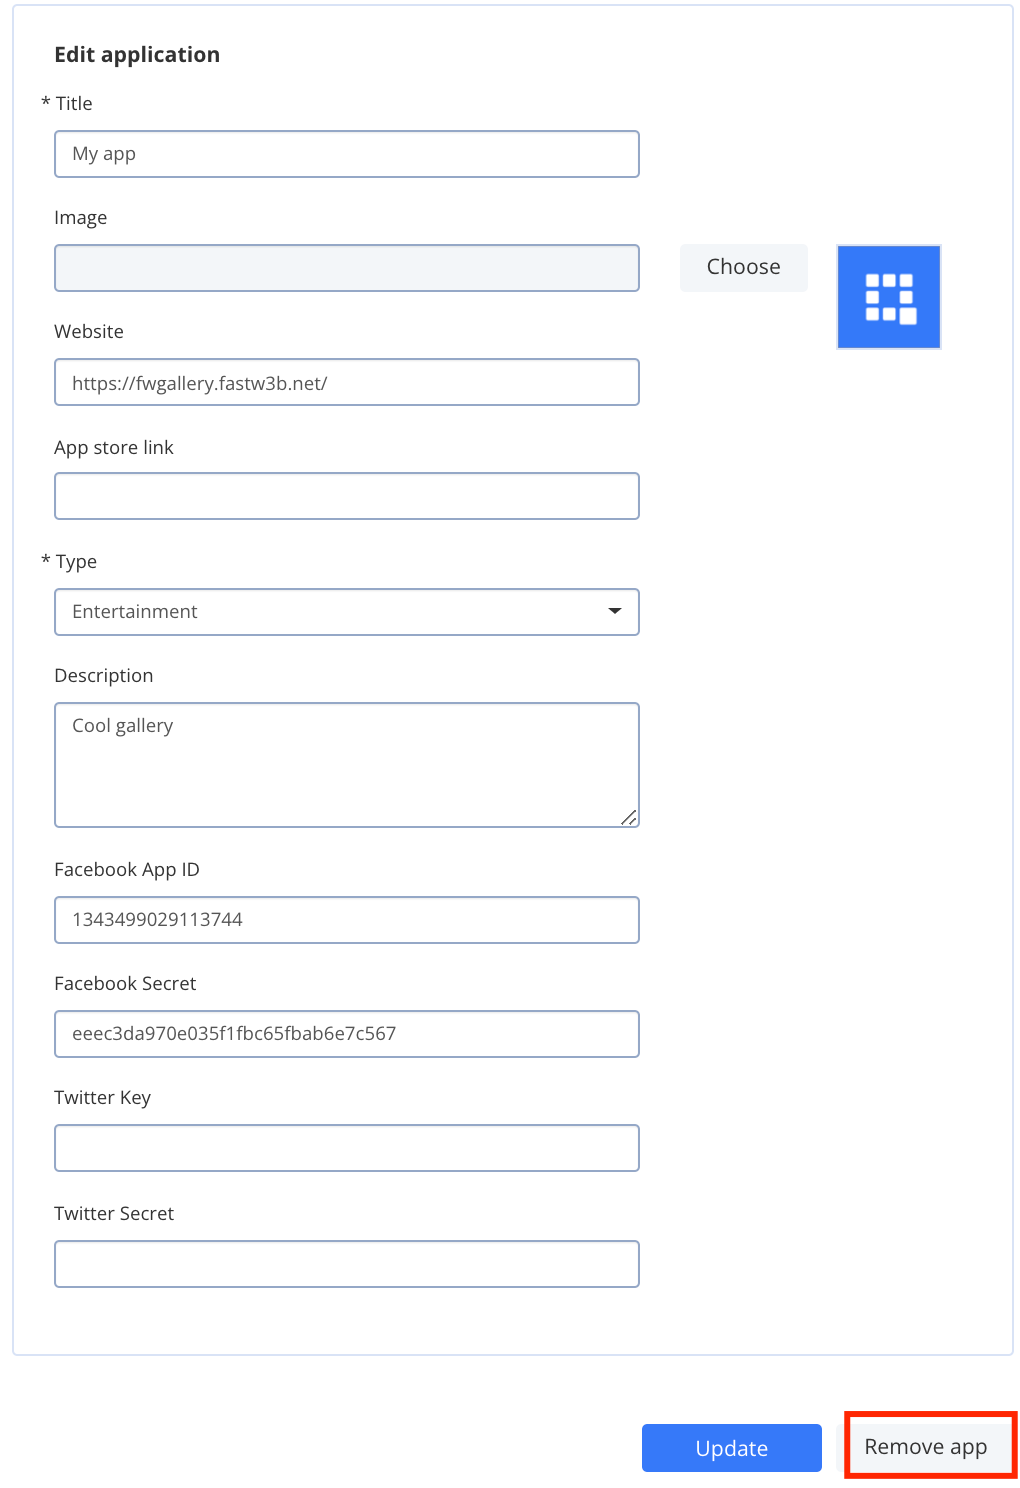
 ## Delete application
You can delete an application. Once you delete the application, you can no longer access any of the data within that app. To delete the application, follow the steps below:
## Delete application
You can delete an application. Once you delete the application, you can no longer access any of the data within that app. To delete the application, follow the steps below:
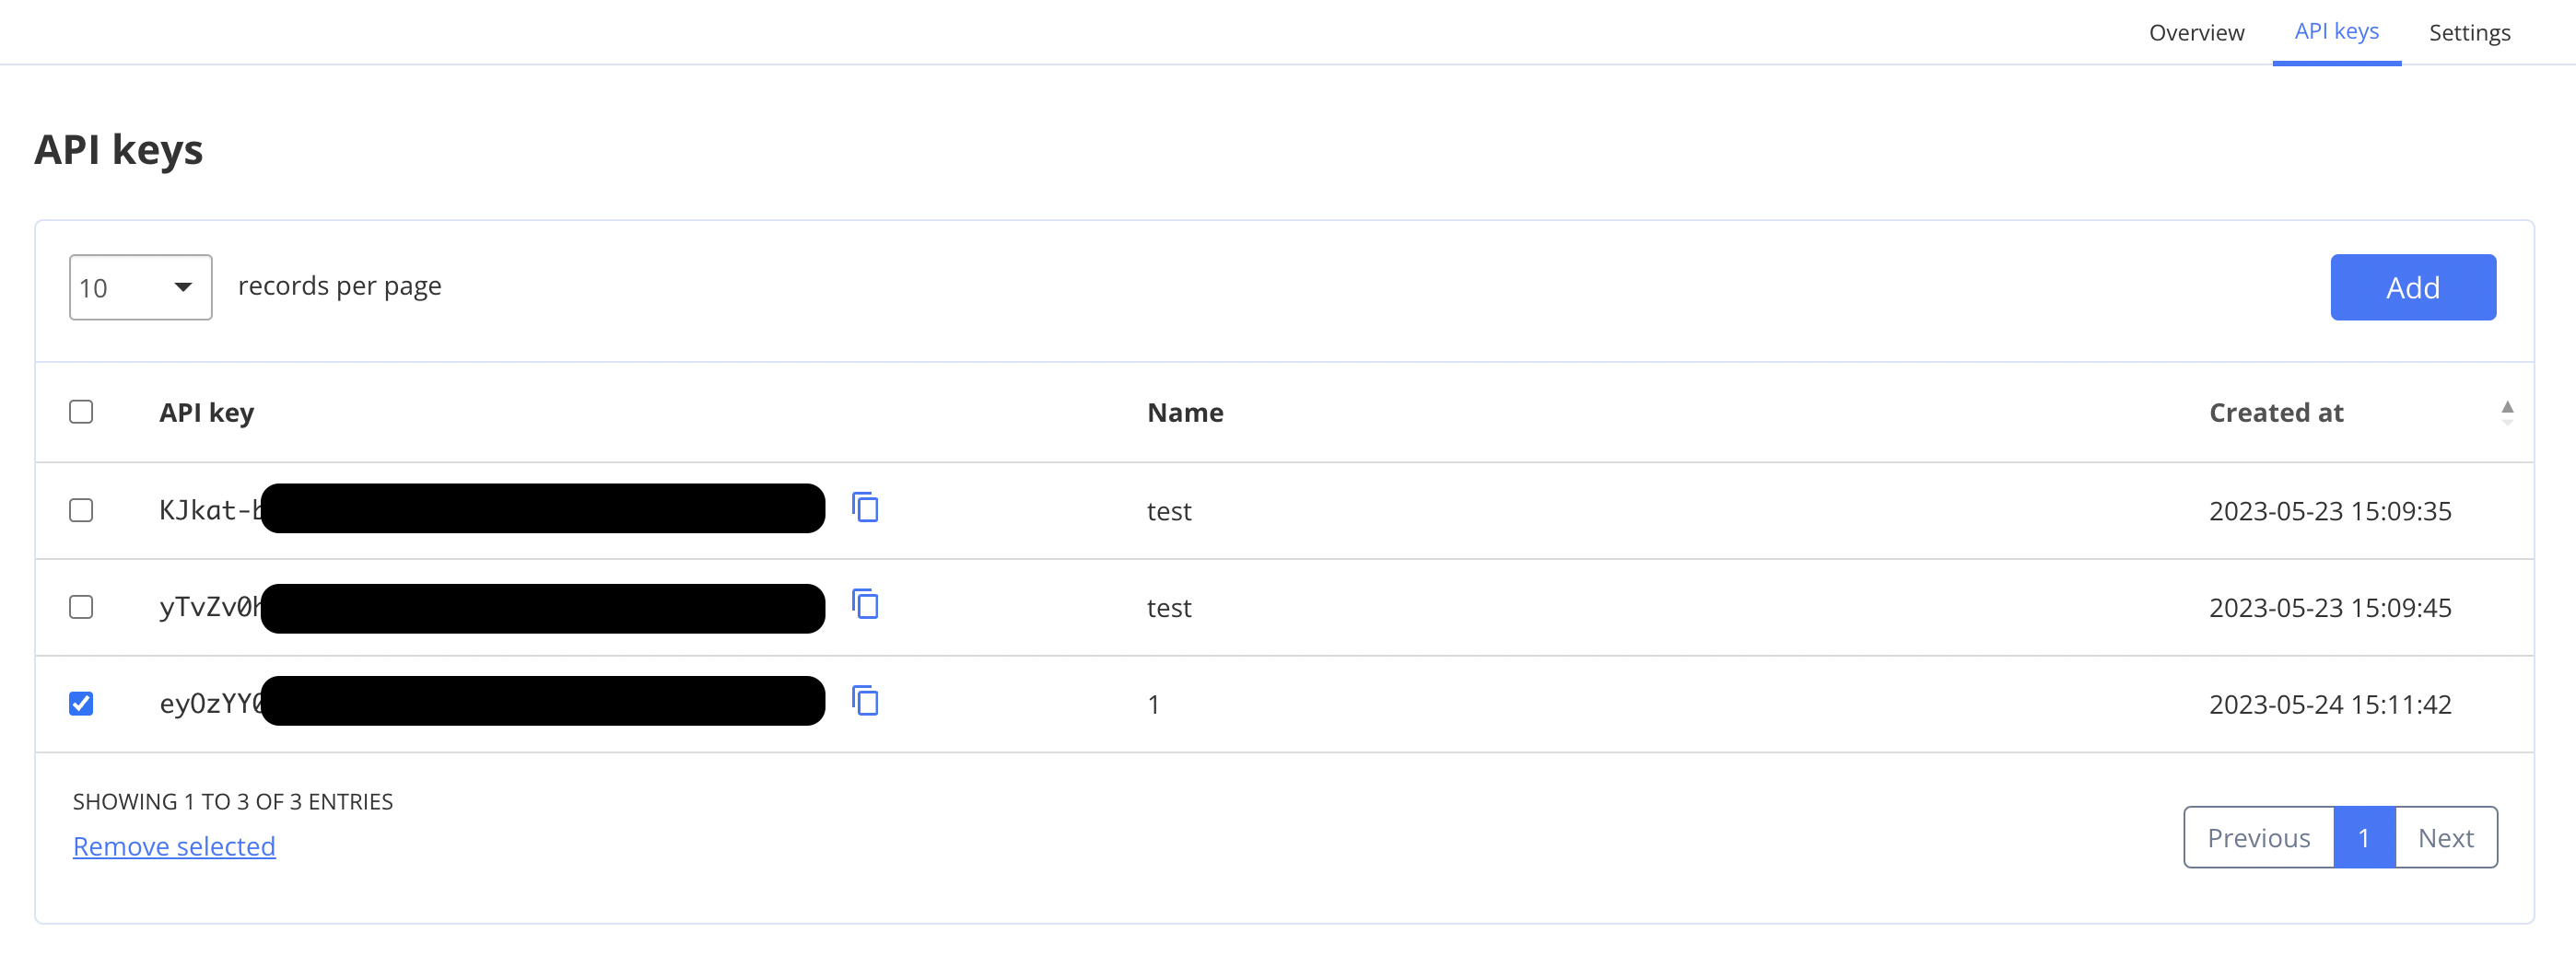
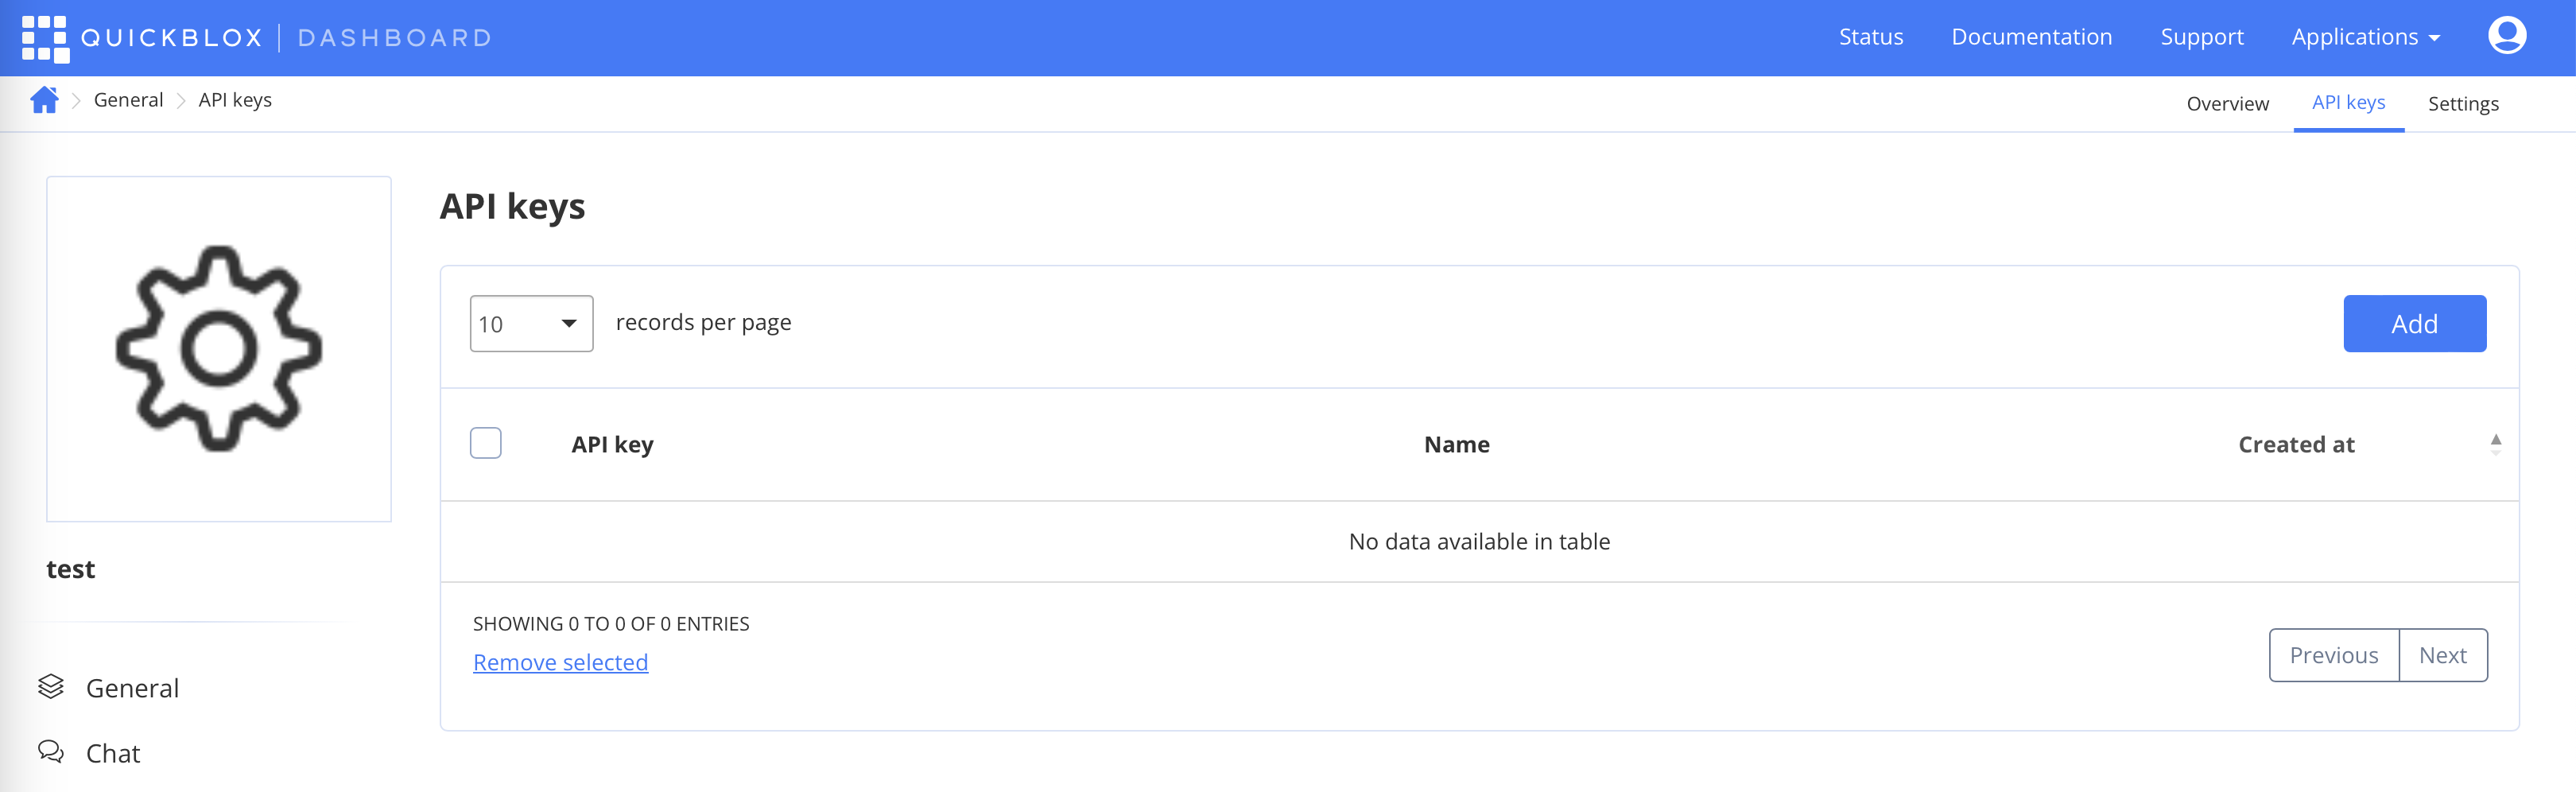
 ## View list of API keys
You can view a list of available API keys in the app, to do this please follow steps below:
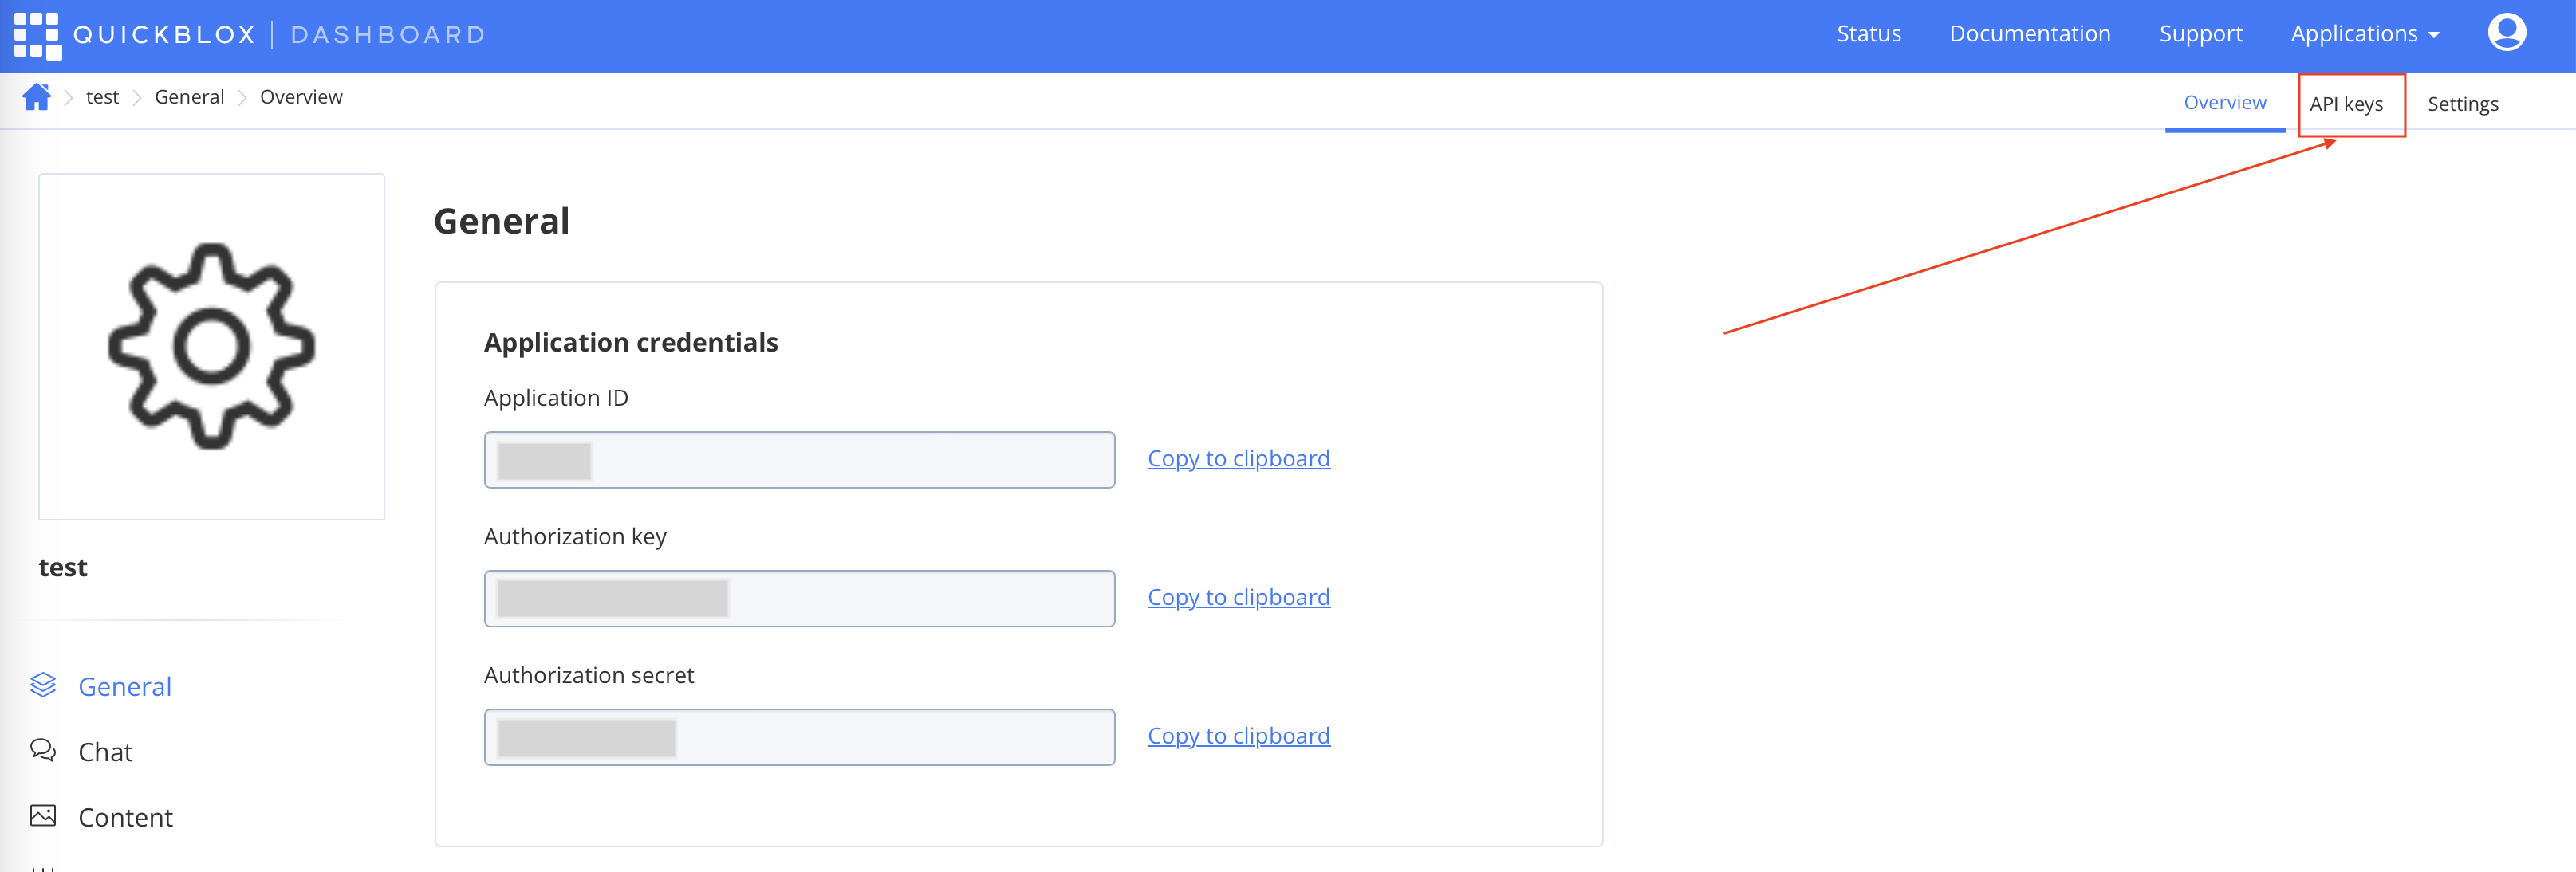
Navigate to the **Dashboard => *YOUR\_APP* => General => API keys**.
## View list of API keys
You can view a list of available API keys in the app, to do this please follow steps below:
Navigate to the **Dashboard => *YOUR\_APP* => General => API keys**.
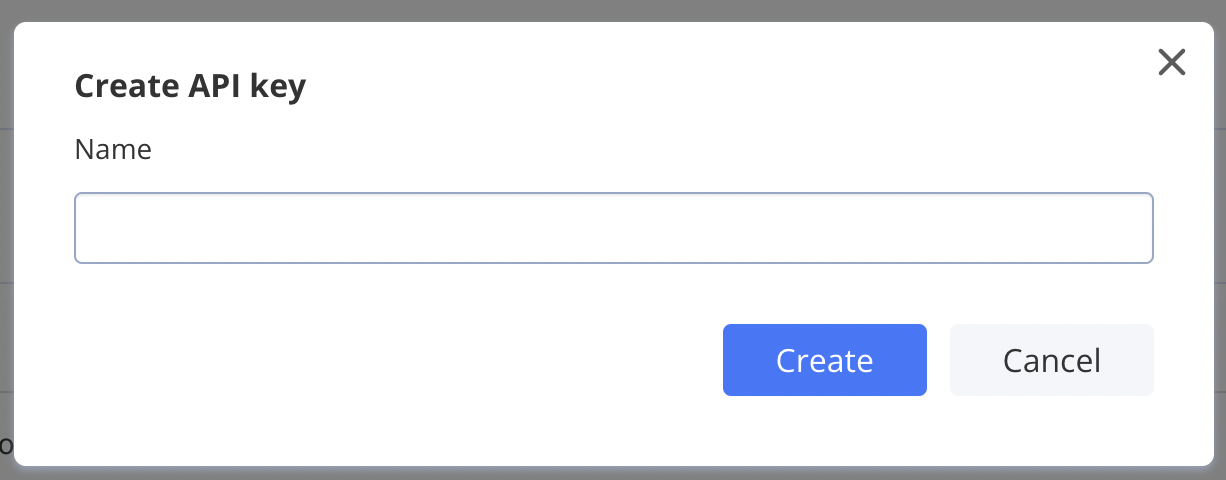
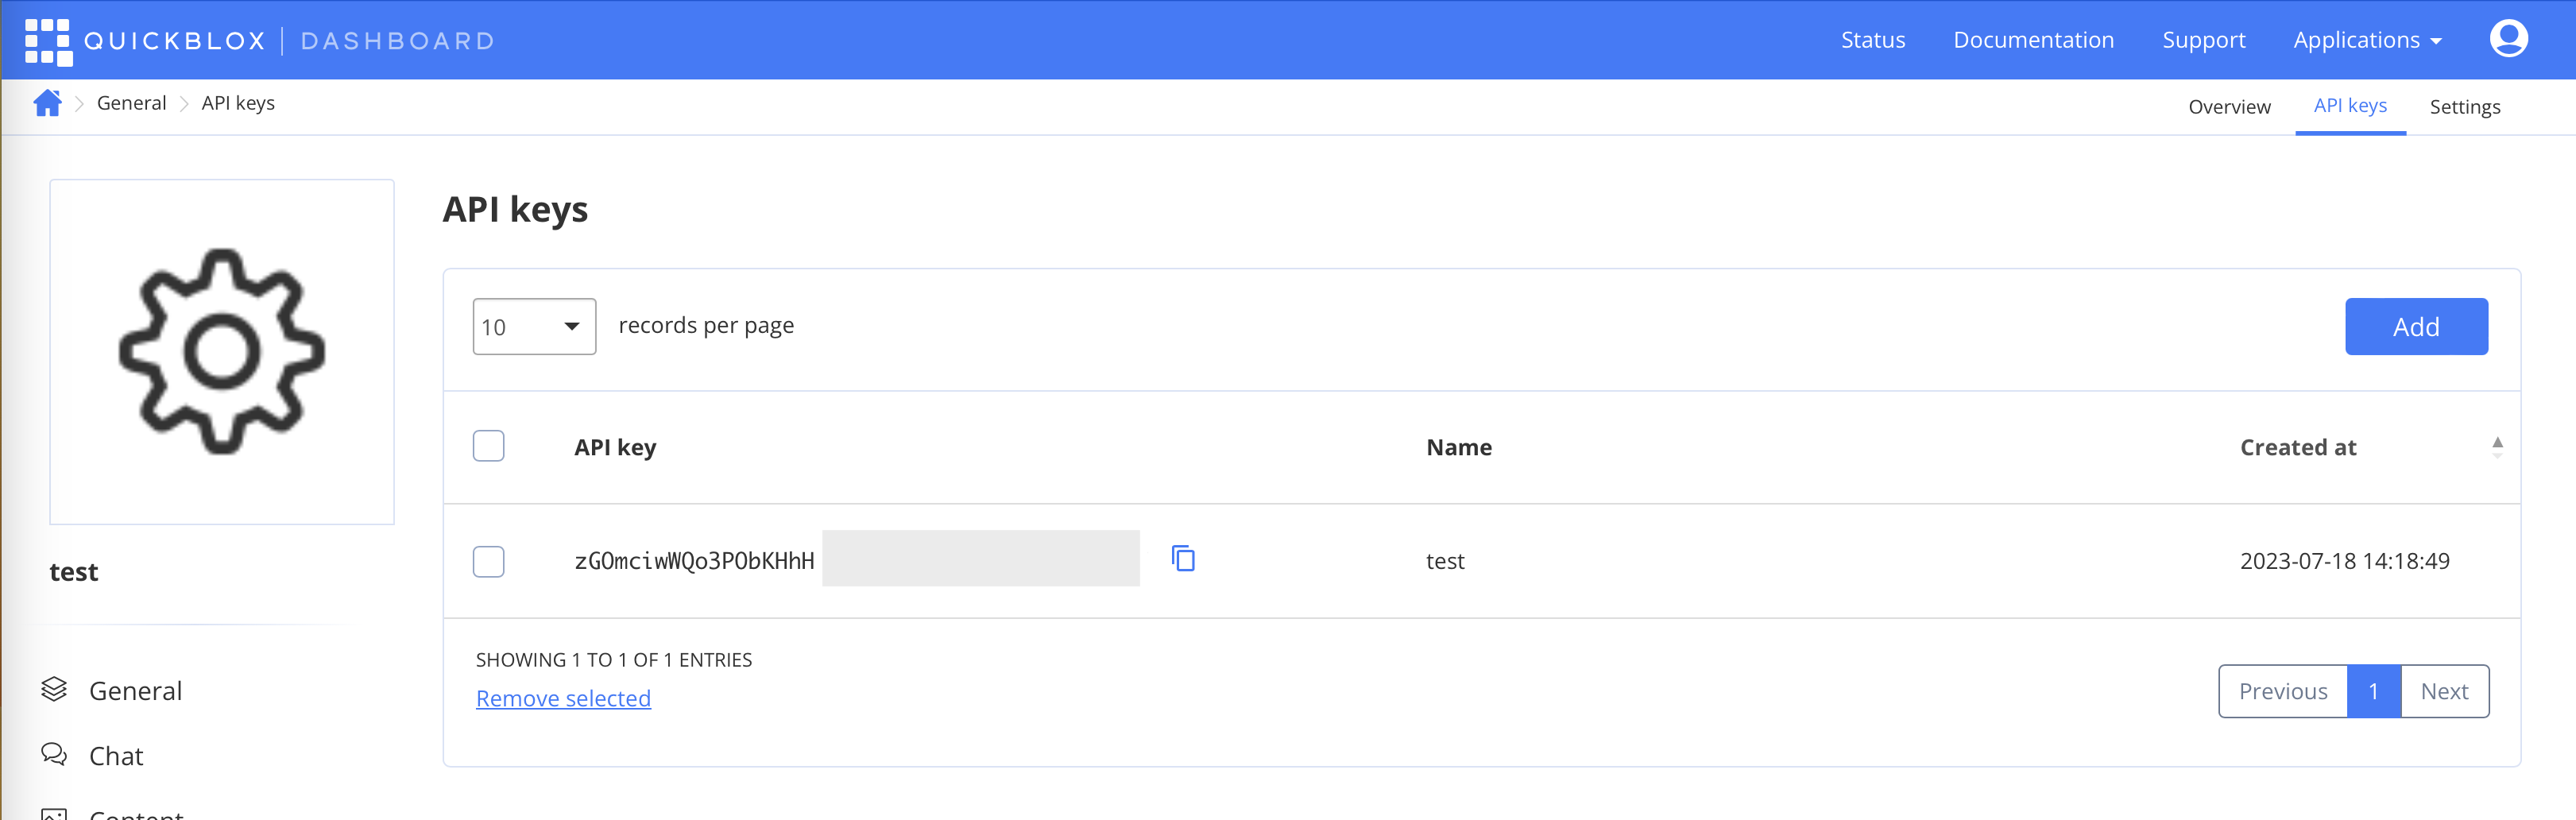
 ## Create API key
You can create up to 10 **API keys**. To create a new API key please follow steps below:
## Create API key
You can create up to 10 **API keys**. To create a new API key please follow steps below:
 ## Set default join required for new group dialogs
This setting applies **only to group dialogs**.
Be careful when changing this setting, as it directly affects the behavior of your application in production.
Prior to **server version 2.34.0**, all group dialogs required participants to join before sending or receiving real-time messages. There was no configurable parameter for this behavior.
Starting from **server version 2.34.0**, a new **join required** setting has been introduced in the application settings. This setting defines the default value of the `is_join_required` field for all **newly created** group dialogs within the application.
* **New applications** created from version 2.34.0 onwards have **join required disabled** by default.
* **Existing applications** created before version 2.34.0 retain the previous behavior with **join required enabled** by default.
To migrate an older application to the new behavior where joining is not required, disable this setting.
Changing this setting does **not** affect existing dialogs. It only applies to dialogs that are created **after** the change.
To fully migrate to the new behavior, you need to:
1. Migrate existing dialogs to the new behavior by setting `is_join_required` to `false`.
2. Update your client application in accordance with the new behavior.
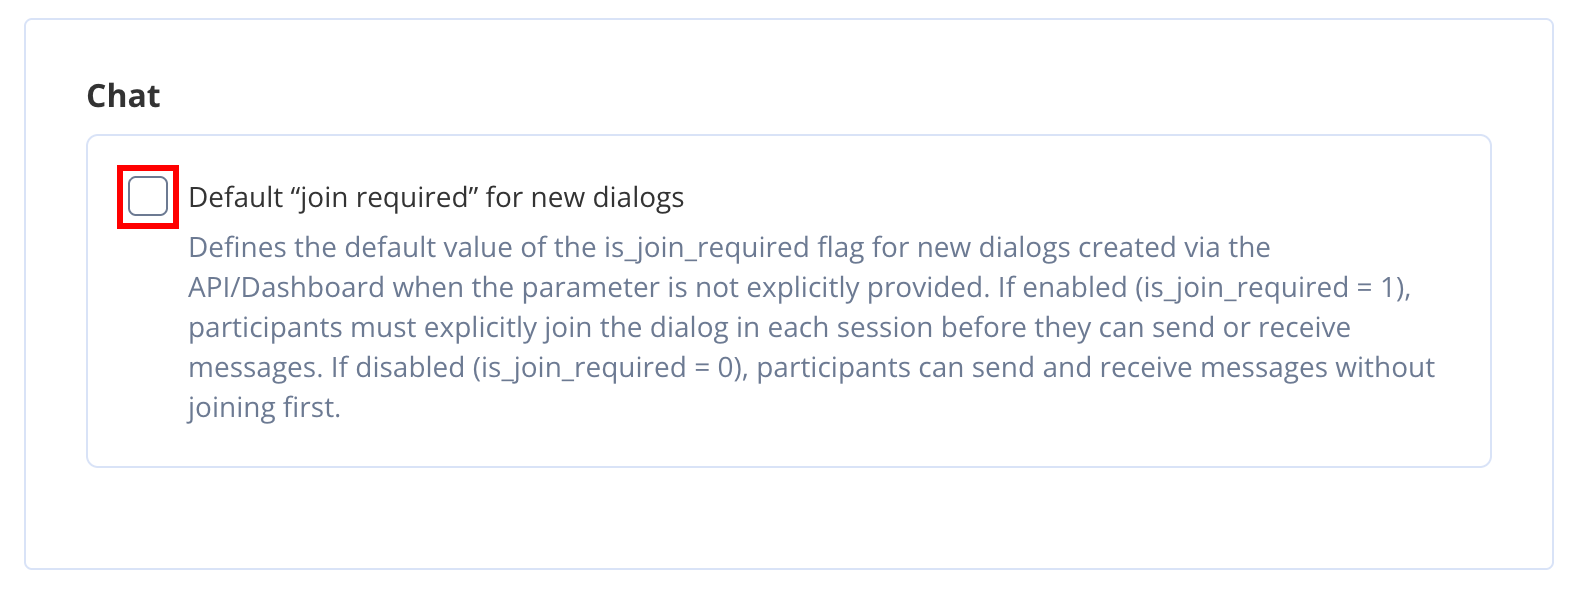
To set default join required follow the steps below:
1. Navigate to the **Dashboard => *YOUR\_APP* => General => Settings**.
2. Enable or disable the **join required** setting.
## Set default join required for new group dialogs
This setting applies **only to group dialogs**.
Be careful when changing this setting, as it directly affects the behavior of your application in production.
Prior to **server version 2.34.0**, all group dialogs required participants to join before sending or receiving real-time messages. There was no configurable parameter for this behavior.
Starting from **server version 2.34.0**, a new **join required** setting has been introduced in the application settings. This setting defines the default value of the `is_join_required` field for all **newly created** group dialogs within the application.
* **New applications** created from version 2.34.0 onwards have **join required disabled** by default.
* **Existing applications** created before version 2.34.0 retain the previous behavior with **join required enabled** by default.
To migrate an older application to the new behavior where joining is not required, disable this setting.
Changing this setting does **not** affect existing dialogs. It only applies to dialogs that are created **after** the change.
To fully migrate to the new behavior, you need to:
1. Migrate existing dialogs to the new behavior by setting `is_join_required` to `false`.
2. Update your client application in accordance with the new behavior.
To set default join required follow the steps below:
1. Navigate to the **Dashboard => *YOUR\_APP* => General => Settings**.
2. Enable or disable the **join required** setting.
 ## Set session permissions
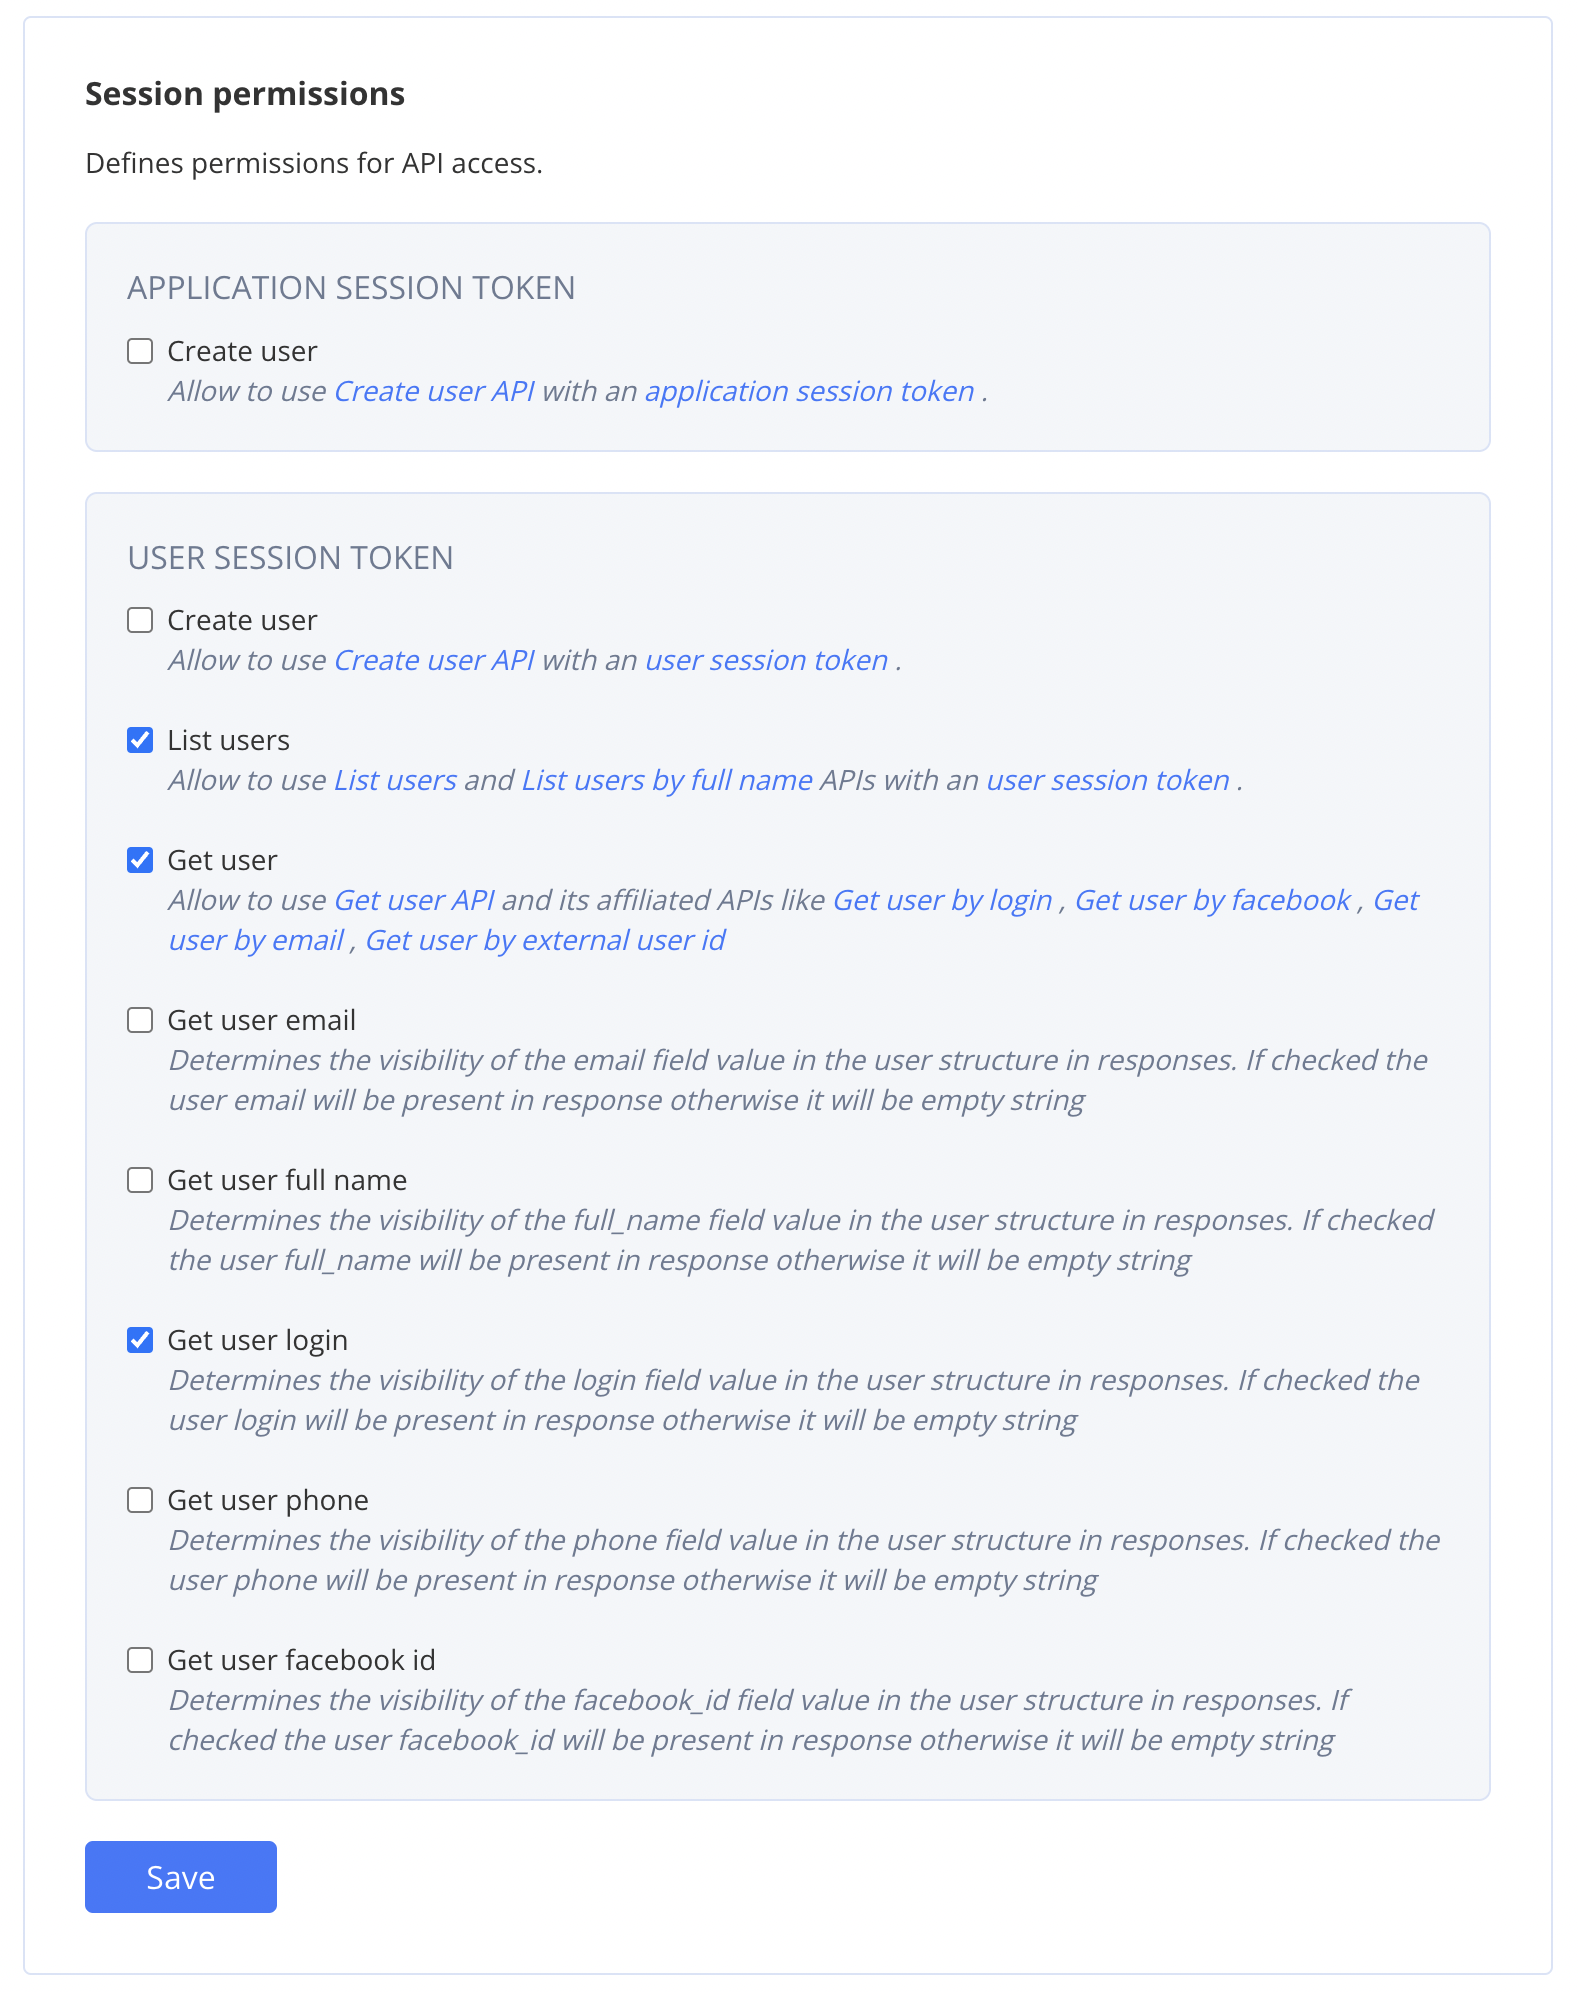
You can configure session permissions to setup proper privacy level. By default, for development simplicity everything is allowed, but for production environment it is recommended to setup more restrictive configuration:
* Implement user management on own backend and disable possibility to create users with application/user session.
* Choose carefully what data considered as PII are allowed to be stored within User and retrieved by other users.
To set session permissions follow the steps below:
1. Navigate to the **Dashboard => *YOUR\_APP* => General => Settings**.
2. Check/uncheck chosen options.
3. Click the **Save** button.
## Set session permissions
You can configure session permissions to setup proper privacy level. By default, for development simplicity everything is allowed, but for production environment it is recommended to setup more restrictive configuration:
* Implement user management on own backend and disable possibility to create users with application/user session.
* Choose carefully what data considered as PII are allowed to be stored within User and retrieved by other users.
To set session permissions follow the steps below:
1. Navigate to the **Dashboard => *YOUR\_APP* => General => Settings**.
2. Check/uncheck chosen options.
3. Click the **Save** button.