> ## Documentation Index
> Fetch the complete documentation index at: https://docs.quickblox.com/llms.txt
> Use this file to discover all available pages before exploring further.
# Custom Objects
> Learn how to store and sync data with QuickBlox key-value storage.
Custom Objects module provides flexibility to define any data structure (schema) you need, build one-to-many relations between schemas and control permissions for all operations made on data. The schema is defined in QuickBlox Dashboard.
Visit [Key Concepts](/docs/key-concepts) page to learn the most important QuickBlox concepts.
## View list of classes
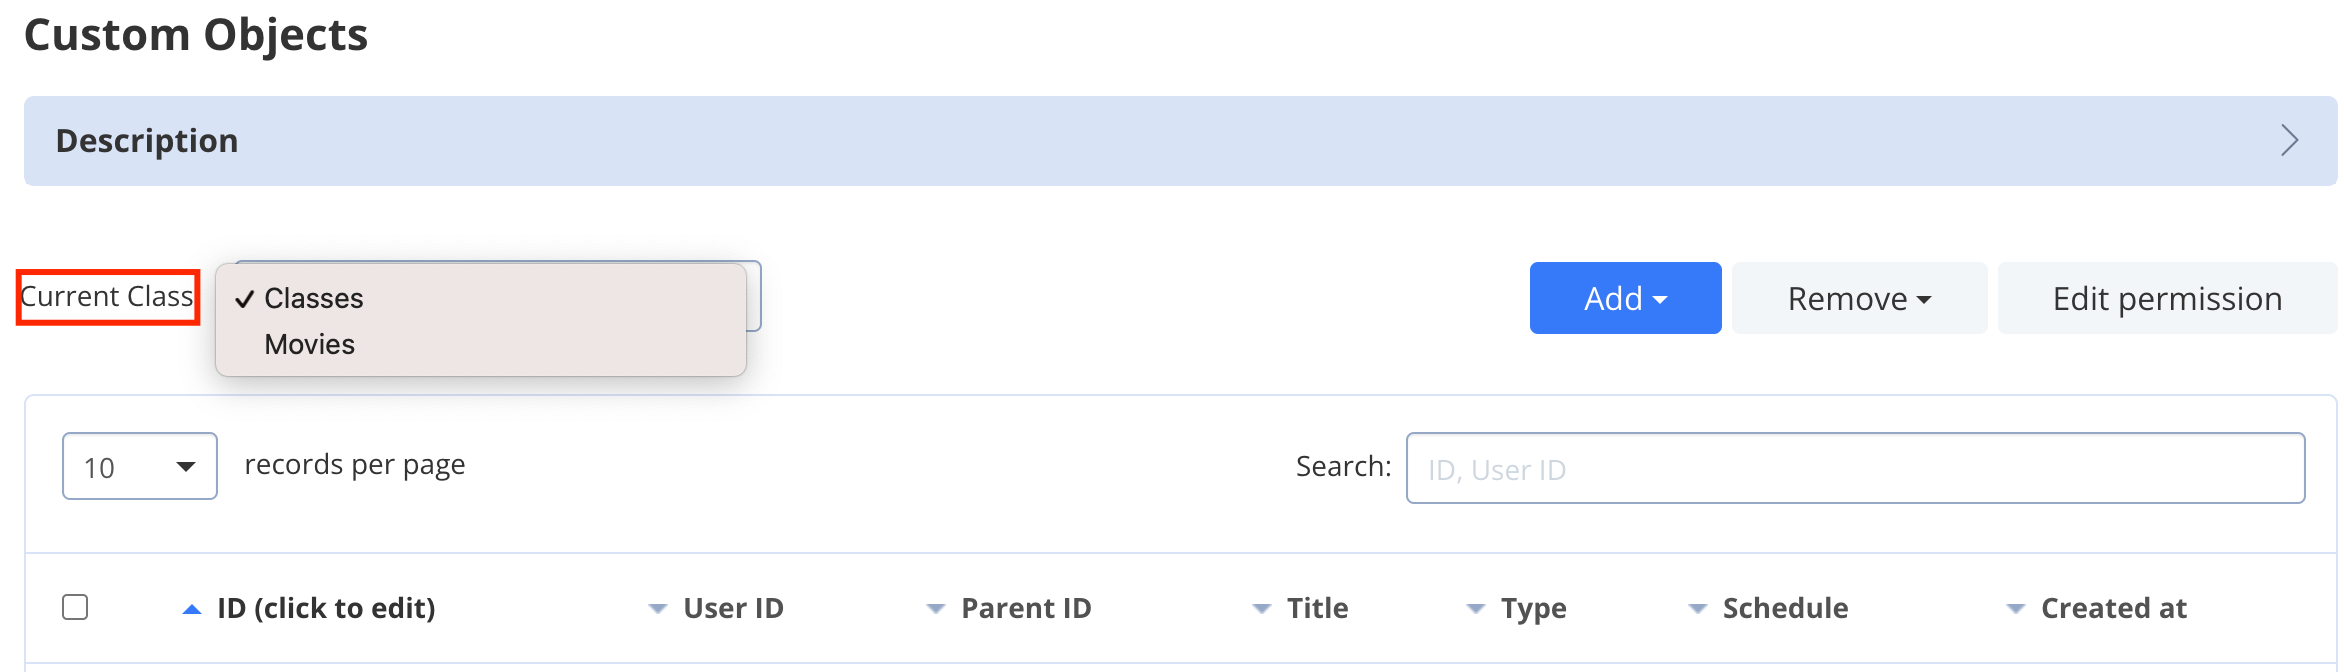
To view a list of classes, follow the steps below:
1. Navigate to the **Dashboard => *YOUR\_APP* => Custom** page.
2. Click the **Current Class** dropdown to view a list of classes.
 ## Create class
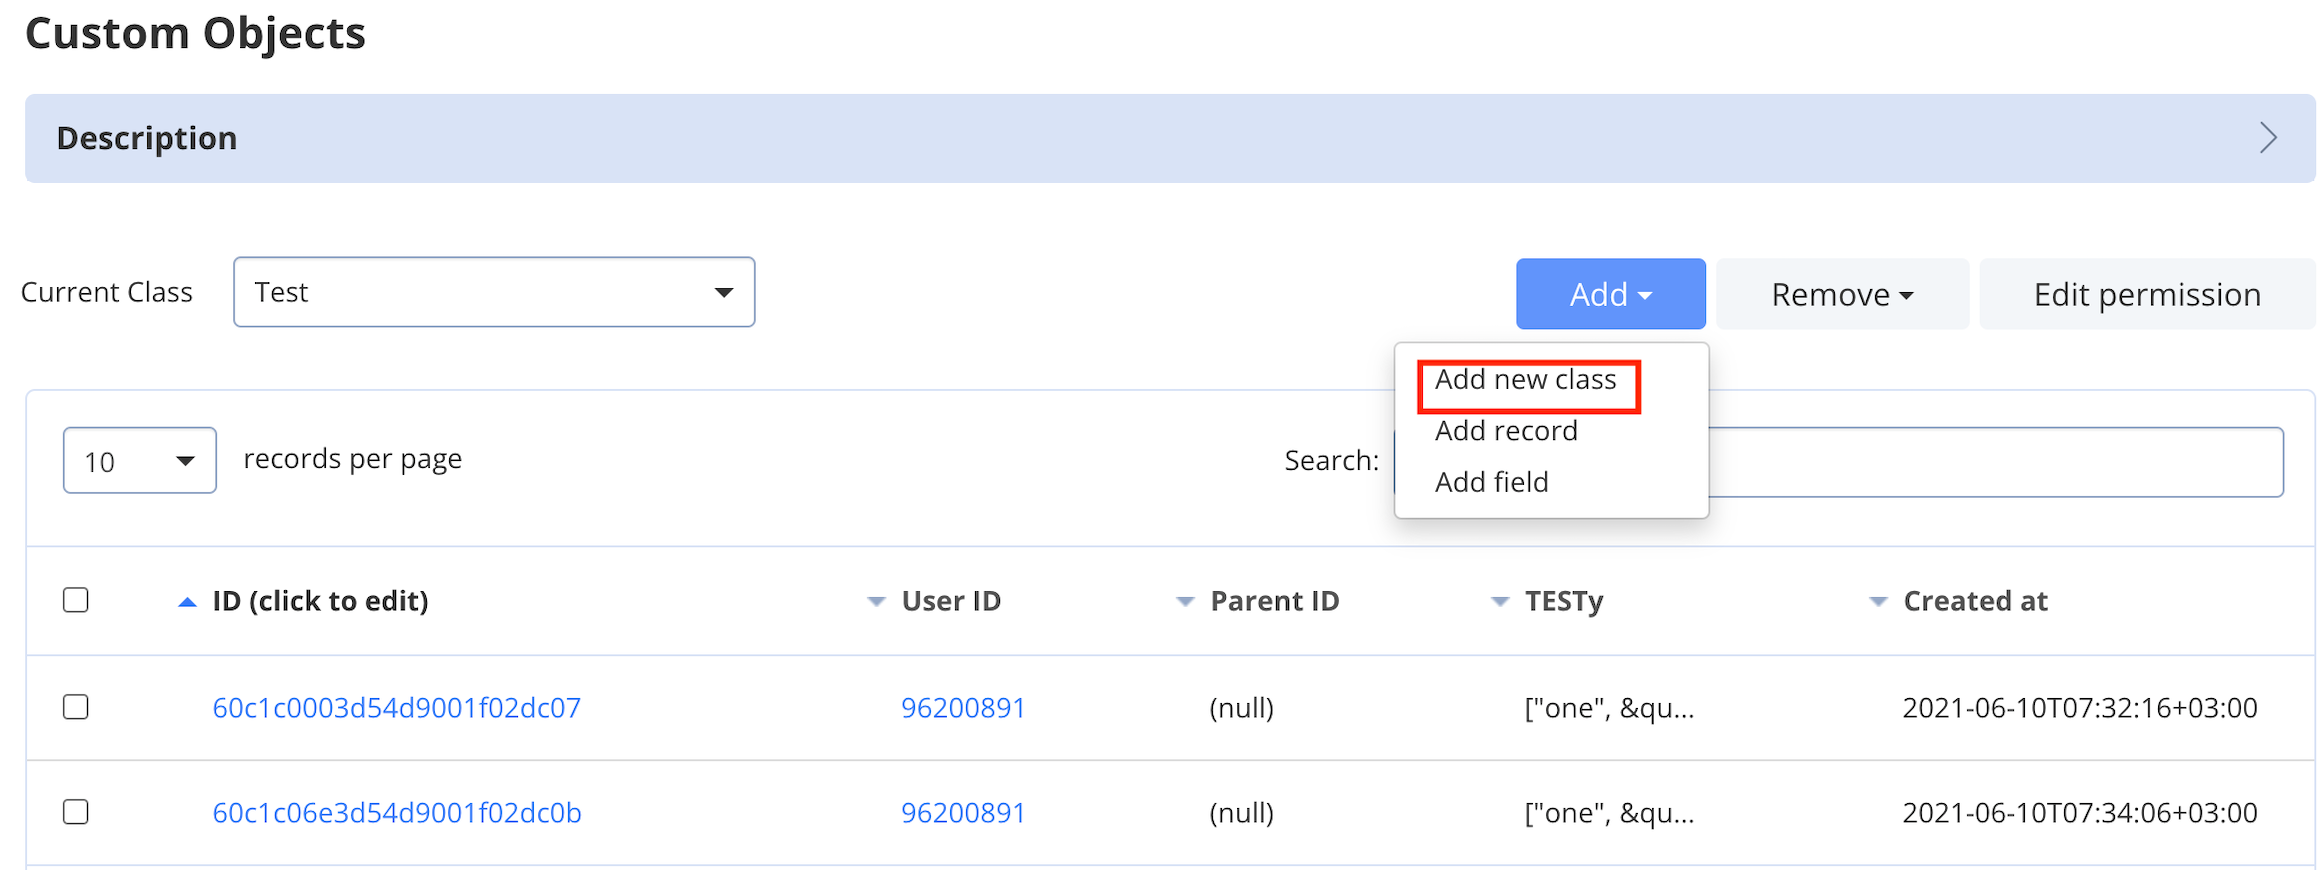
To create a custom object class, follow the steps below:
1. Navigate to the **Dashboard => *YOUR\_APP* => Custom** page.
2. Click the **Add** dropdown and select **Add new class** menu item.
## Create class
To create a custom object class, follow the steps below:
1. Navigate to the **Dashboard => *YOUR\_APP* => Custom** page.
2. Click the **Add** dropdown and select **Add new class** menu item.
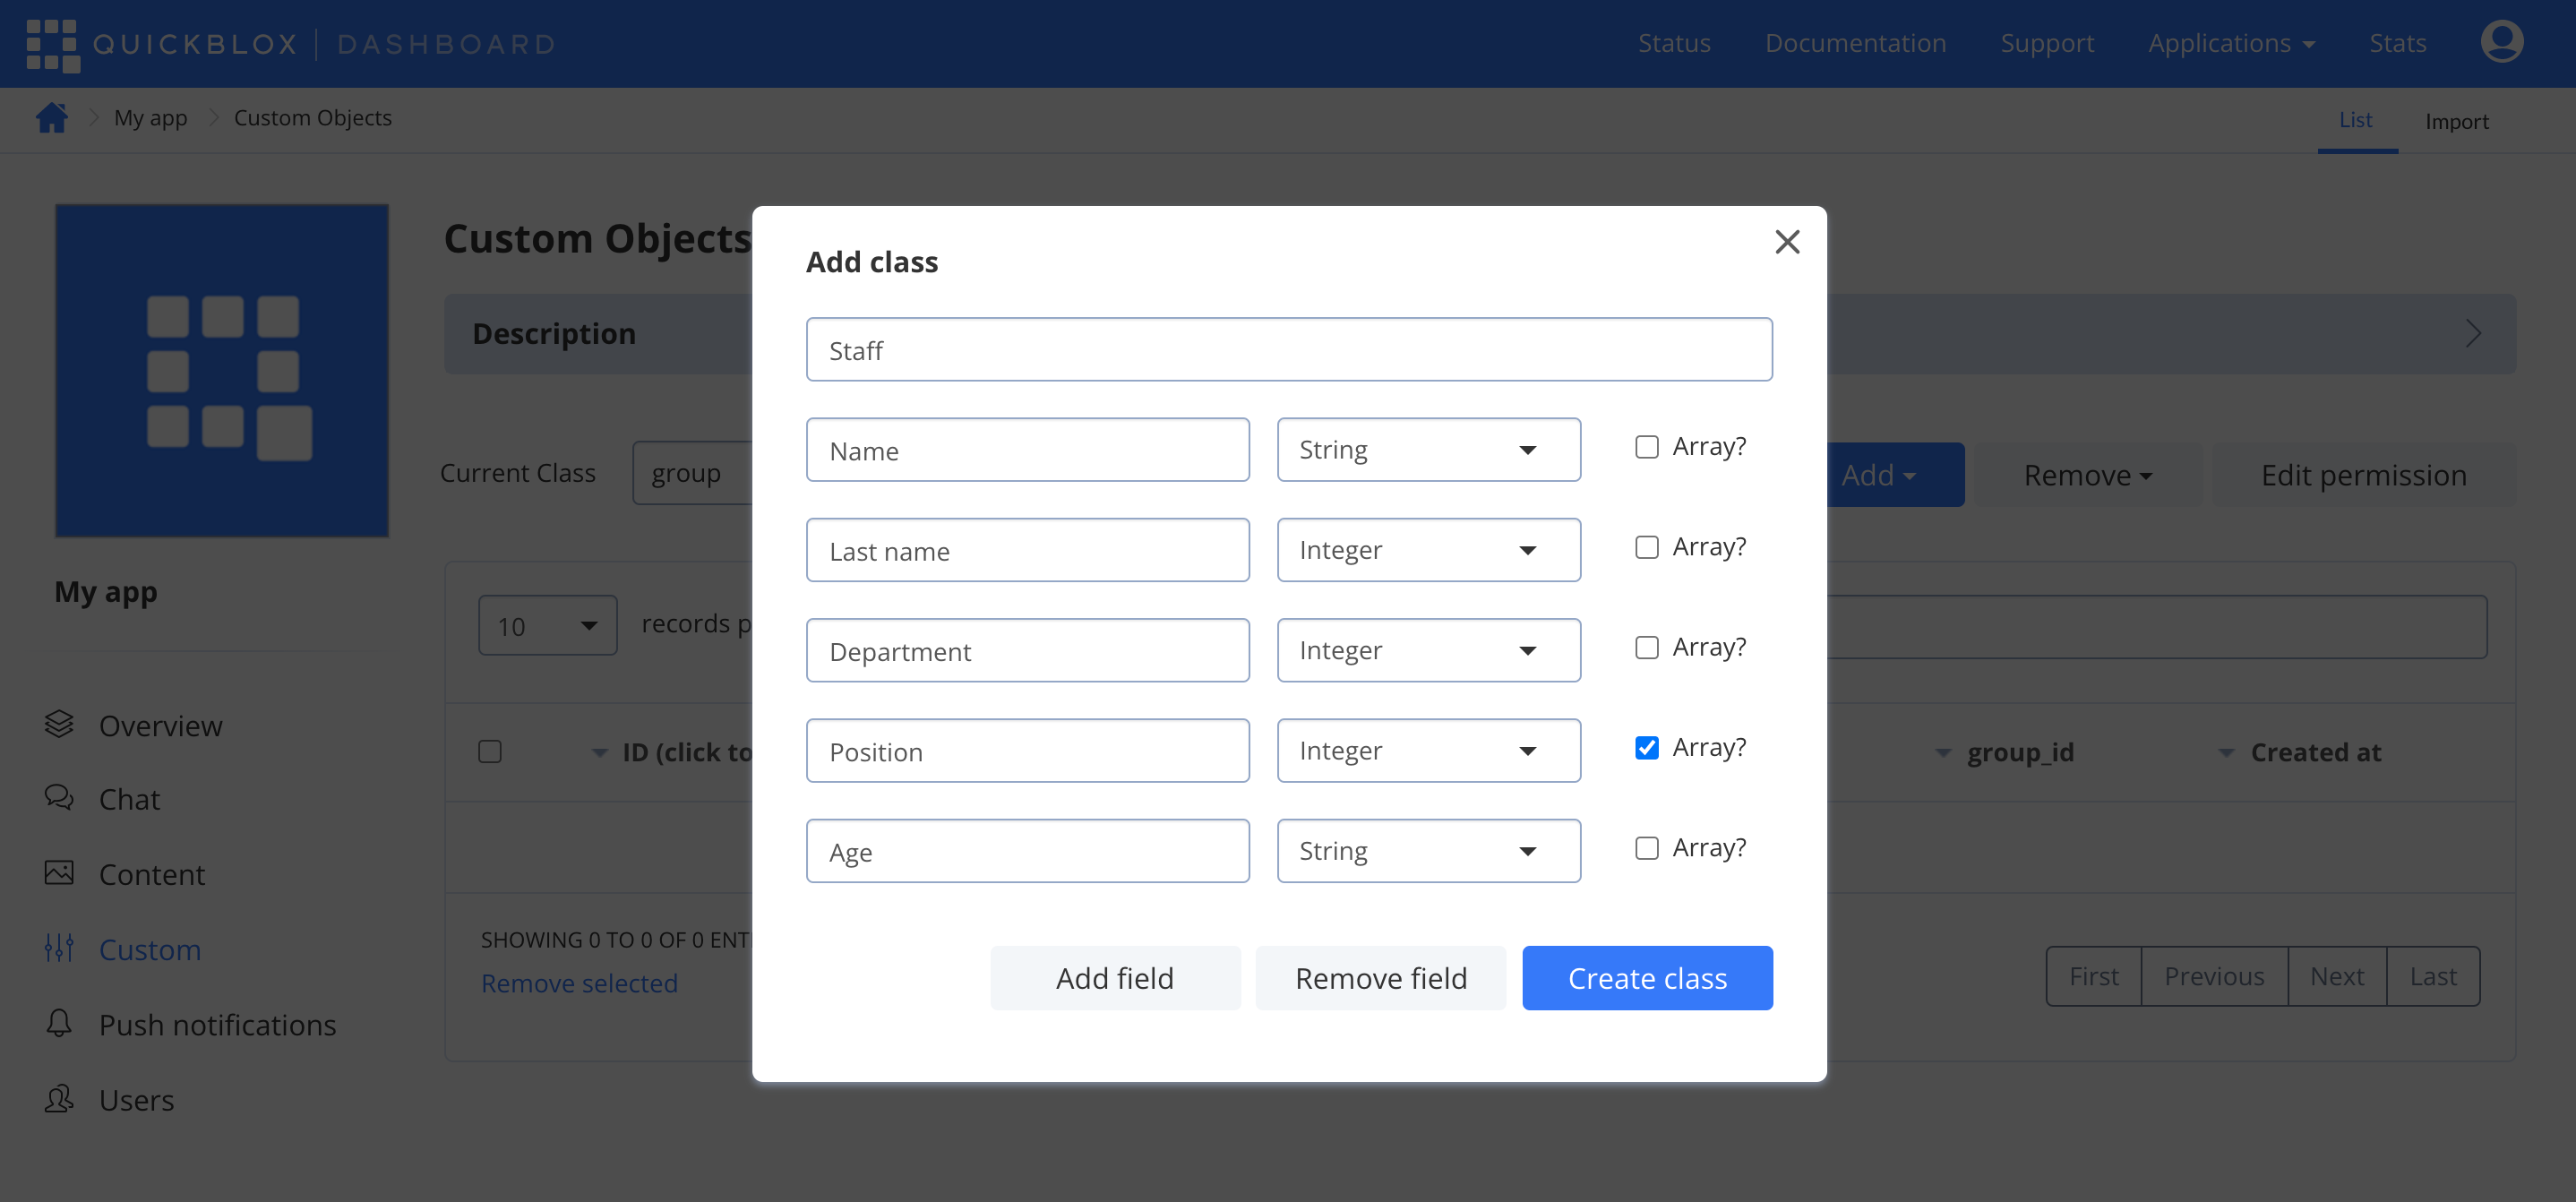
 1. Enter the name of the class.
2. Enter the name of the field.
3. Choose the type of the field.
4. Check if the new field is of the array type.
5. Add as many fields as you need by clicking the **Add field** button.
6. Click the **Create class** button.
1. Enter the name of the class.
2. Enter the name of the field.
3. Choose the type of the field.
4. Check if the new field is of the array type.
5. Add as many fields as you need by clicking the **Add field** button.
6. Click the **Create class** button.
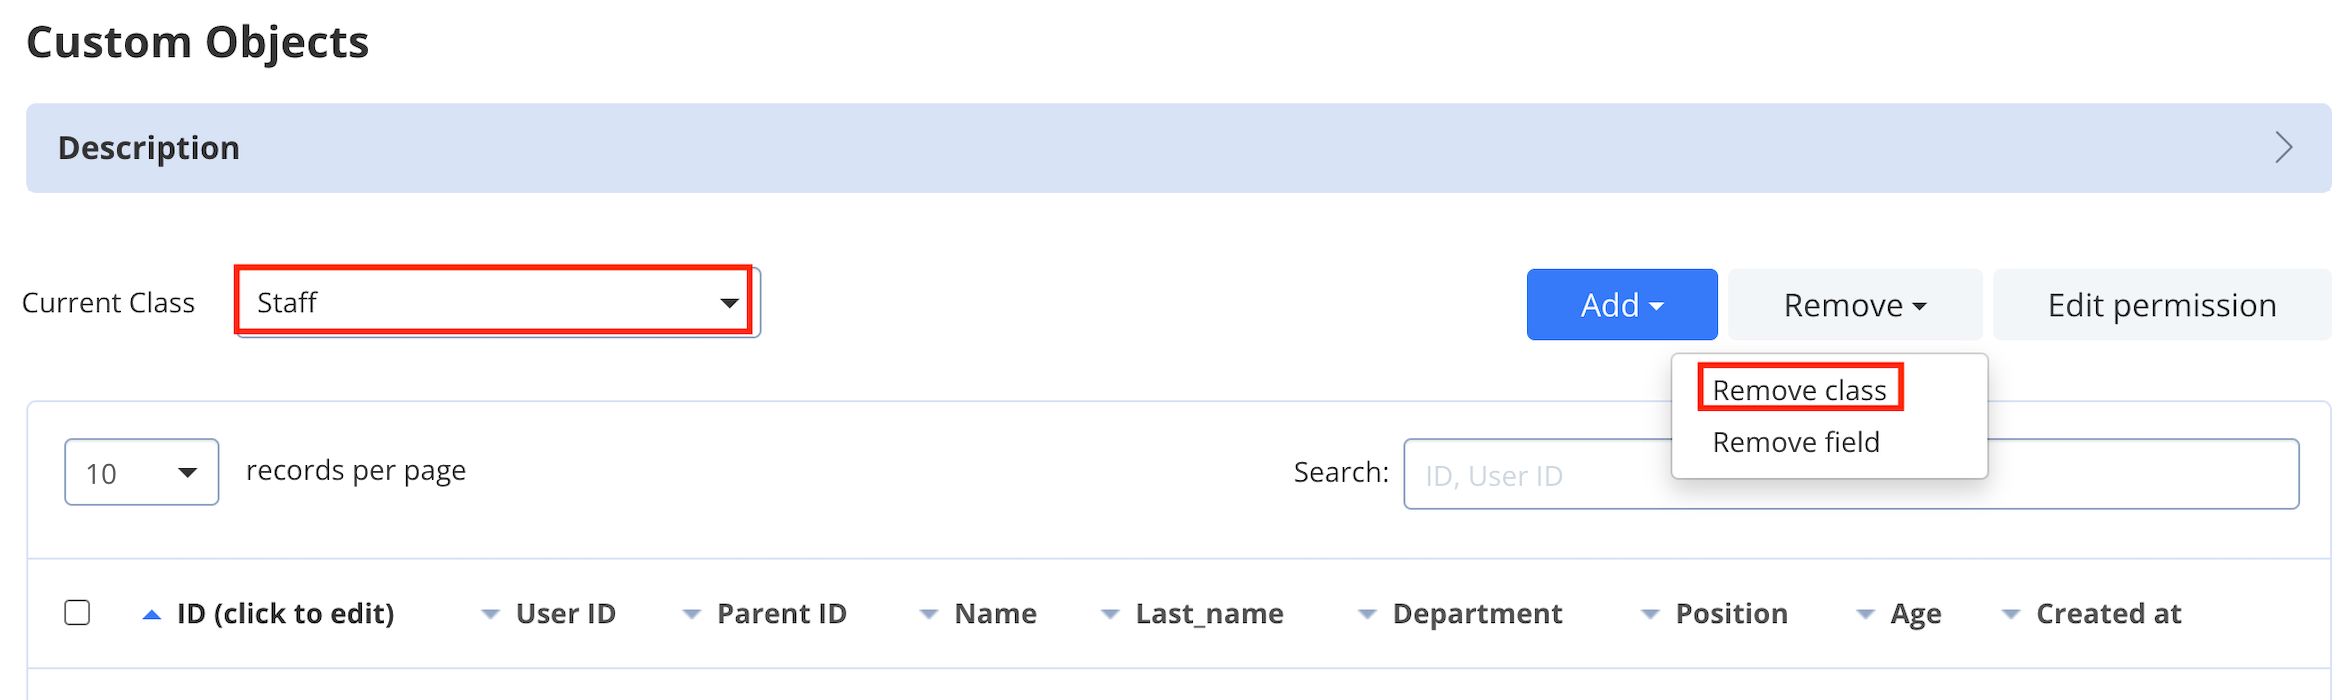
 ## Delete class
To delete a class, follow the steps below:
1. Navigate to the **Dashboard => *YOUR\_APP* => Custom** page.
2. Select a class in the **Current Class** dropdown.
3. Click the **Remove** dropdown and select **Remove class** menu item.
## Delete class
To delete a class, follow the steps below:
1. Navigate to the **Dashboard => *YOUR\_APP* => Custom** page.
2. Select a class in the **Current Class** dropdown.
3. Click the **Remove** dropdown and select **Remove class** menu item.
 ## Add field
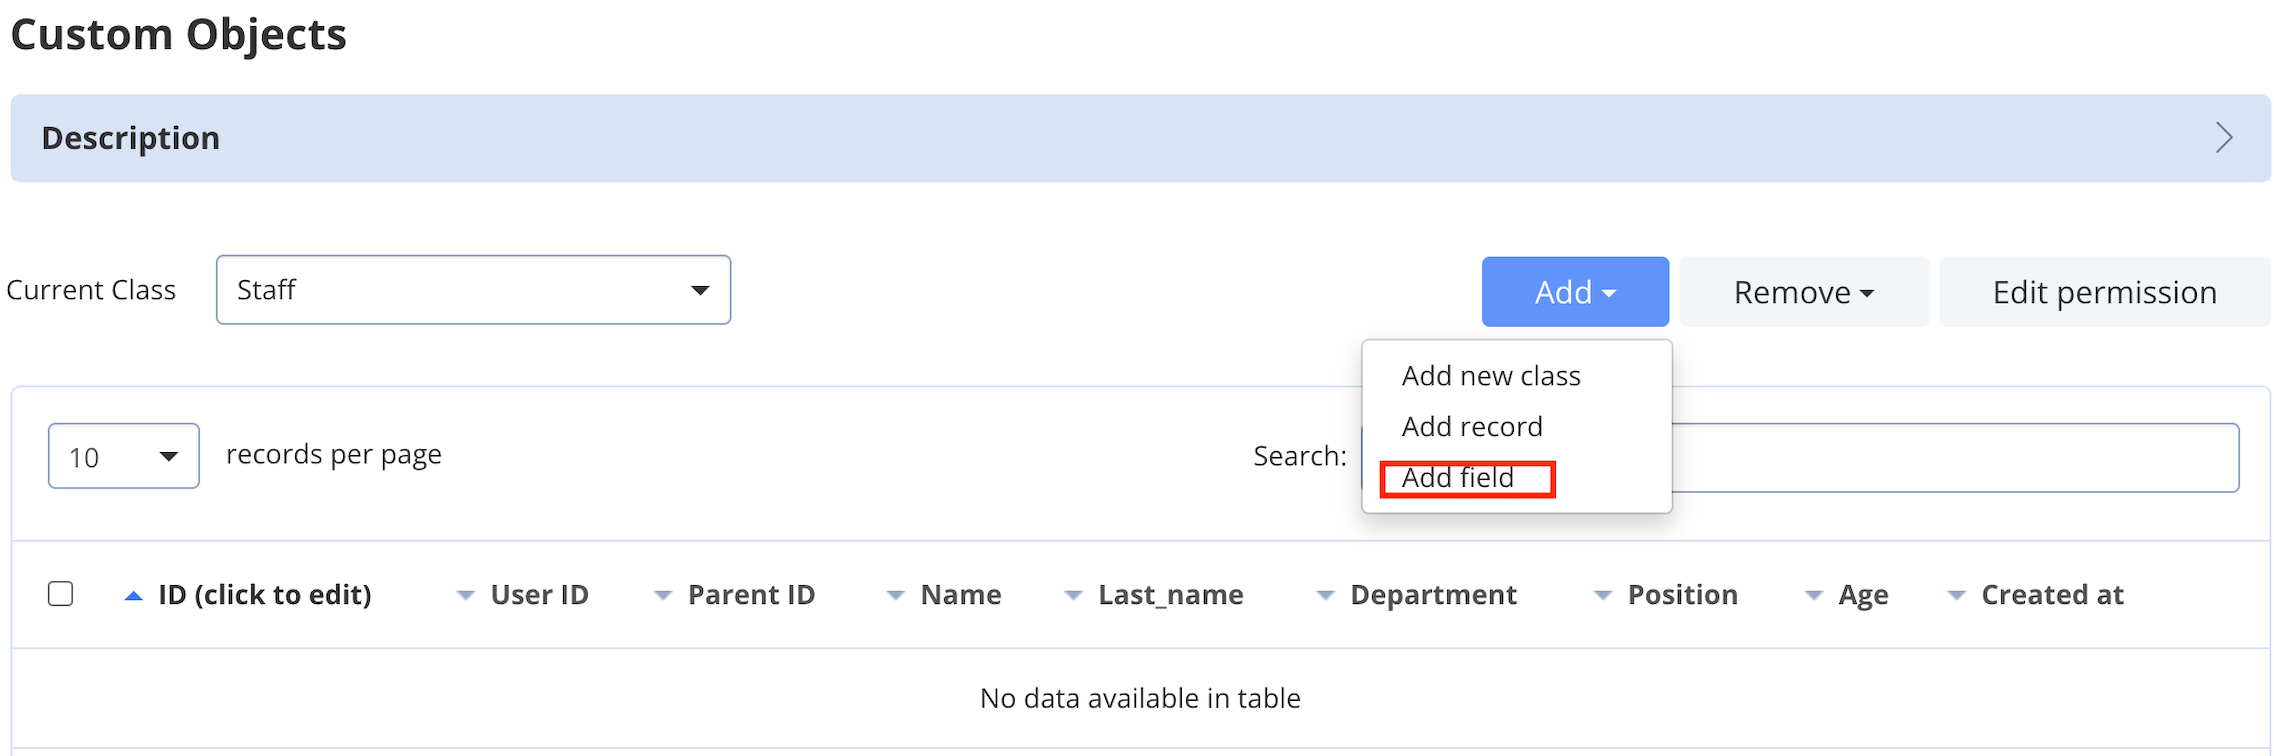
To add a field to a class, follow the steps below:
1. Navigate to the **Dashboard => *YOUR\_APP* => Custom** page.
2. Select a class in the **Current Class** dropdown.
3. Click the **Add** dropdown and select **Add field** menu item.
## Add field
To add a field to a class, follow the steps below:
1. Navigate to the **Dashboard => *YOUR\_APP* => Custom** page.
2. Select a class in the **Current Class** dropdown.
3. Click the **Add** dropdown and select **Add field** menu item.
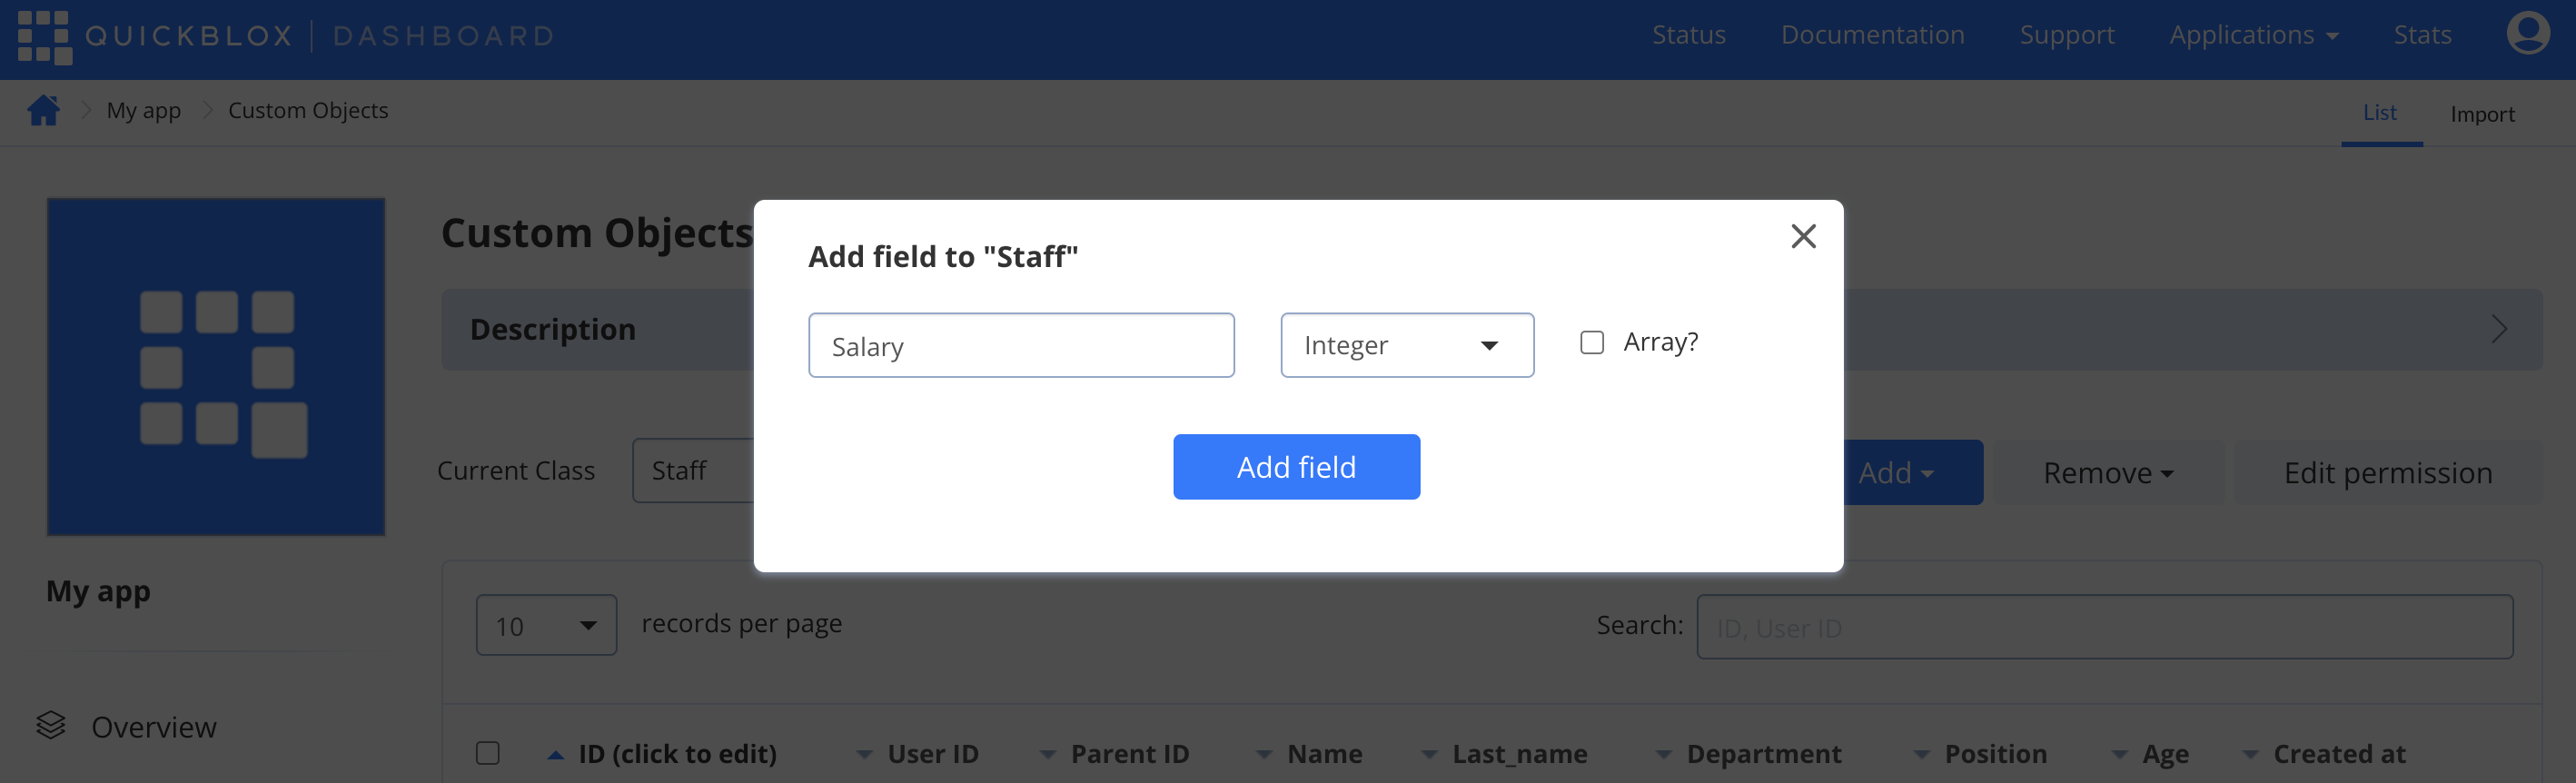
 1. Enter the name of the field.
2. Choose the type of the field.
3. Check if the new field is of the Array type.
4. Click the **Add field** button. You can add as many fields to the class as you need.
1. Enter the name of the field.
2. Choose the type of the field.
3. Check if the new field is of the Array type.
4. Click the **Add field** button. You can add as many fields to the class as you need.
 ## Remove field
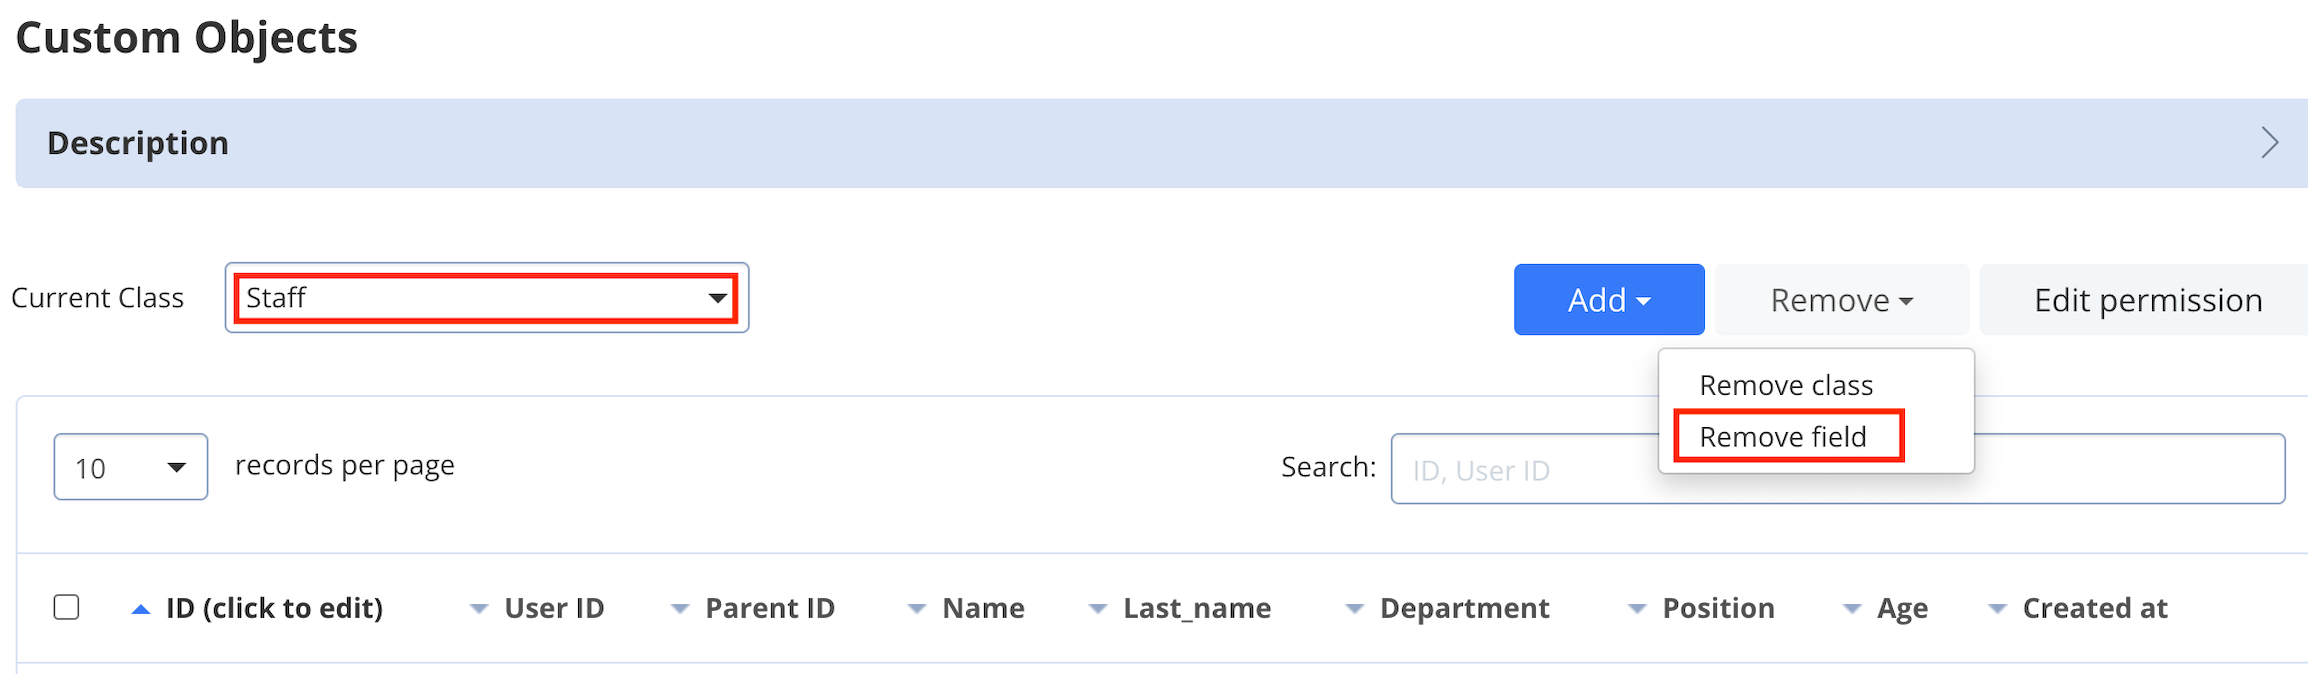
To remove a field from a class, follow the steps below:
1. Navigate to the **Dashboard => *YOUR\_APP* => Custom** page.
2. Select a class in the **Current Class** dropdown.
3. Click the **Remove** dropdown and select **Remove field** menu item.
## Remove field
To remove a field from a class, follow the steps below:
1. Navigate to the **Dashboard => *YOUR\_APP* => Custom** page.
2. Select a class in the **Current Class** dropdown.
3. Click the **Remove** dropdown and select **Remove field** menu item.
 ## View list of records
To view a list of records, follow the steps below:
1. Navigate to the **Dashboard => *YOUR\_APP* => Custom** page.
2. Click the **Current Class** dropdown to choose a specific class. As a result, all records of this class are displayed on the page.
## View list of records
To view a list of records, follow the steps below:
1. Navigate to the **Dashboard => *YOUR\_APP* => Custom** page.
2. Click the **Current Class** dropdown to choose a specific class. As a result, all records of this class are displayed on the page.
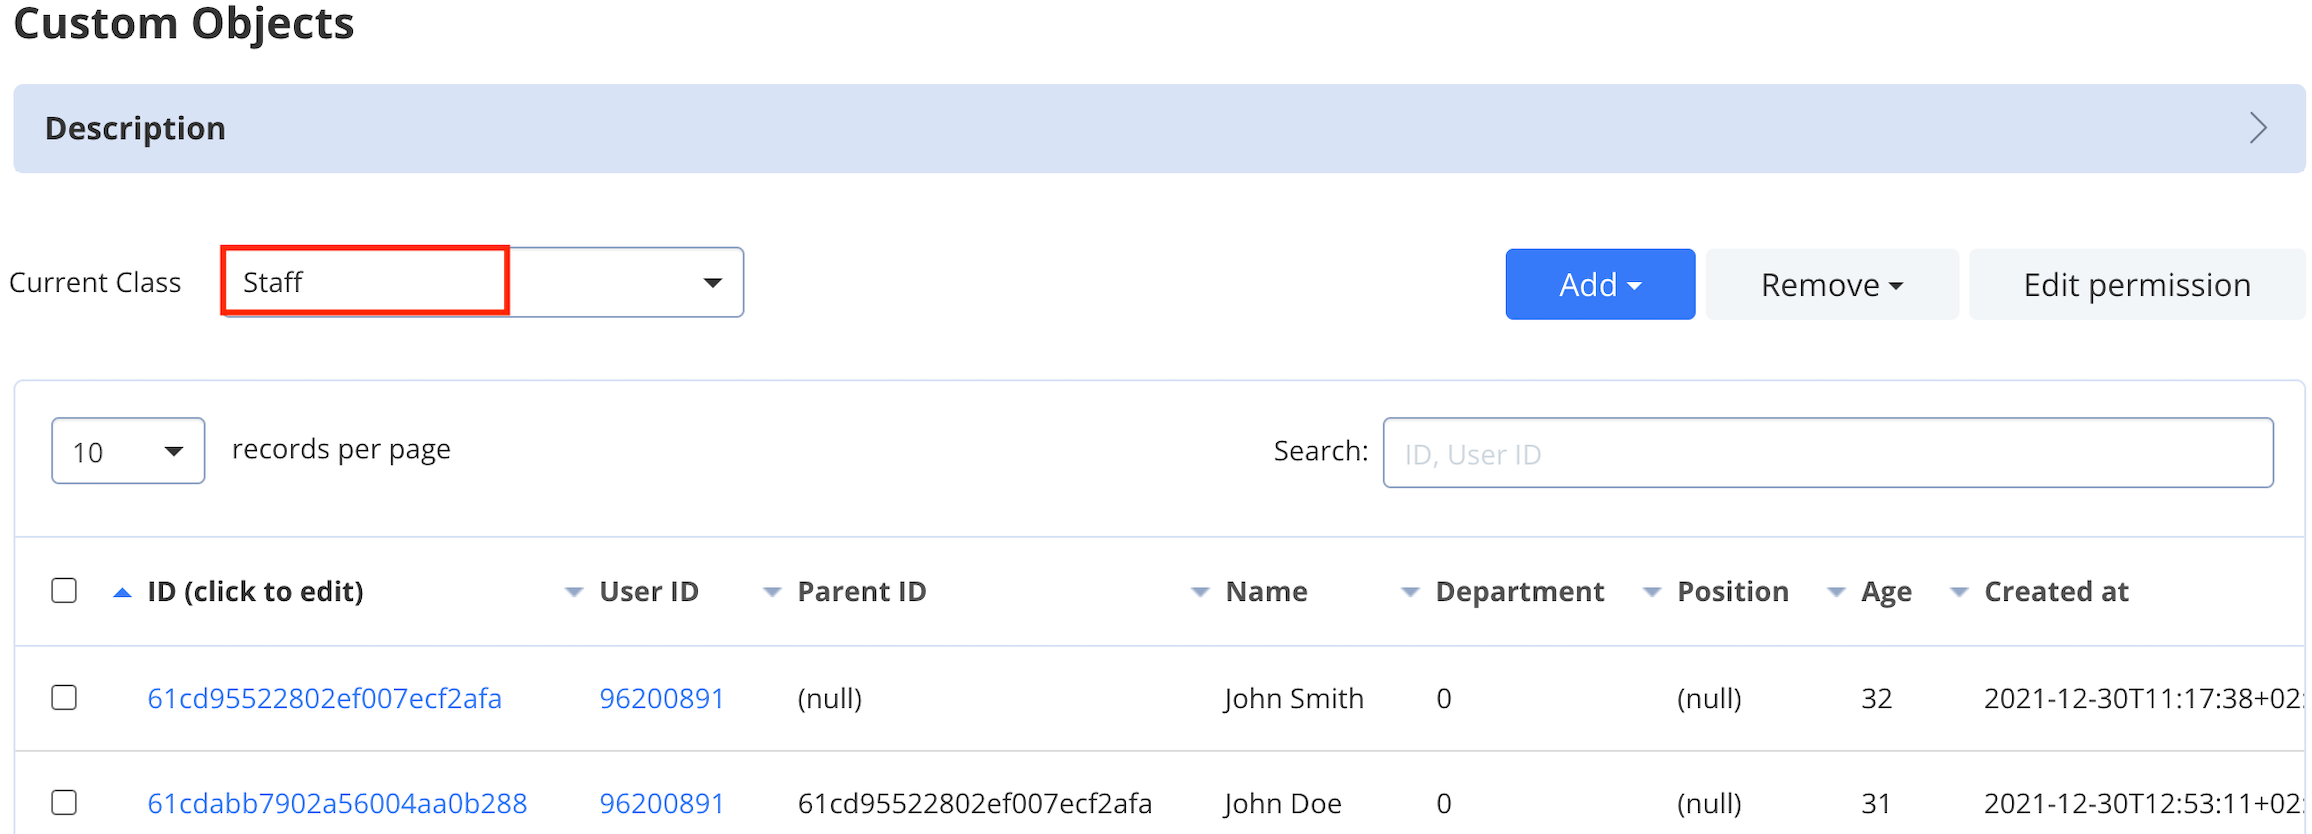 ## Add record
To add a custom object record, follow the steps below:
1. Navigate to the **Dashboard => *YOUR\_APP* => Custom** page.
2. Select a class in the **Current Class** dropdown.
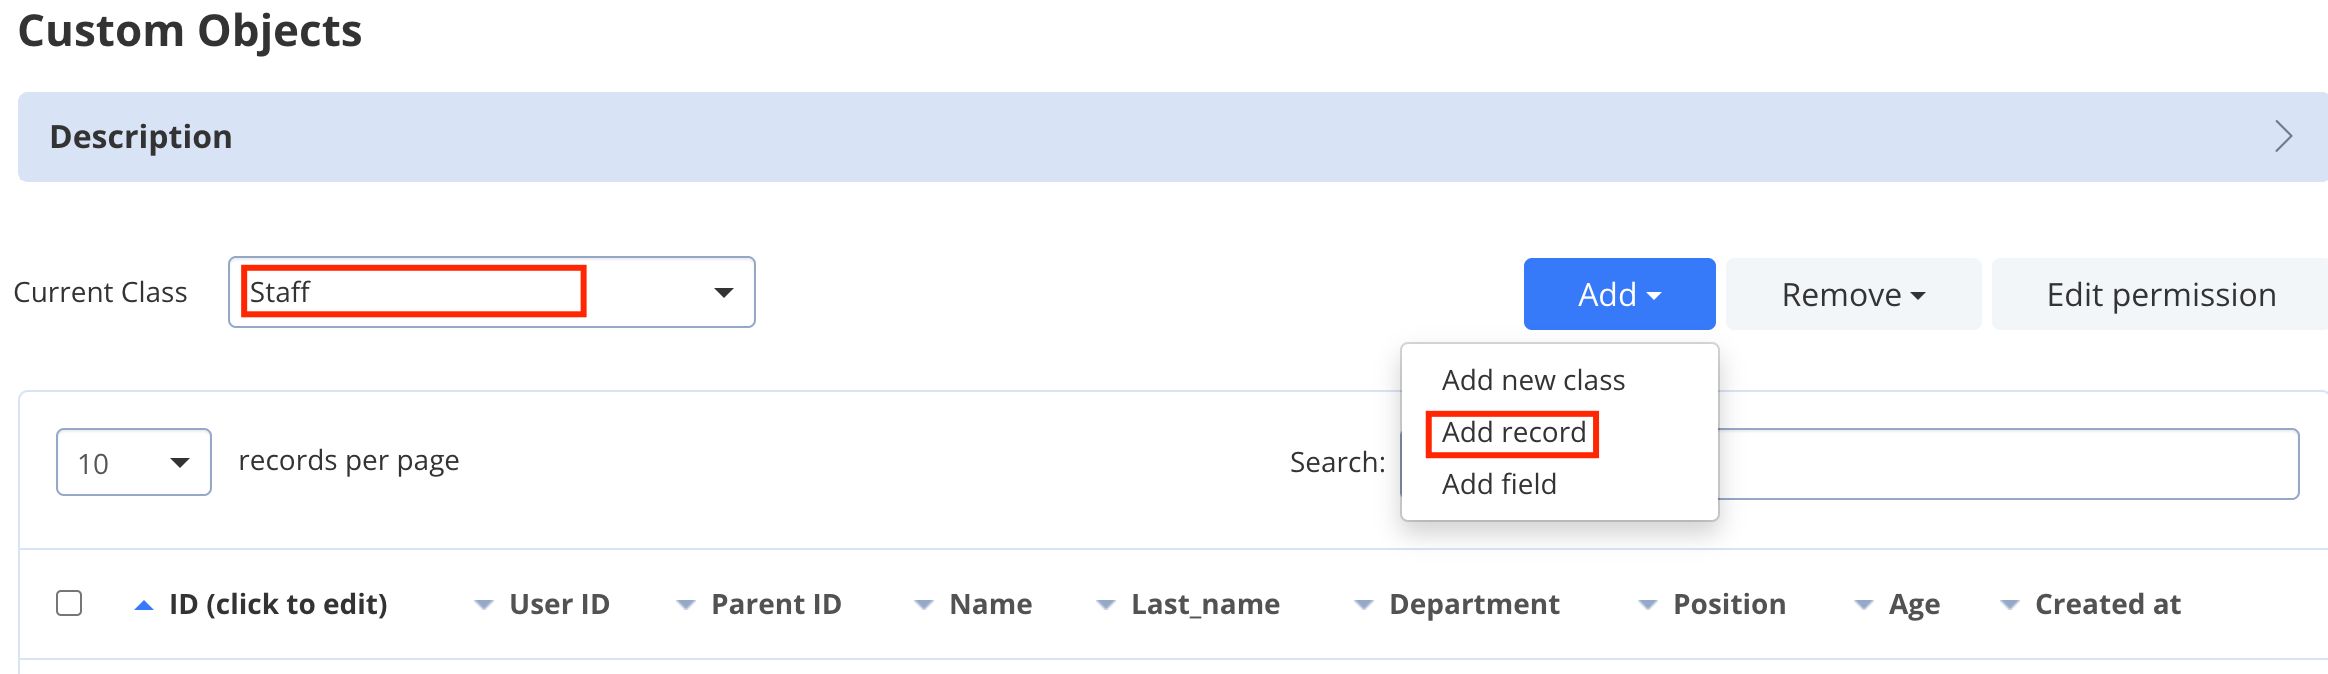
3. Click the **Add** dropdown and select **Add record** menu item.
## Add record
To add a custom object record, follow the steps below:
1. Navigate to the **Dashboard => *YOUR\_APP* => Custom** page.
2. Select a class in the **Current Class** dropdown.
3. Click the **Add** dropdown and select **Add record** menu item.
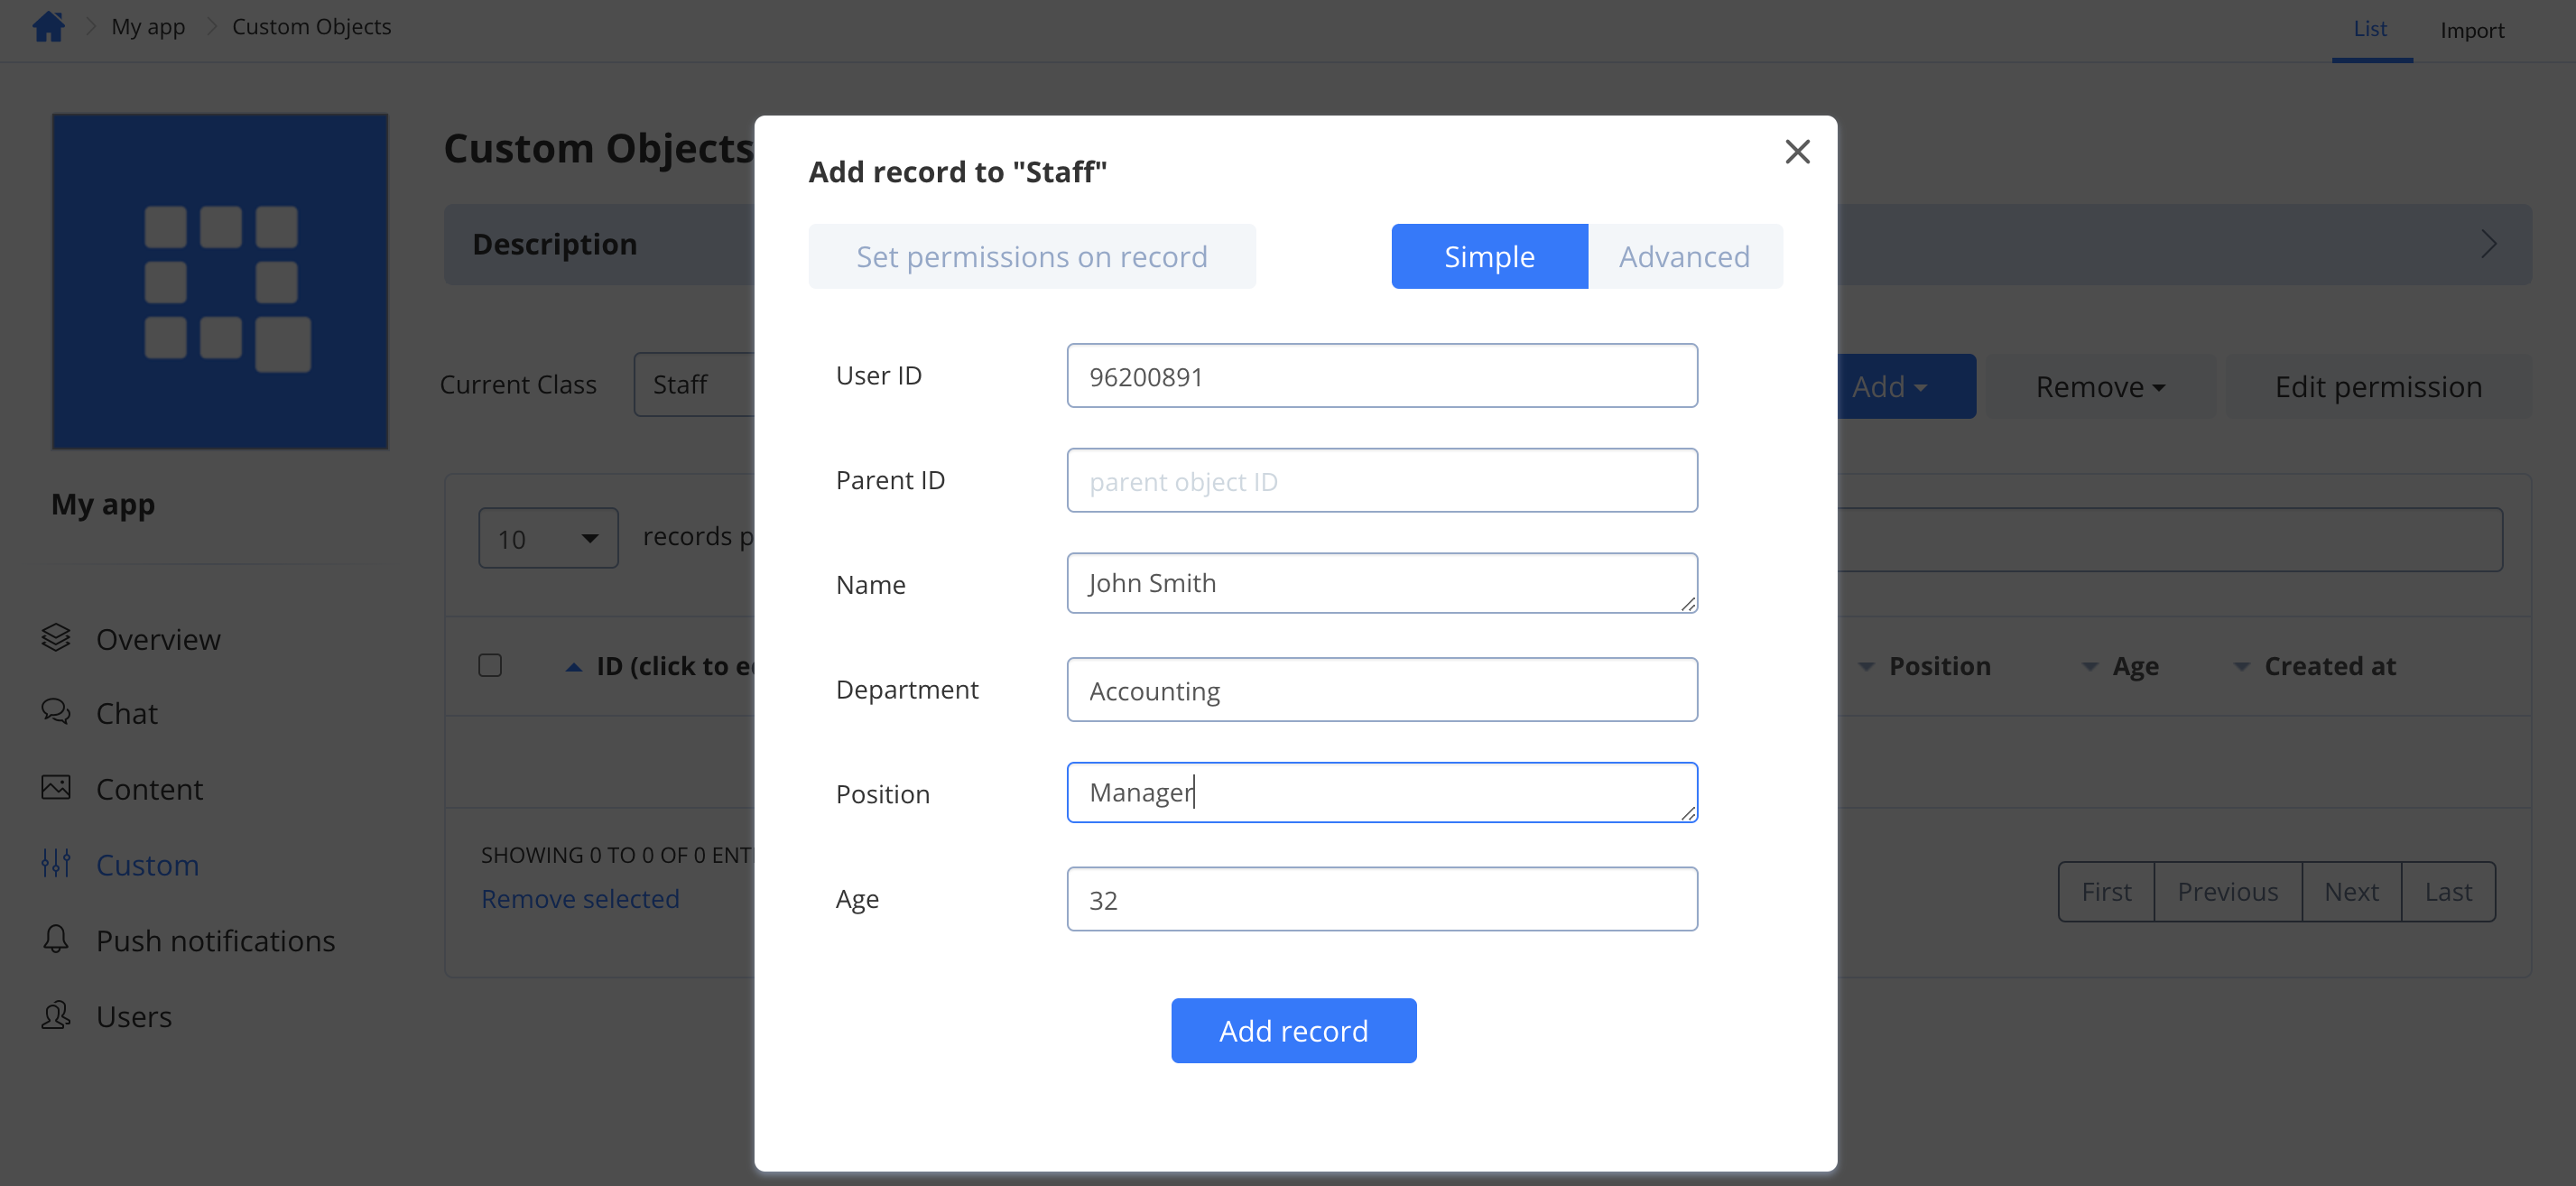
 1. Set fields of the record. The record fields are defined in the class. If the field value isn't specified, a null value is inserted automatically.
2. Click the **Add record** button.
1. Set fields of the record. The record fields are defined in the class. If the field value isn't specified, a null value is inserted automatically.
2. Click the **Add record** button.
 ## Add child record
You can create a child record. A child record is a record that refers to another record that has already been created, a parent. When a record is created, it is assigned a record ID. Thus, you can create a new record, a child, and attach it to the parent record by pointing to its ID. See [this section](/docs/key-concepts#relations) to learn more about relations between records. To create a child record, follow the steps below:
1. Navigate to the **Dashboard => *YOUR\_APP* => Custom** page.
2. Select a class in the **Current Class** dropdown.
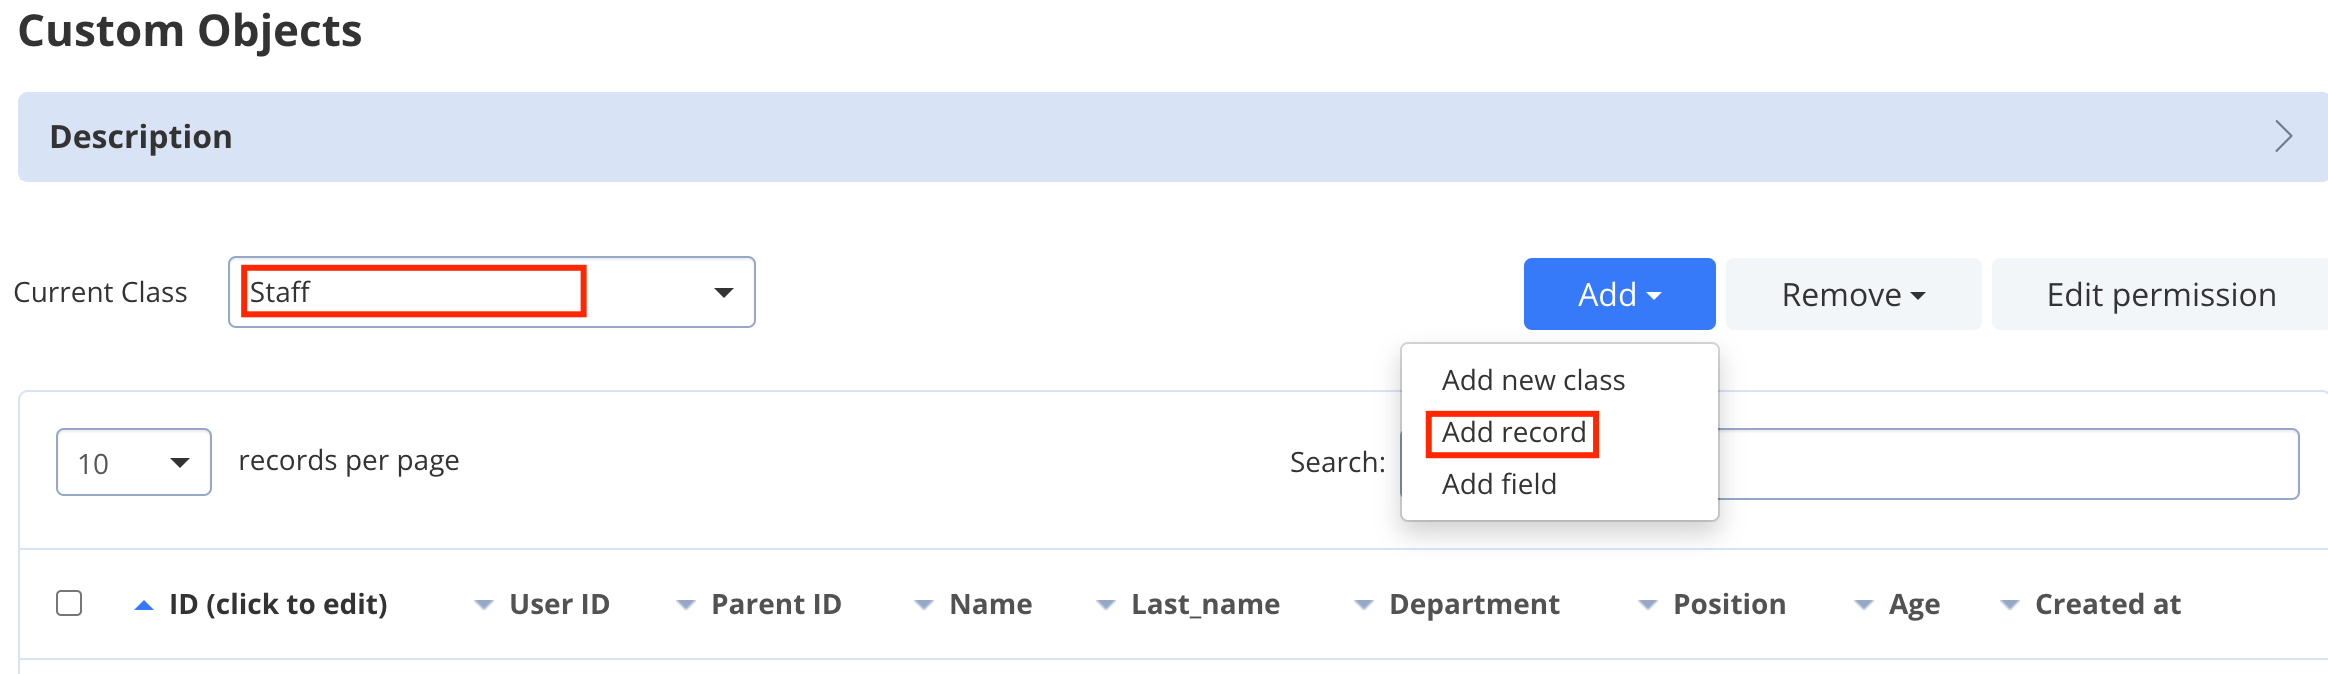
3. Click the **Add** dropdown and select **Add record** menu item.
## Add child record
You can create a child record. A child record is a record that refers to another record that has already been created, a parent. When a record is created, it is assigned a record ID. Thus, you can create a new record, a child, and attach it to the parent record by pointing to its ID. See [this section](/docs/key-concepts#relations) to learn more about relations between records. To create a child record, follow the steps below:
1. Navigate to the **Dashboard => *YOUR\_APP* => Custom** page.
2. Select a class in the **Current Class** dropdown.
3. Click the **Add** dropdown and select **Add record** menu item.
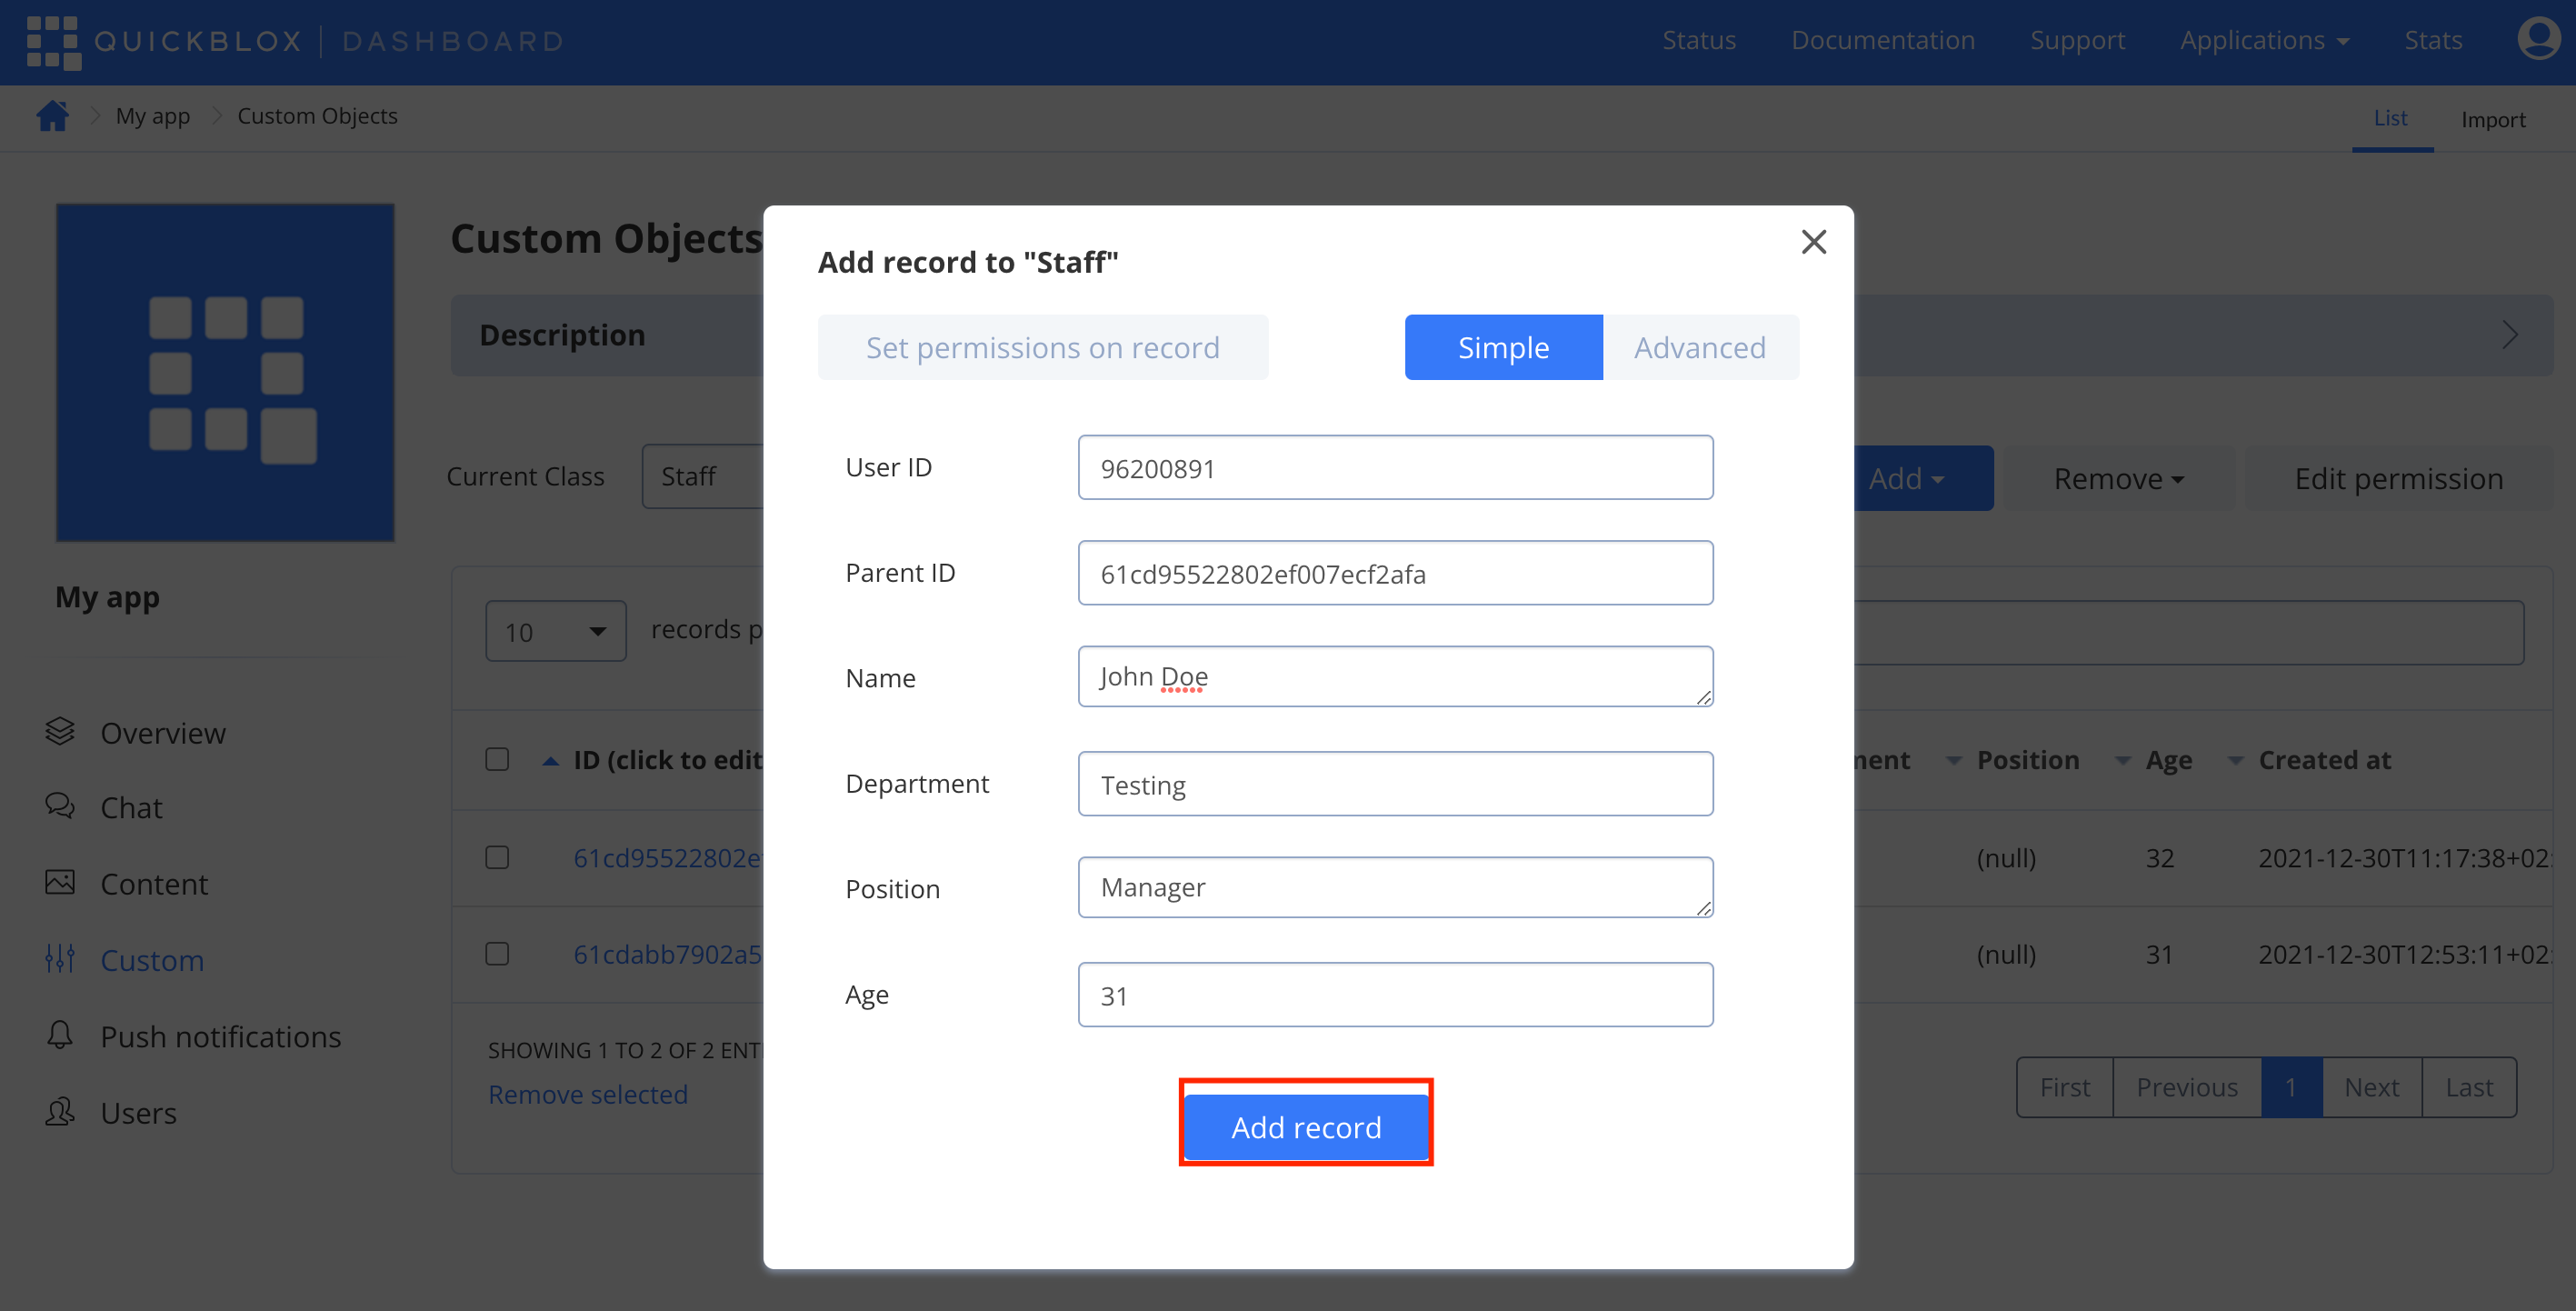
 1. Set fields of the record. The record fields are defined in the class. If the field value isn't specified, a null value is inserted automatically.
2. Set a parent ID to refer to a parent record.
3. Click the **Add record** button.
1. Set fields of the record. The record fields are defined in the class. If the field value isn't specified, a null value is inserted automatically.
2. Set a parent ID to refer to a parent record.
3. Click the **Add record** button.
 ## Edit record
To edit a record, do the following:
1. Navigate to the **Dashboard => *YOUR\_APP* => Custom** page.
2. Select a class in the **Current Class** dropdown.
3. Click the ID of the record to edit.
## Edit record
To edit a record, do the following:
1. Navigate to the **Dashboard => *YOUR\_APP* => Custom** page.
2. Select a class in the **Current Class** dropdown.
3. Click the ID of the record to edit.
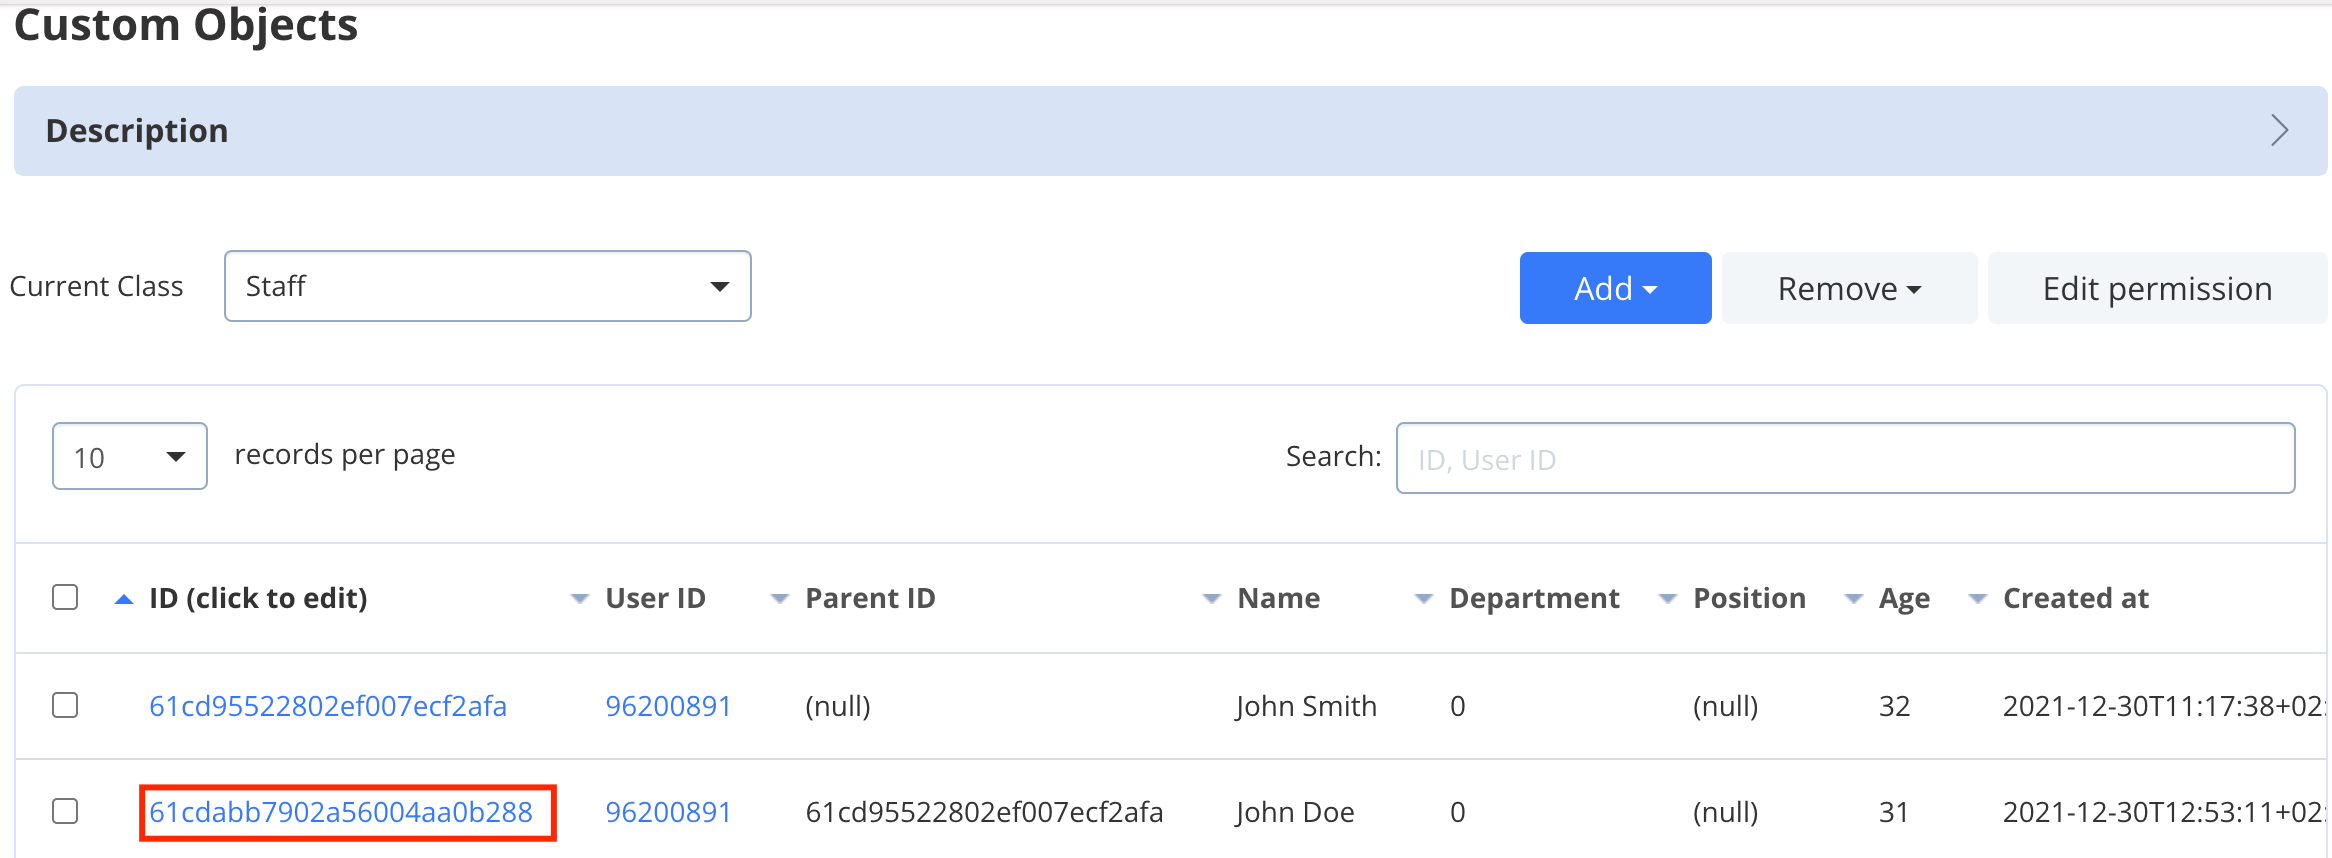 1. Edit record fields.
2. Click the **Update record** button to save changes.
1. Edit record fields.
2. Click the **Update record** button to save changes.
 ## Remove record
To remove a record, follow the steps below:
1. Navigate to the **Dashboard => *YOUR\_APP* => Custom** page.
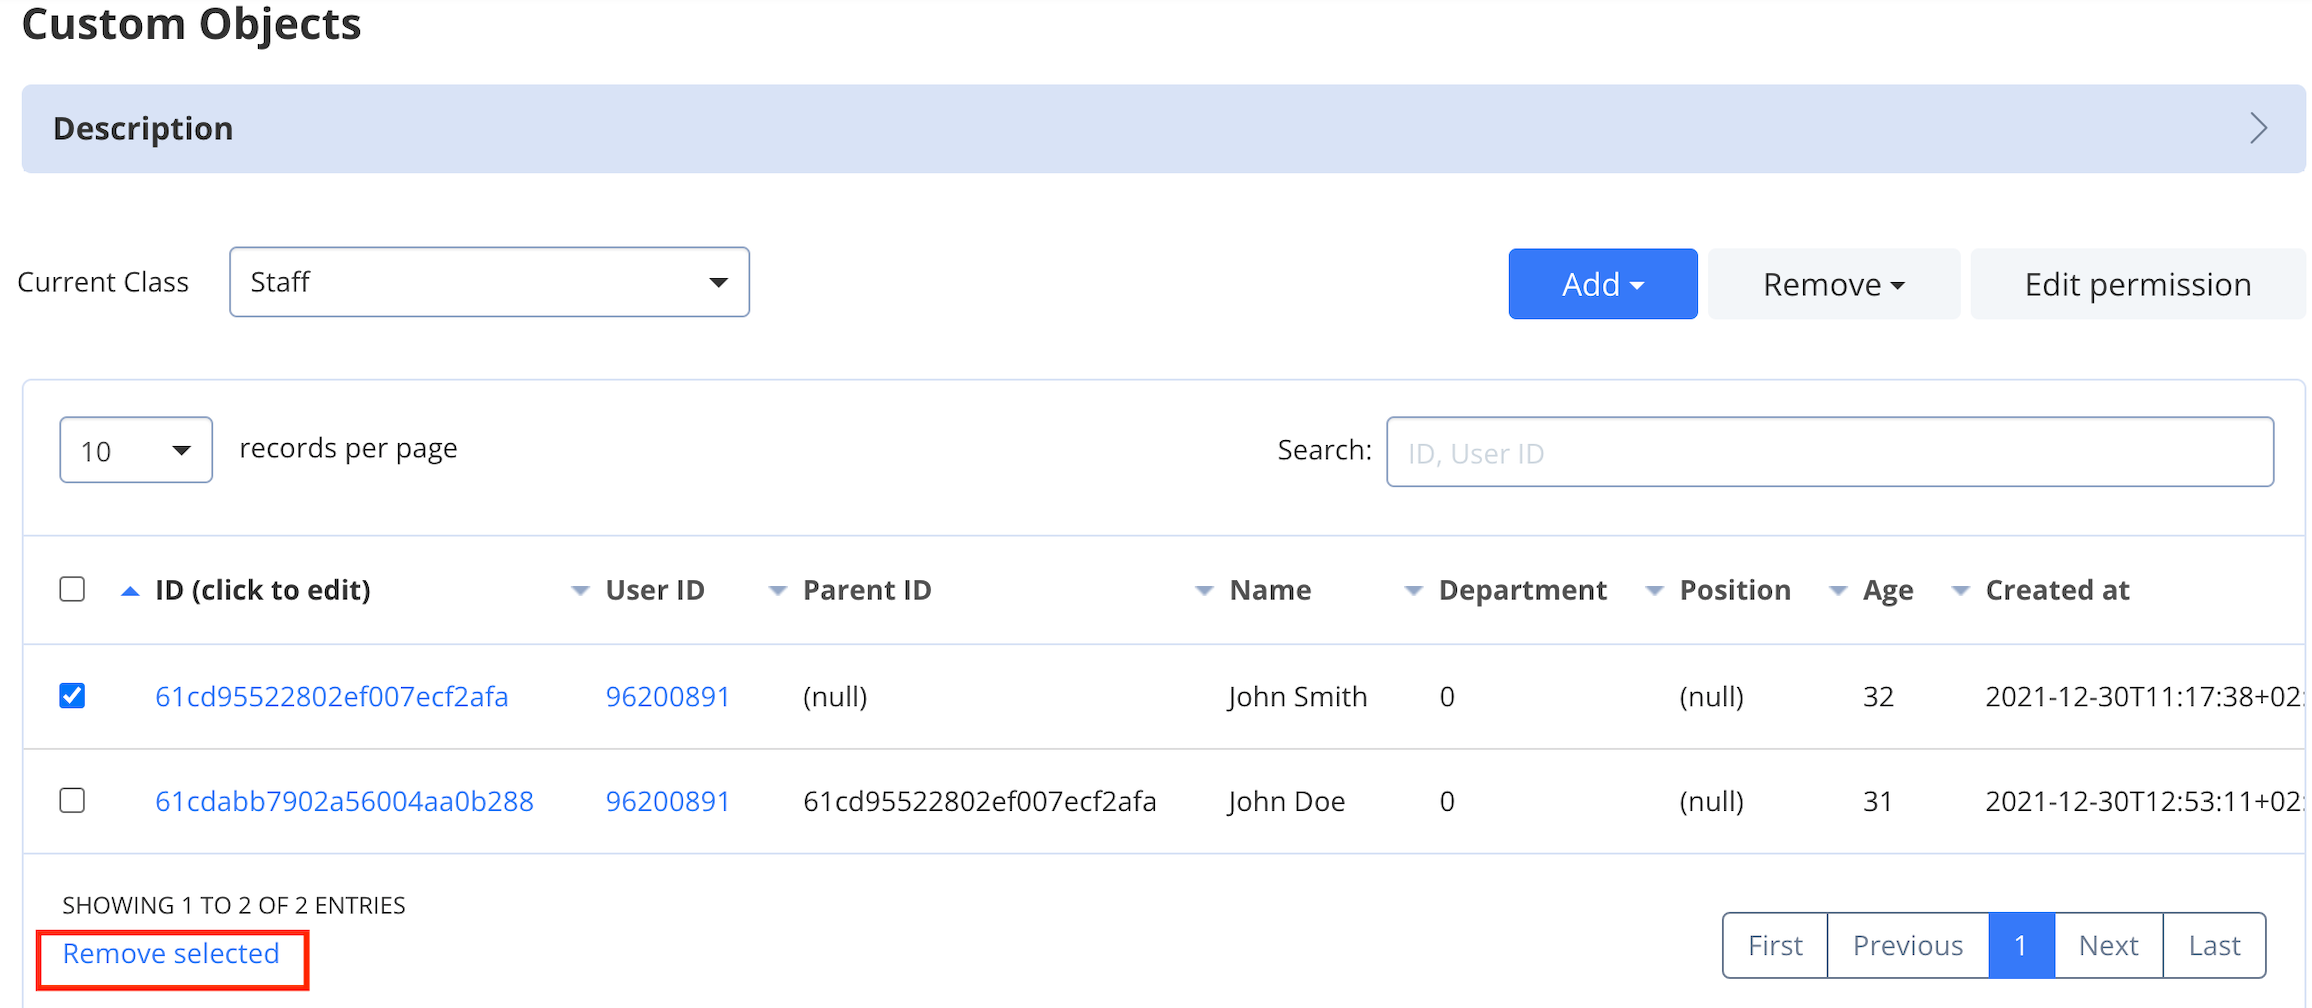
2. Check the record you want to delete.
3. Click the **Remove selected** button.
## Remove record
To remove a record, follow the steps below:
1. Navigate to the **Dashboard => *YOUR\_APP* => Custom** page.
2. Check the record you want to delete.
3. Click the **Remove selected** button.
 ## Set permissions
You can set a permissions schema. There are two access levels in the permissions schema: class and record. Only one permission level can be applicable to the record: class permission schema or record permission schema.
### Class permissions
Only the account owner can create a class in the Custom Objects module and make all possible actions with it.
All actions (Create, Read, Update, and Delete) are available for the class entity and are applicable for all records in the class.
Every action has a separate permission level available. The exception is a Create action that is not available for the **Owner** permission level.
See [this section](/docs/key-concepts#permission-levels) to learn about permission levels.
Default class permission schema is used while creating a class:
* **Create**: Open
* **Read**: Open
* **Update**: Owner
* **Delete**: Owner
To set a permissions schema for the class, do the following:
1. Navigate to the **Dashboard => *YOUR\_APP* => Custom** page.
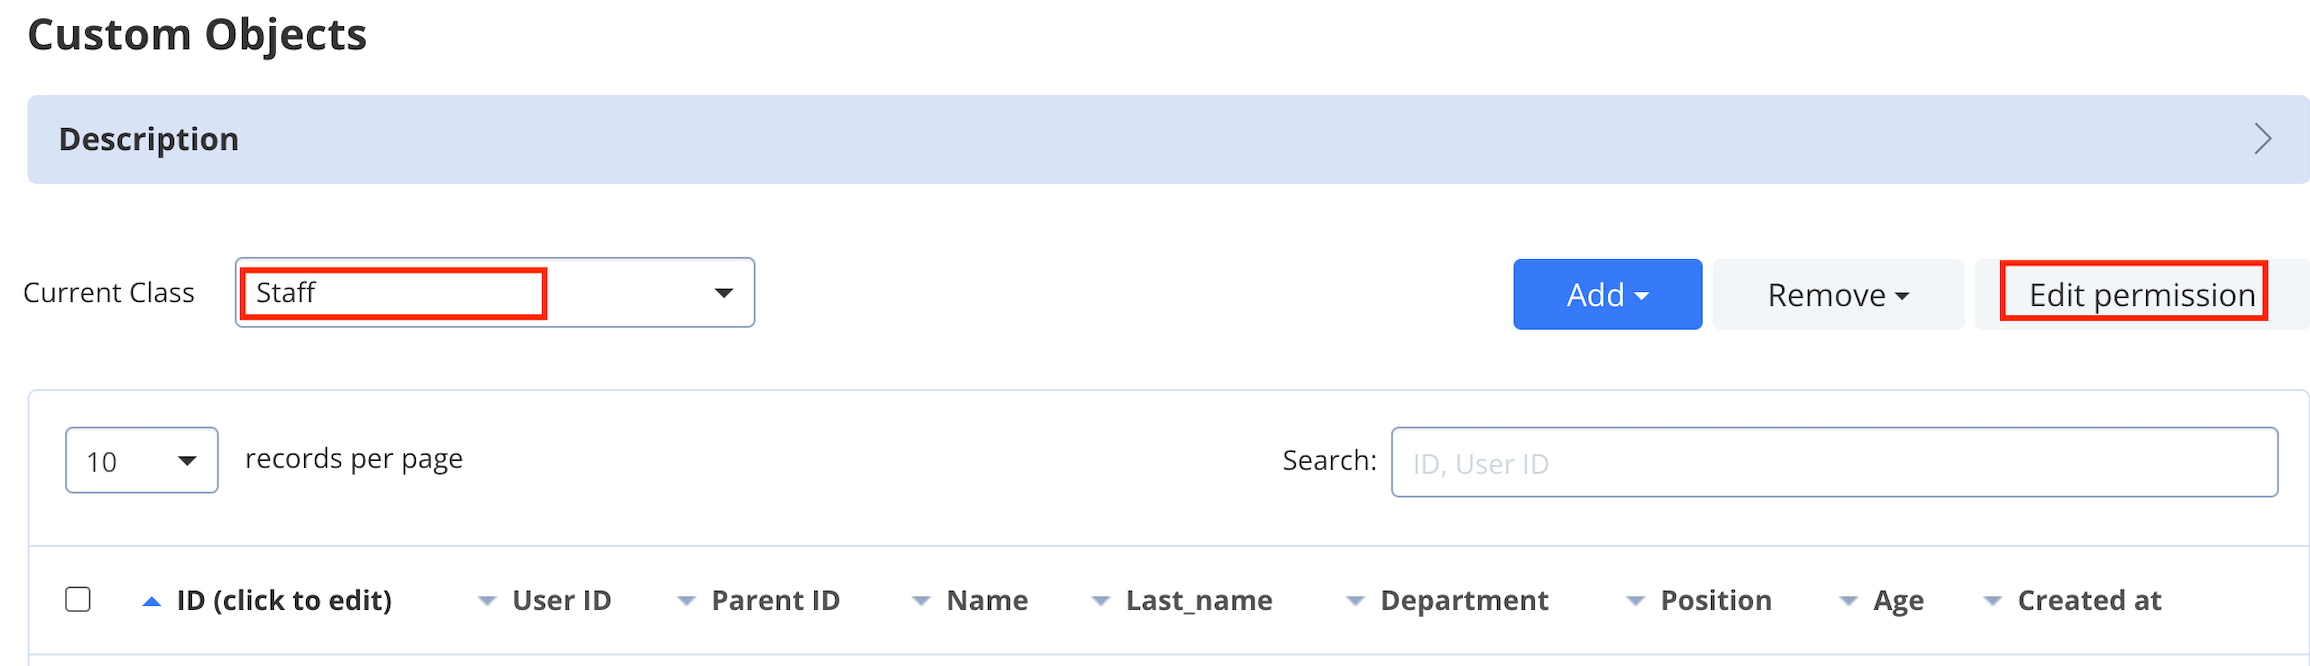
2. Select a class in the **Current Class** dropdown.
3. Click **Edit permission** button.
## Set permissions
You can set a permissions schema. There are two access levels in the permissions schema: class and record. Only one permission level can be applicable to the record: class permission schema or record permission schema.
### Class permissions
Only the account owner can create a class in the Custom Objects module and make all possible actions with it.
All actions (Create, Read, Update, and Delete) are available for the class entity and are applicable for all records in the class.
Every action has a separate permission level available. The exception is a Create action that is not available for the **Owner** permission level.
See [this section](/docs/key-concepts#permission-levels) to learn about permission levels.
Default class permission schema is used while creating a class:
* **Create**: Open
* **Read**: Open
* **Update**: Owner
* **Delete**: Owner
To set a permissions schema for the class, do the following:
1. Navigate to the **Dashboard => *YOUR\_APP* => Custom** page.
2. Select a class in the **Current Class** dropdown.
3. Click **Edit permission** button.
 1. Set a permission level for each CRUD operation here. See [this section](/docs/key-concepts#permission-schema) to learn more about permission levels.
2. Check the boxes in **Use Class permissions** if you want to apply class permissions to all its records.
3. Click the **Edit permissions** button.
1. Set a permission level for each CRUD operation here. See [this section](/docs/key-concepts#permission-schema) to learn more about permission levels.
2. Check the boxes in **Use Class permissions** if you want to apply class permissions to all its records.
3. Click the **Edit permissions** button.
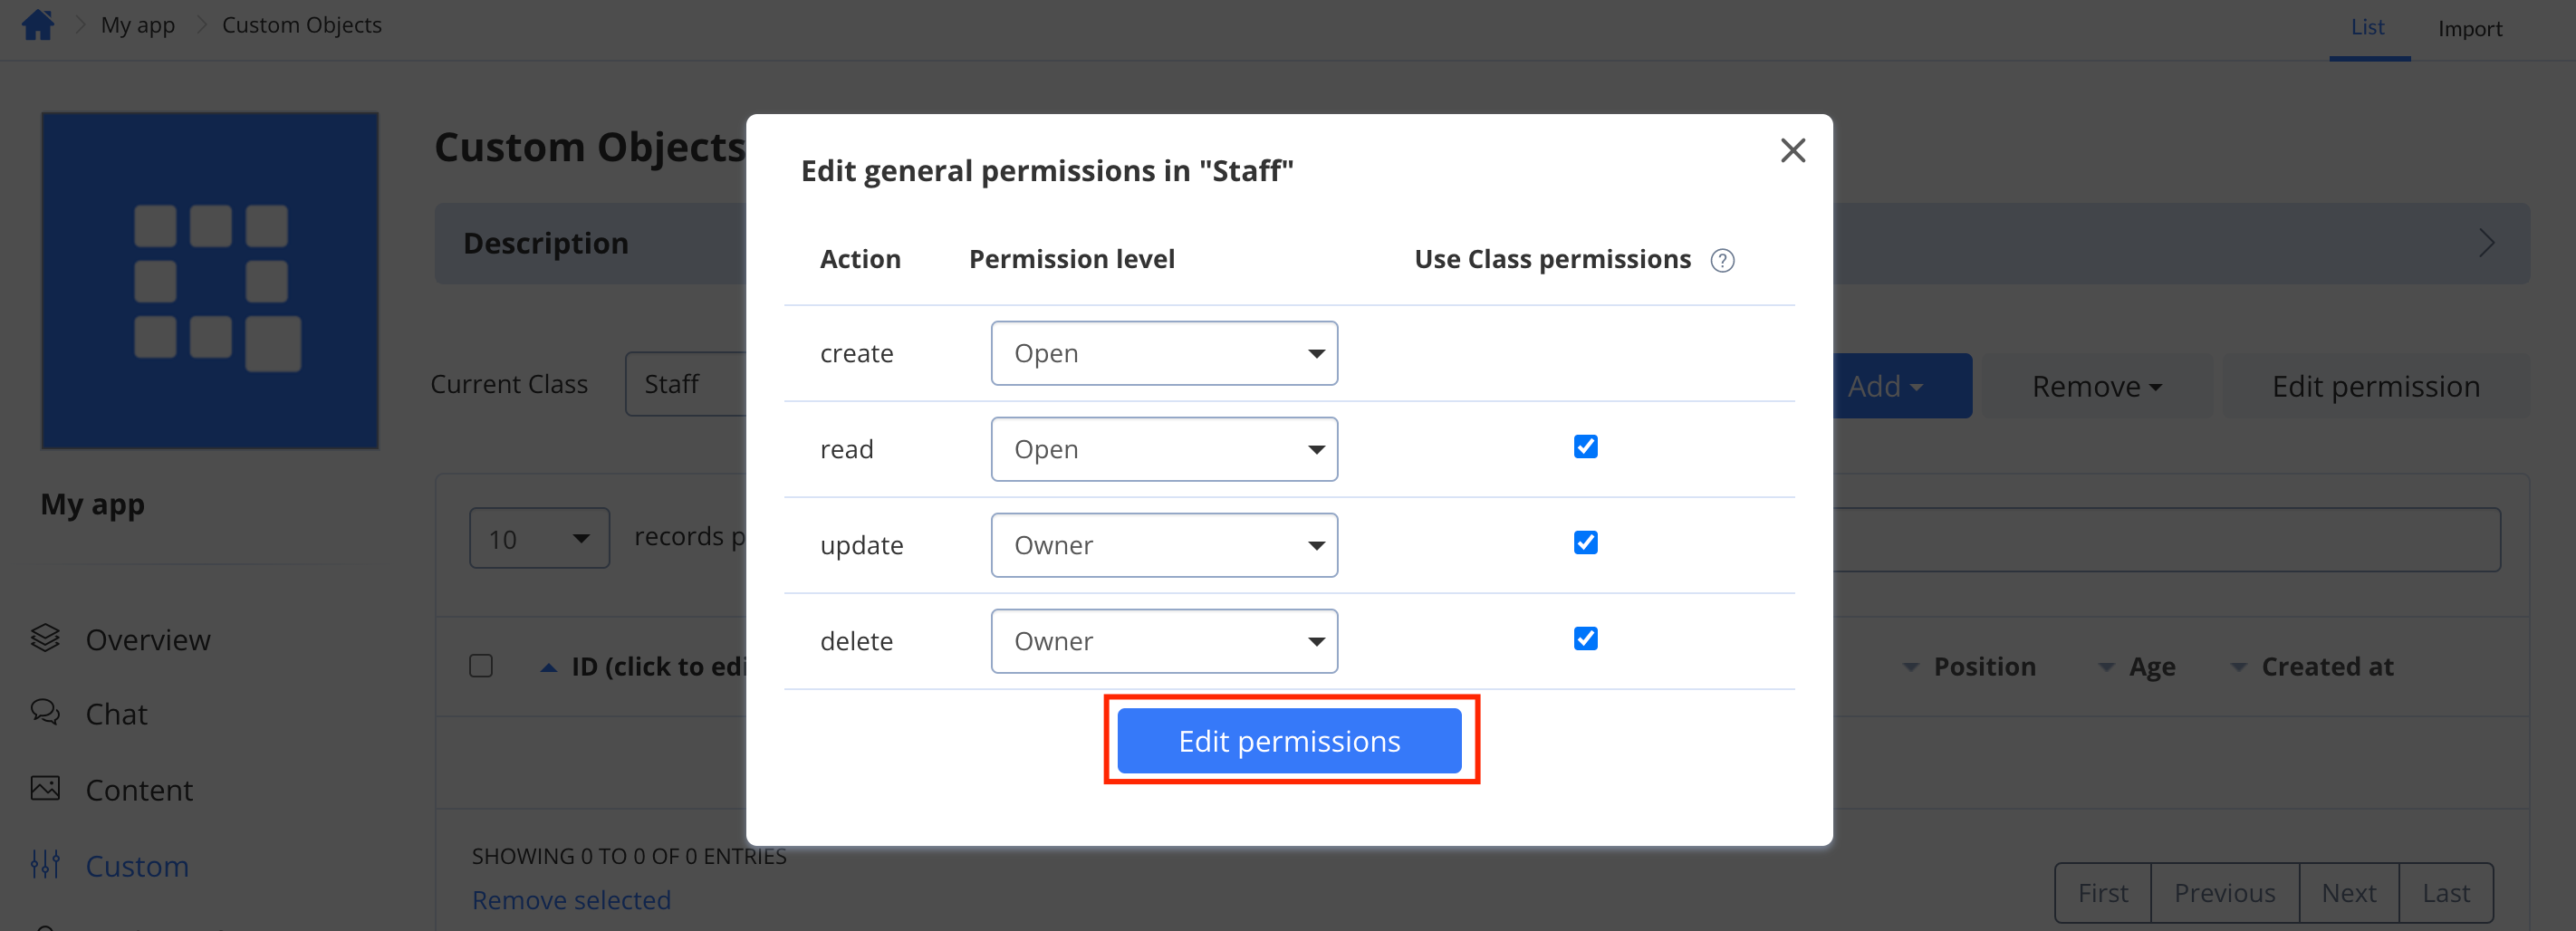 A class permission schema has a higher priority than a record permission schema. If an **account owner** ticks the **Use Class permissions** checkbox, the record permissions are ignored.
In case, an **account owner** doesn't tick the **Use Class permissions** checkbox, a user has a possibility to change permission levels for every separate record in the table or create a new one with the ACL that a user requires.
### Record permissions
A record is an entity within the class in the Custom Objects module that has its own permission levels. All permission levels except for the **Not Allowed** are available for the record and there are only three actions available and applicable for the record: Read, Update, and Delete. See [this section](/docs/key-concepts#permissions) to learn more about permissions.
Default Record permission schema is used while creating a class:
* **Read**: Open
* **Update**: Owner
* **Delete**: Owner
To set a permissions schema for the record, do the following:
1. Navigate to the **Dashboard => *YOUR\_APP* => Custom** page.
2. Select a class in the **Current Class** dropdown.
3. Click the ID of the record to edit.
4. Click the **Set permissions on record** button.
A class permission schema has a higher priority than a record permission schema. If an **account owner** ticks the **Use Class permissions** checkbox, the record permissions are ignored.
In case, an **account owner** doesn't tick the **Use Class permissions** checkbox, a user has a possibility to change permission levels for every separate record in the table or create a new one with the ACL that a user requires.
### Record permissions
A record is an entity within the class in the Custom Objects module that has its own permission levels. All permission levels except for the **Not Allowed** are available for the record and there are only three actions available and applicable for the record: Read, Update, and Delete. See [this section](/docs/key-concepts#permissions) to learn more about permissions.
Default Record permission schema is used while creating a class:
* **Read**: Open
* **Update**: Owner
* **Delete**: Owner
To set a permissions schema for the record, do the following:
1. Navigate to the **Dashboard => *YOUR\_APP* => Custom** page.
2. Select a class in the **Current Class** dropdown.
3. Click the ID of the record to edit.
4. Click the **Set permissions on record** button.
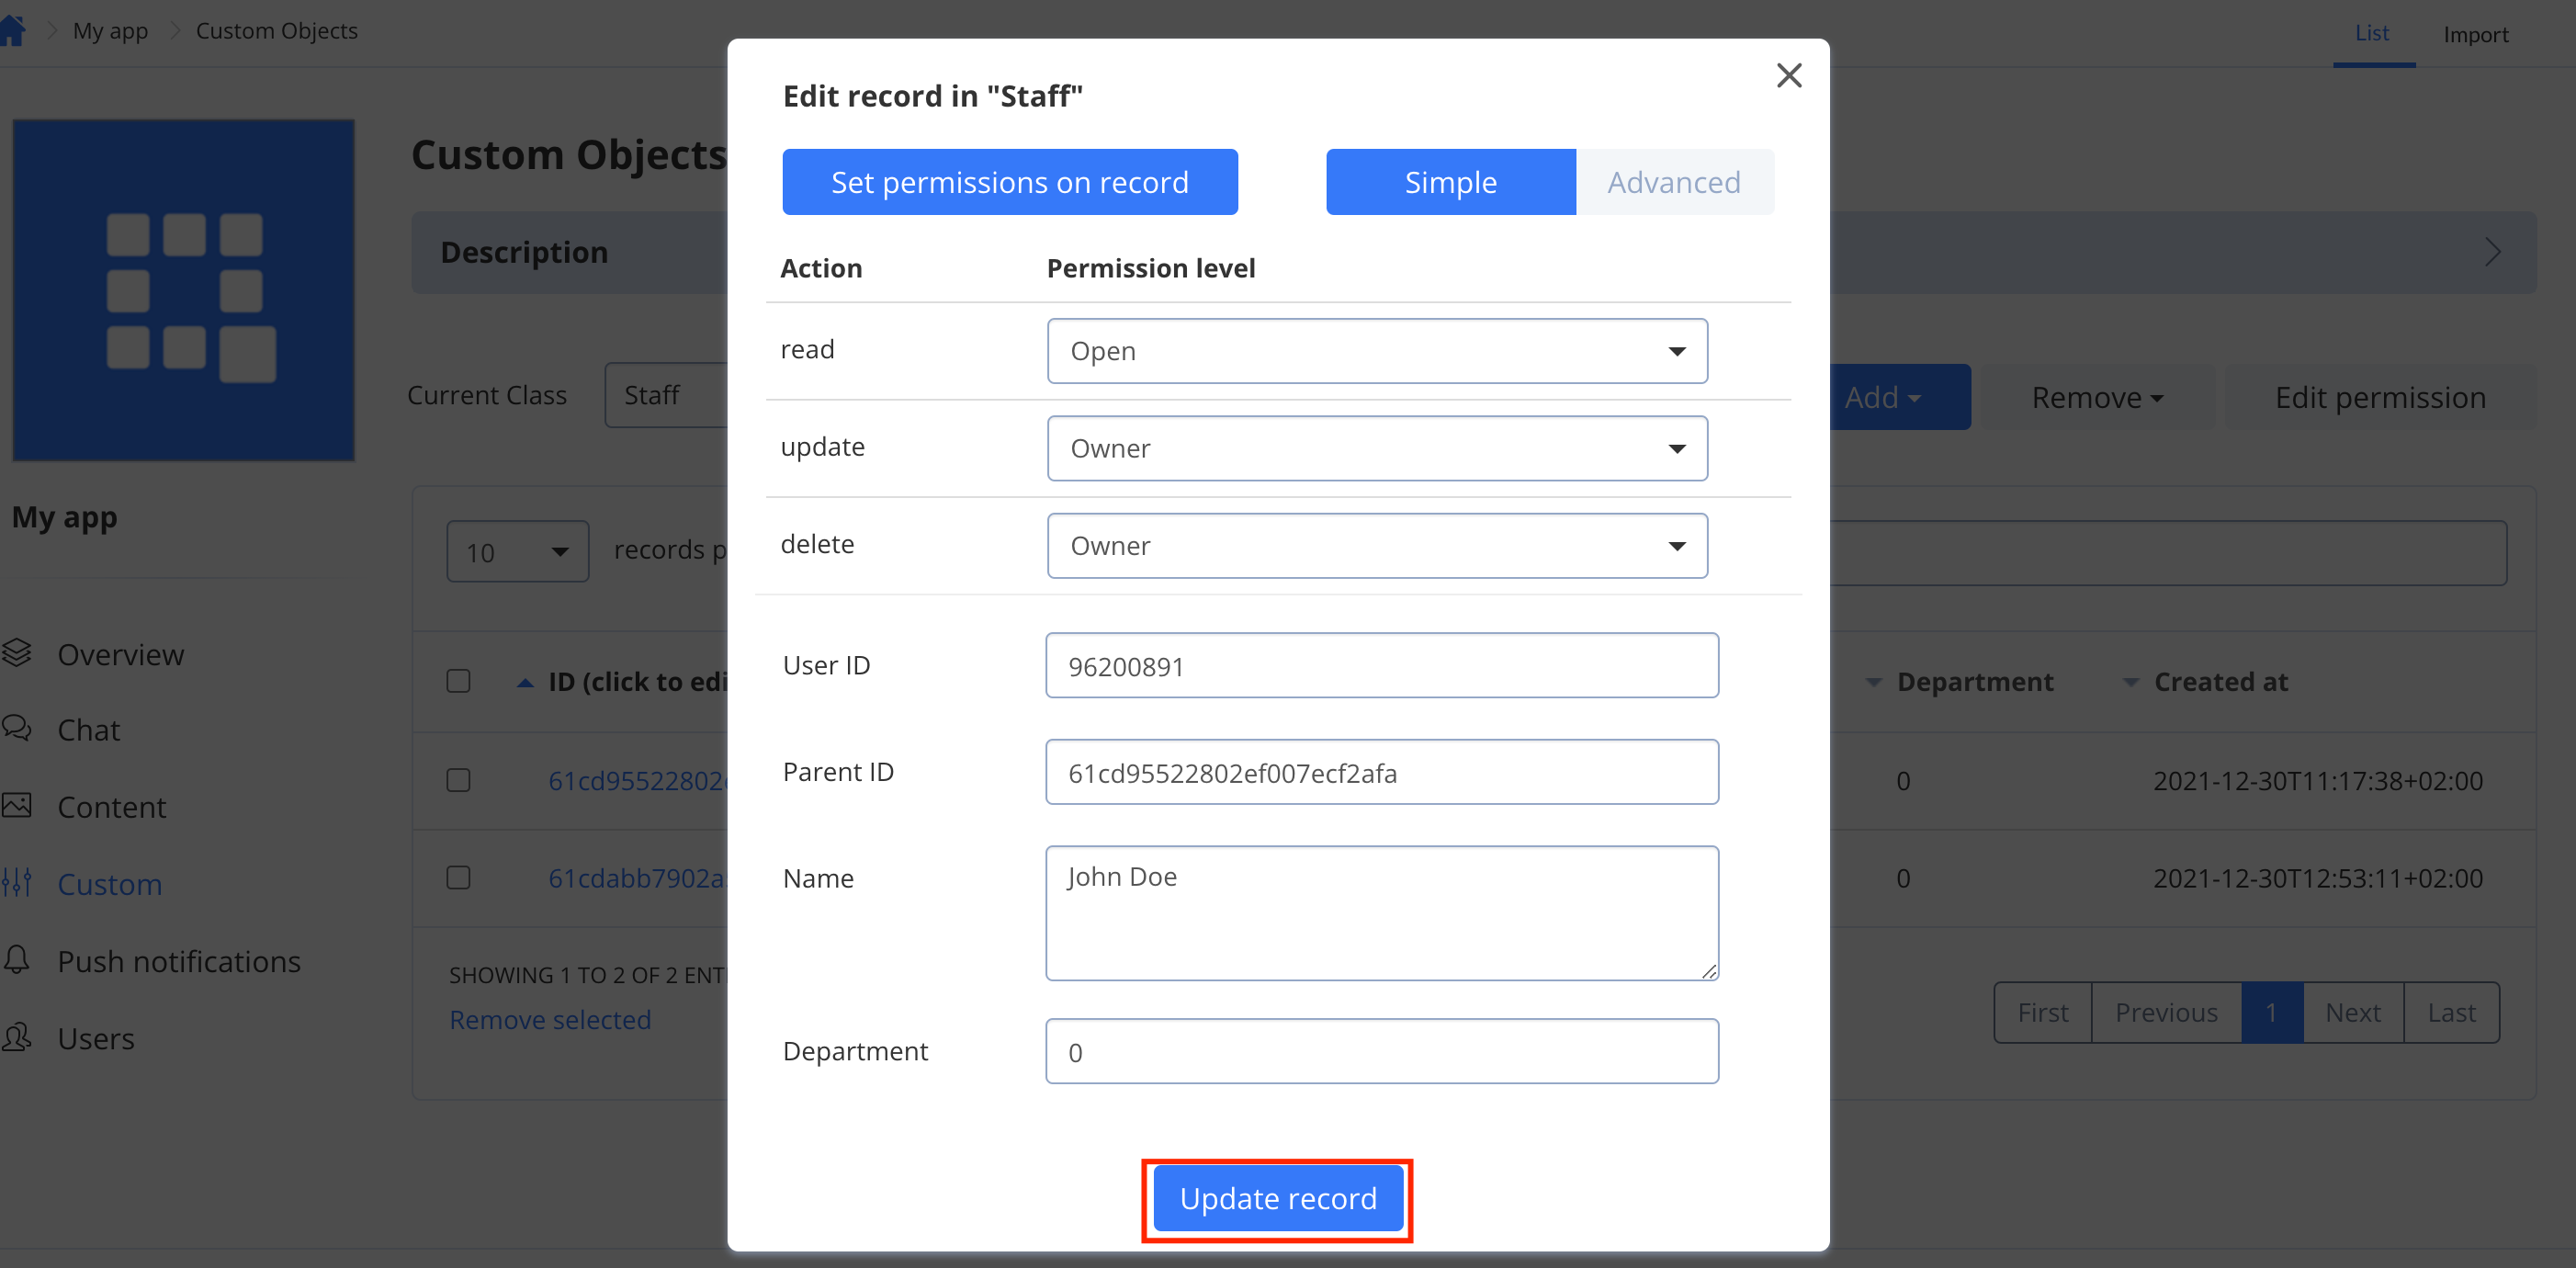 1. Set a permission level for each CRUD operation here. See [this section](/docs/key-concepts#permission-levels) to learn more about permission levels.
2. Click the **Update record** button to save changes.
A class permission schema has a higher priority than a record permission schema. If an **account owner** ticks the **Use Class permissions** checkbox, the record permissions are ignored. See [this section](/docs/custom-objects-dashboard#class-permissions) for more details.
## Import data
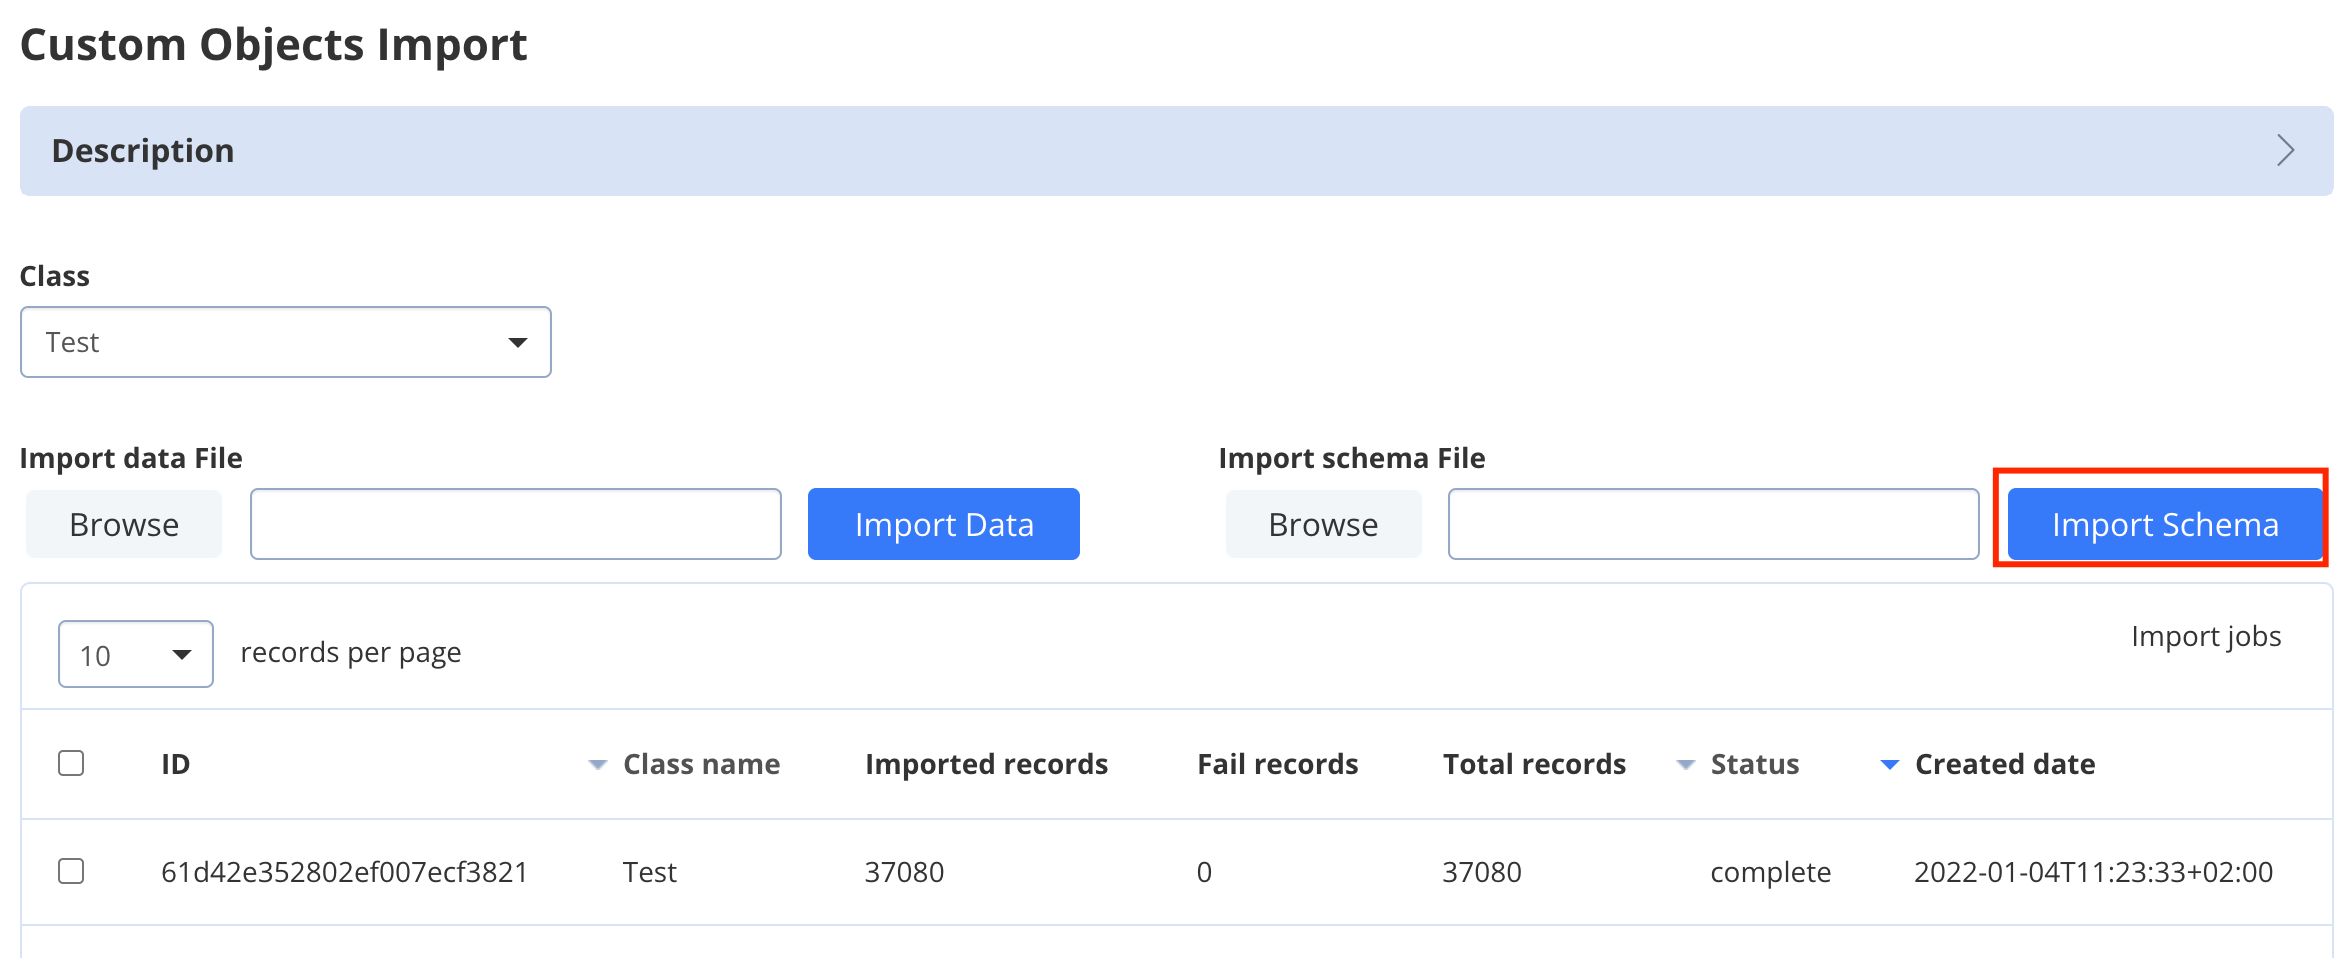
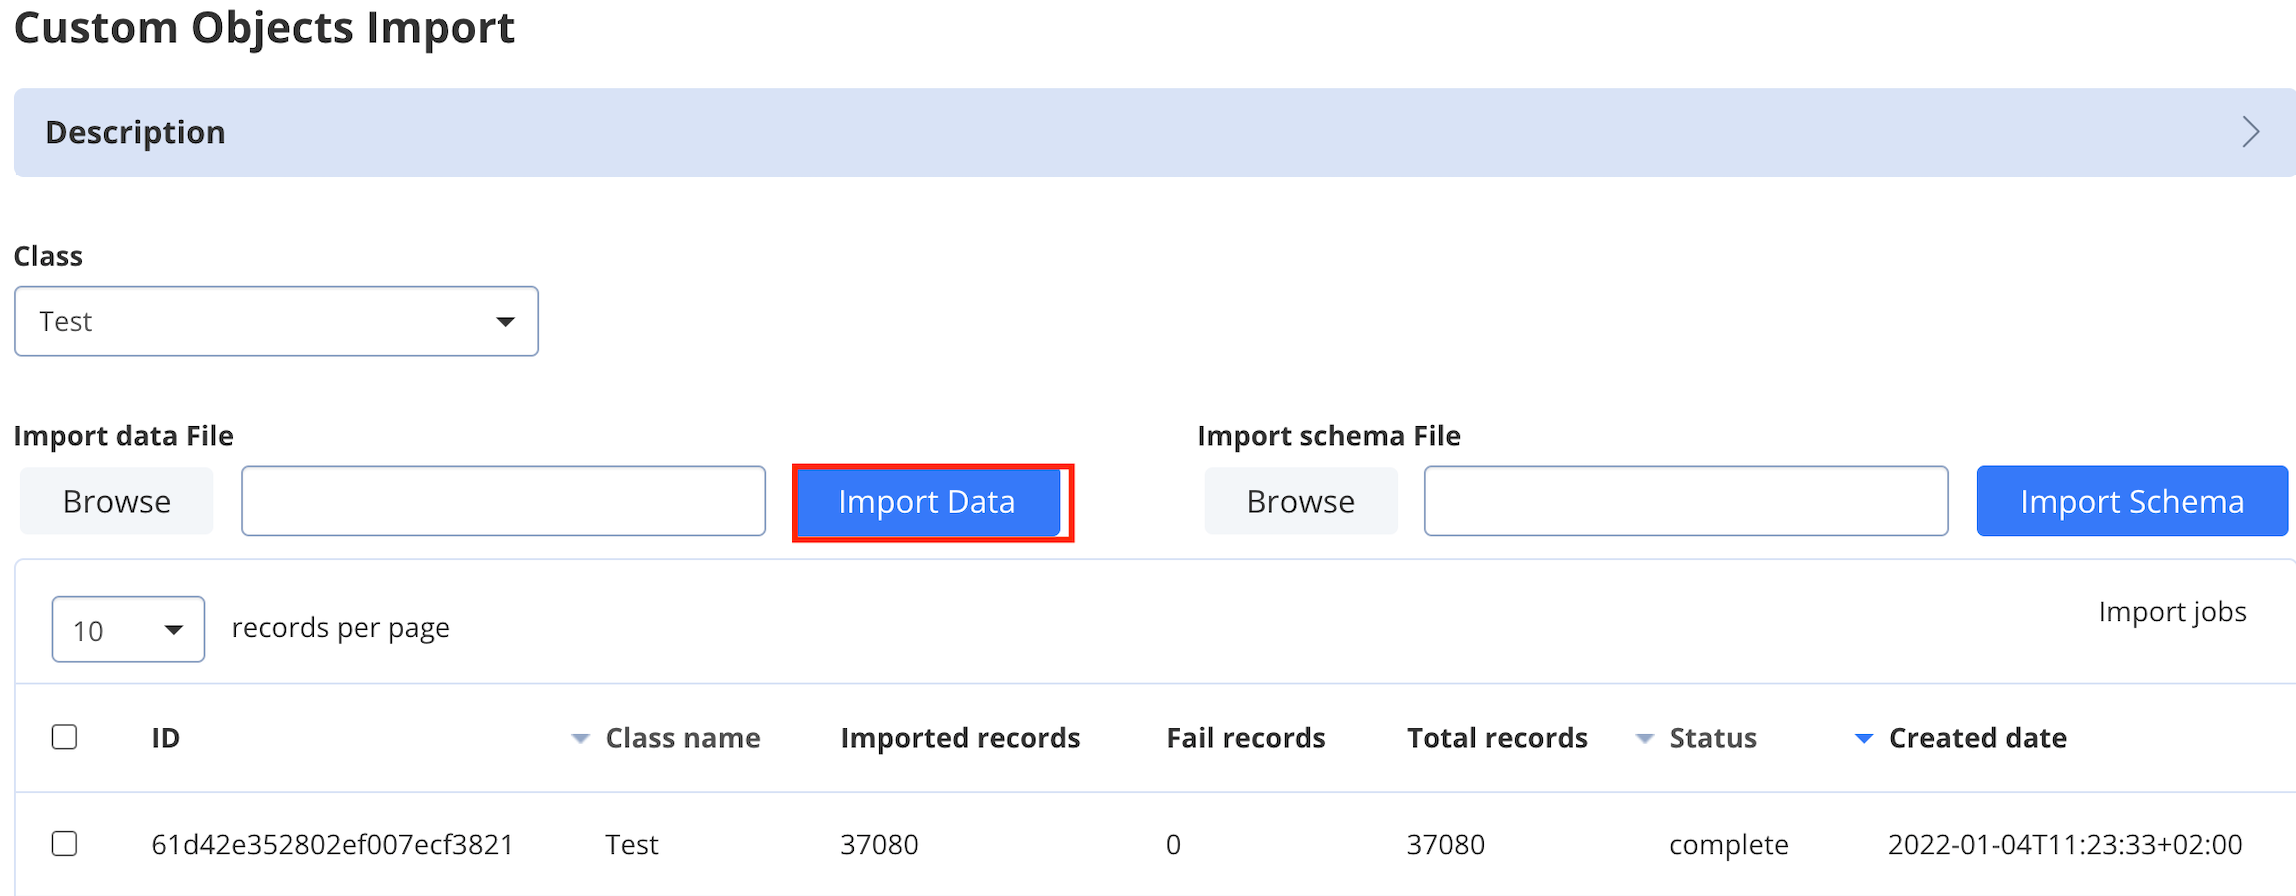
You can import data in CSV or JSON format. To import data, do the following:
1. Navigate to the **Dashboard => *YOUR\_APP* => Custom** page.
2. Select a class in the **Current Class** dropdown.
3. Click **Browse** to choose a CSV or JSON file in a local file system.
4. Click **Import Data**.
1. Set a permission level for each CRUD operation here. See [this section](/docs/key-concepts#permission-levels) to learn more about permission levels.
2. Click the **Update record** button to save changes.
A class permission schema has a higher priority than a record permission schema. If an **account owner** ticks the **Use Class permissions** checkbox, the record permissions are ignored. See [this section](/docs/custom-objects-dashboard#class-permissions) for more details.
## Import data
You can import data in CSV or JSON format. To import data, do the following:
1. Navigate to the **Dashboard => *YOUR\_APP* => Custom** page.
2. Select a class in the **Current Class** dropdown.
3. Click **Browse** to choose a CSV or JSON file in a local file system.
4. Click **Import Data**.
 ## Import schema
You can import a class schema. The class schema defines class fields and their data types in .yml format. To import a class schema, do the following:
1. Navigate to the **Dashboard => *YOUR\_APP* => Custom** page.
2. Select a class in the **Current Class** dropdown.
3. Click the **Browse** to choose a .yml file in a local file system.
4. Click **Import Schema**.
## Import schema
You can import a class schema. The class schema defines class fields and their data types in .yml format. To import a class schema, do the following:
1. Navigate to the **Dashboard => *YOUR\_APP* => Custom** page.
2. Select a class in the **Current Class** dropdown.
3. Click the **Browse** to choose a .yml file in a local file system.
4. Click **Import Schema**.