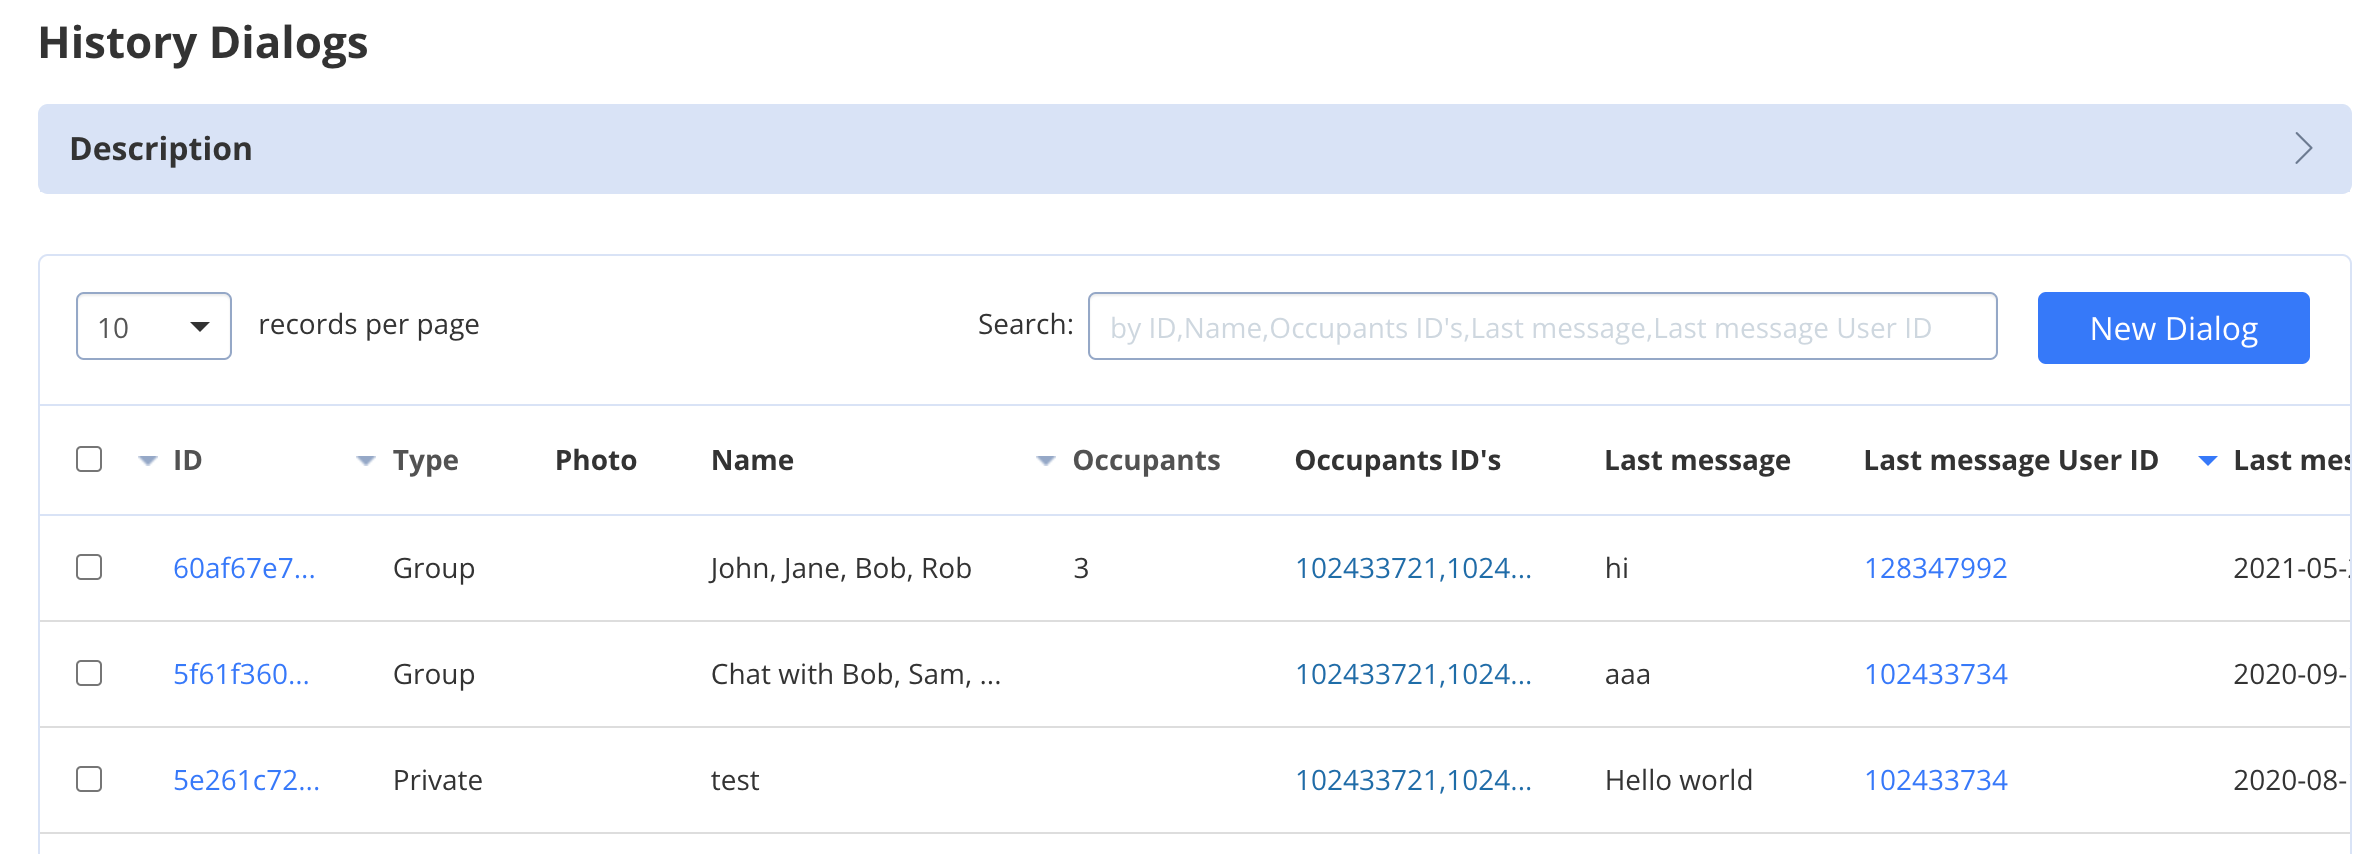
View list of dialogs
To view a list of dialogs, follow the steps below:- Navigate to the Dashboard => YOUR_APP => Chat tab.
- Use a Search area to view a dialog by dialog ID, dialog name, occupants IDs, last message, etc.
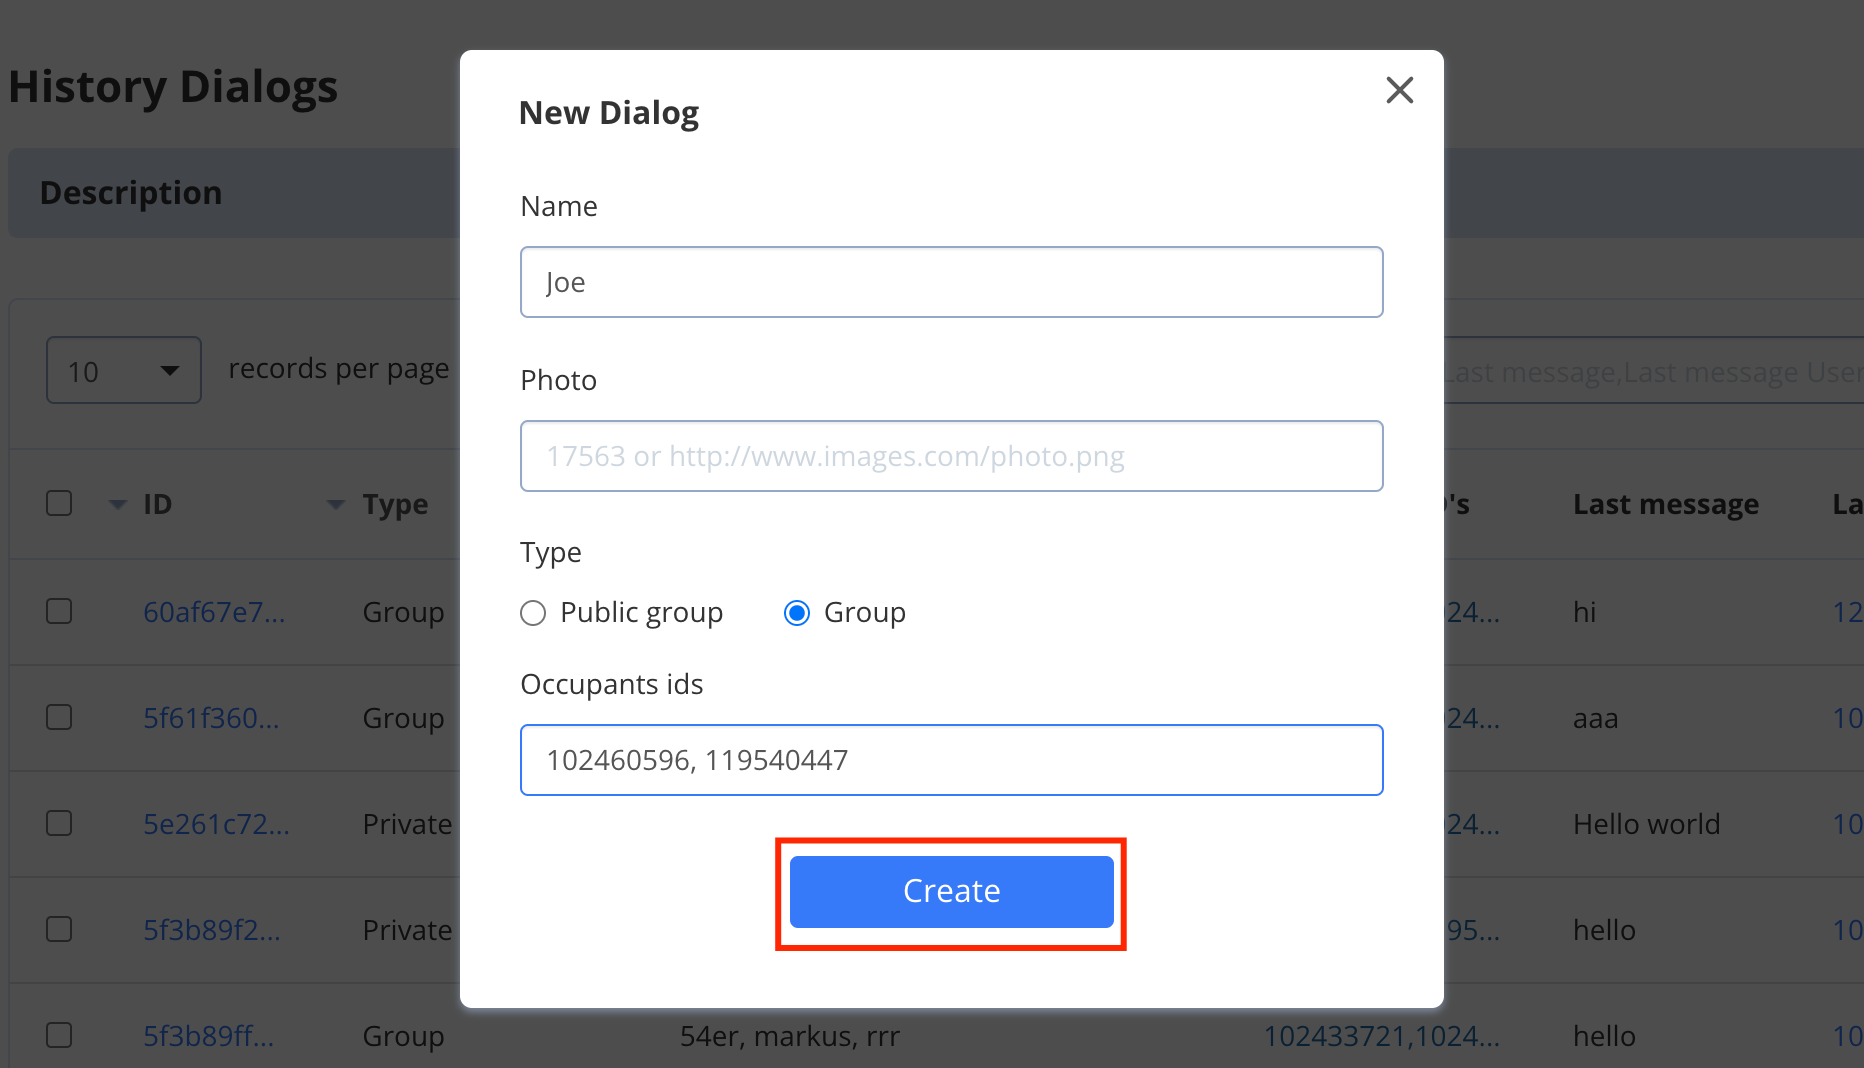
Create dialog
To create a dialog, follow the steps below:- Navigate to the Dashboard => YOUR_APP => Chat tab.
- Click the New Dialog button.
- Enter the name of the dialog into the Name field.
- Enter a photo ID/UID or URL of the photo.
- Specify if the dialog is a group or public group.
- Specify IDs of opponents who are going to participate in the dialog (for group dialog only).
- Click the Create button.
Update dialog
To update a dialog, follow the steps below:- Navigate to the Dashboard => YOUR_APP => Chat tab.
- Click the ID of the dialog in the ID column.
- Update dialog fields.
- Click the Save and close.
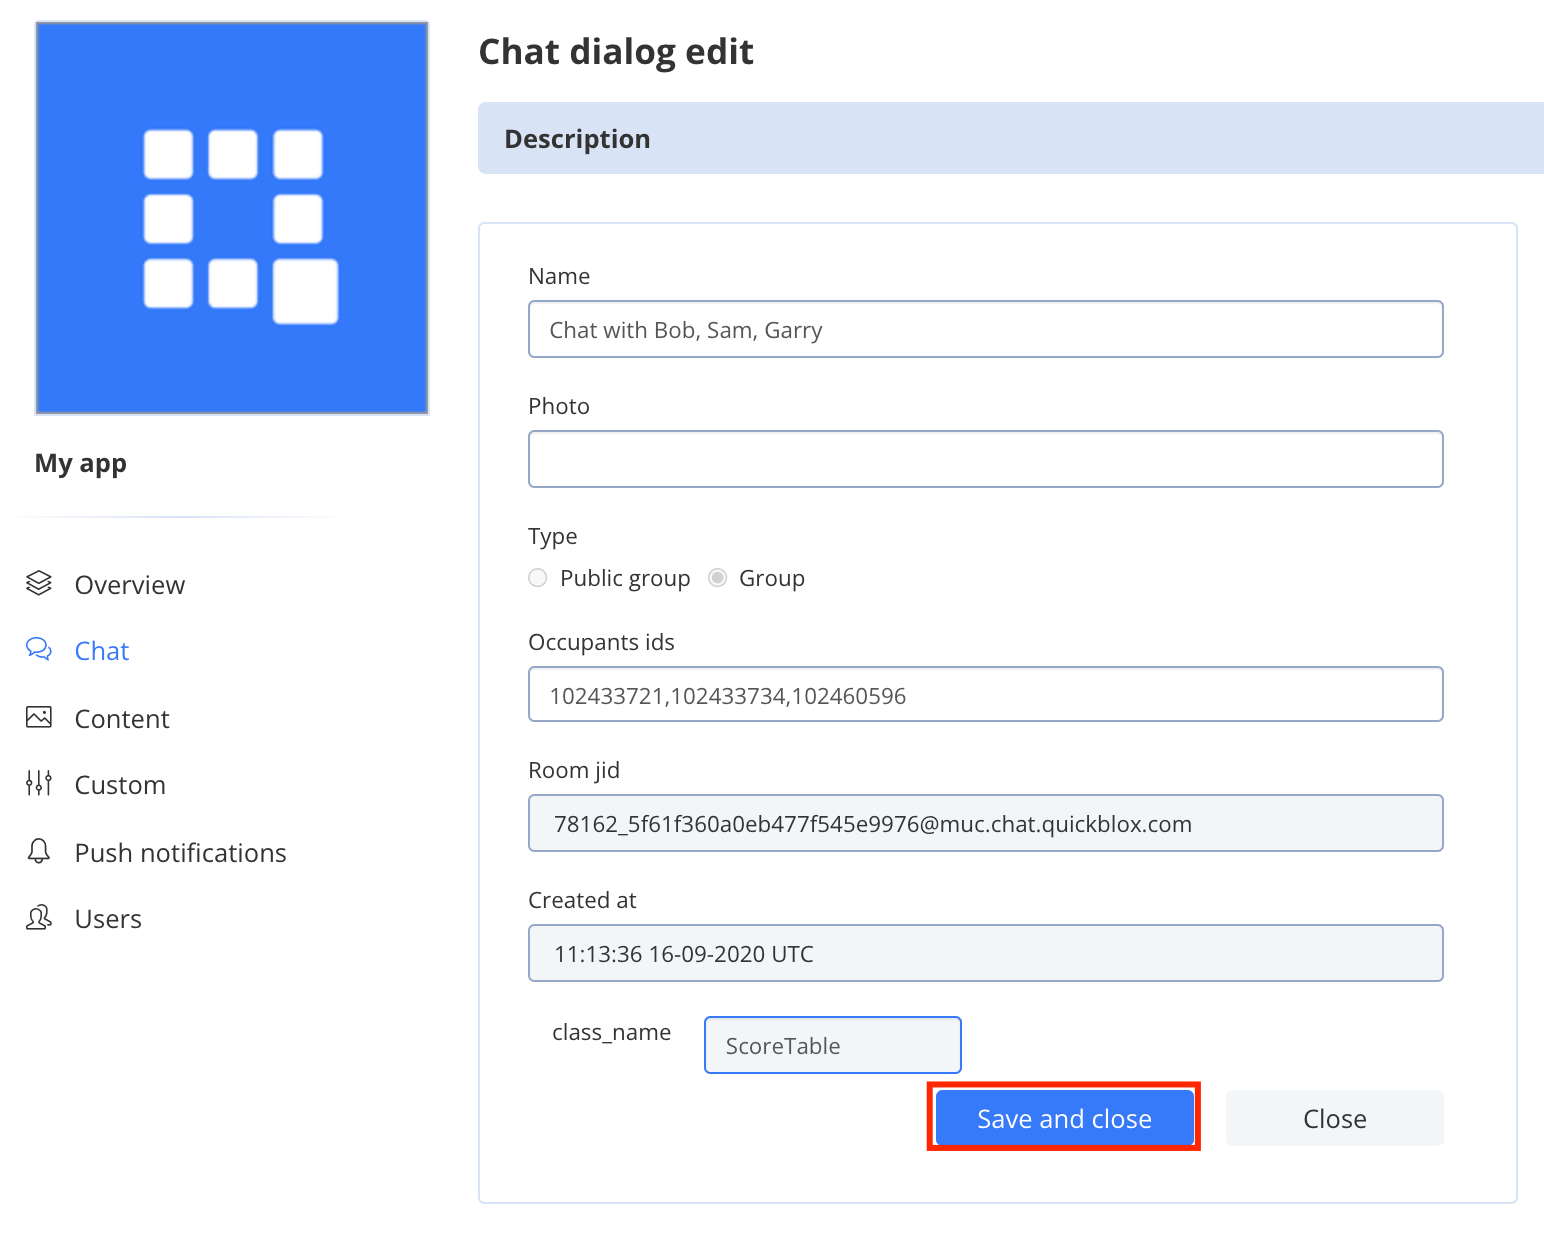
If an account owner removes a dialog occupant, the occupant ID is removed from the occupants IDs list of this dialog. As a result, the dialog is removed from the user’s list of dialogs. However, the dialog remains in the history of other users who are still present in the occupants IDs list.
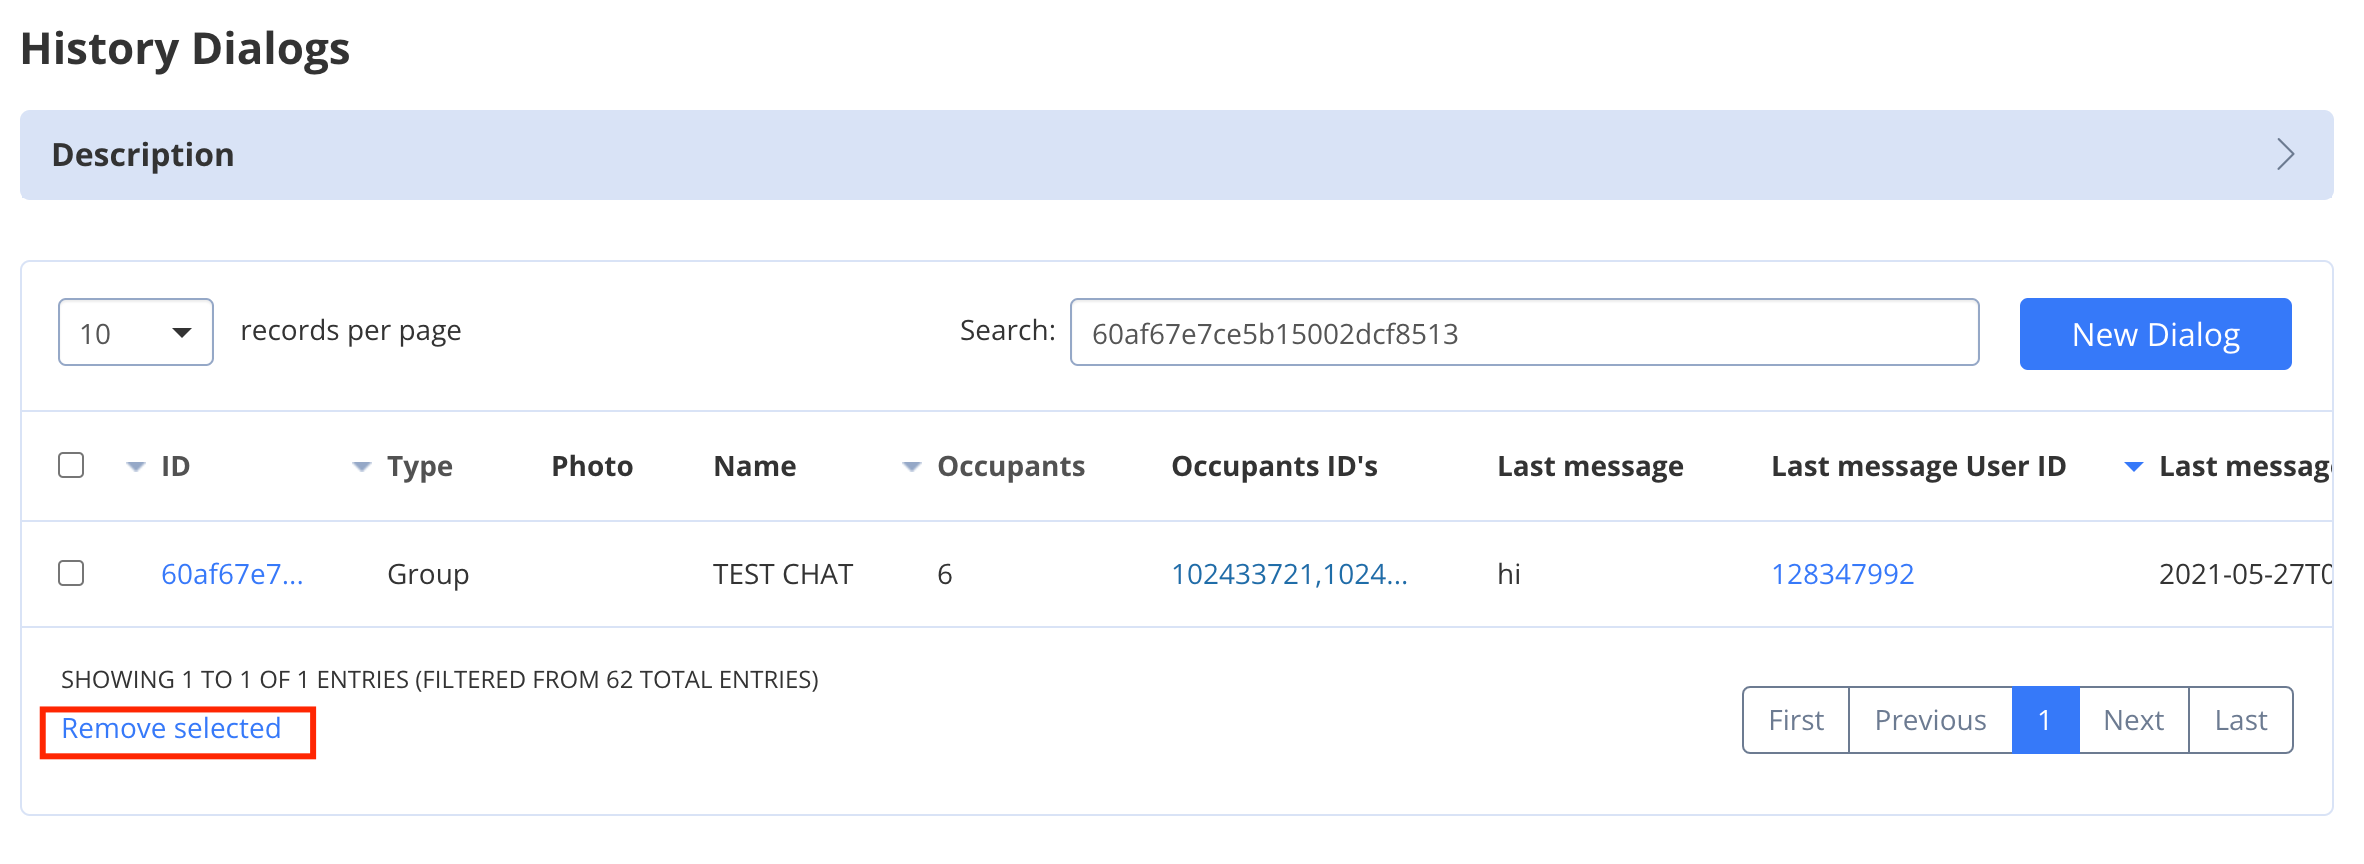
Delete dialog
To delete a dialog, follow the steps below:- Navigate to the Dashboard => YOUR_APP => Chat tab.
- Find the dialog. You can use the search or just locate it in the list of dialogs.
- Check a dialog you want to delete.
- Click the Remove selected.
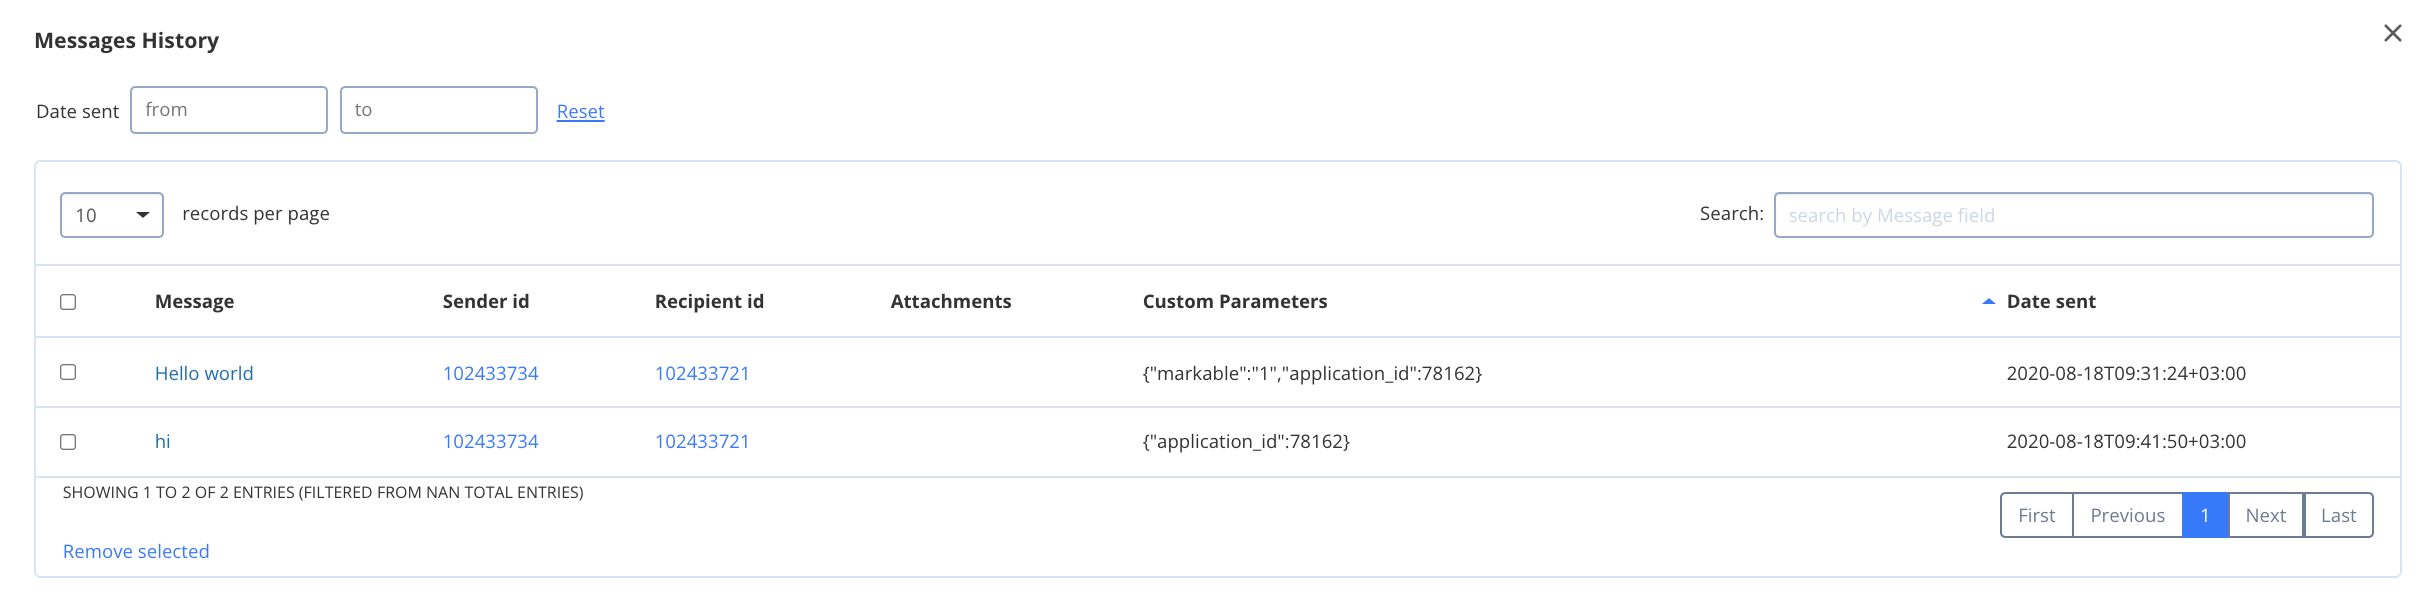
View messages history
To view messages history, follow the steps below:- Navigate to Dashboard => YOUR_APP => Chat tab.
- Find the dialog. You can use the search or just locate it in the list of dialogs.
- Click the View button in the History column.
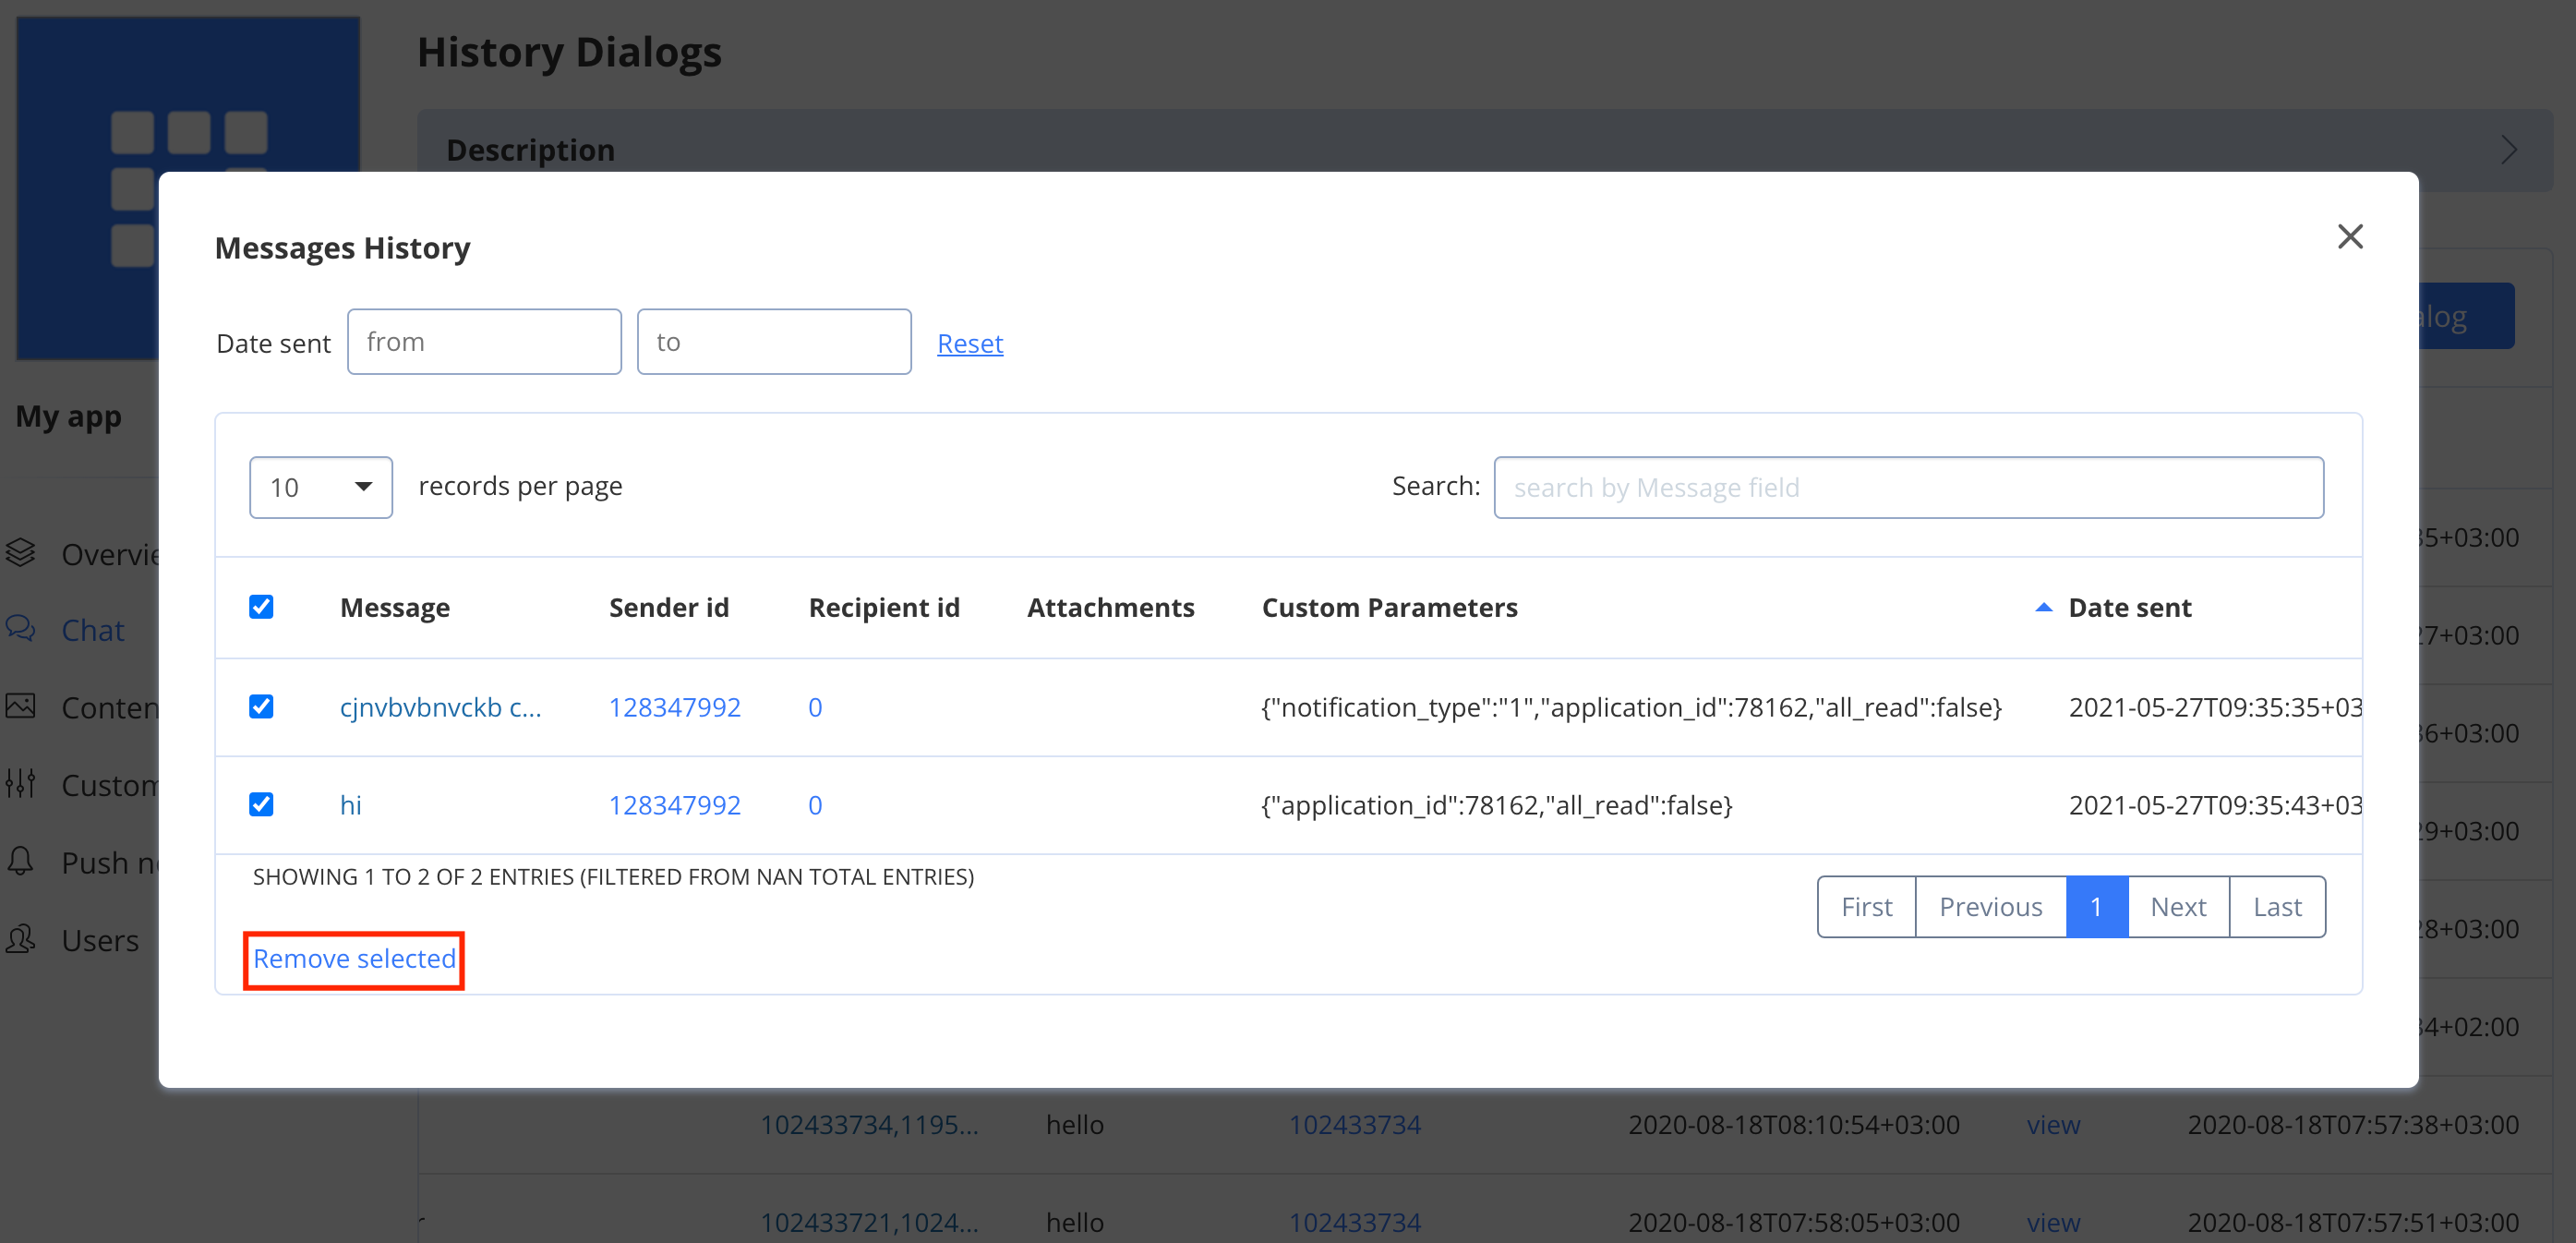
Delete message
To delete a message, follow the steps below:- Navigate to Dashboard => YOUR_APP => Chat tab.
- Find the dialog. You can use the search or just locate it in the list of dialogs.
- Click the View button in the History column.
- Check the messages you want to delete.
- Click the Remove selected button.
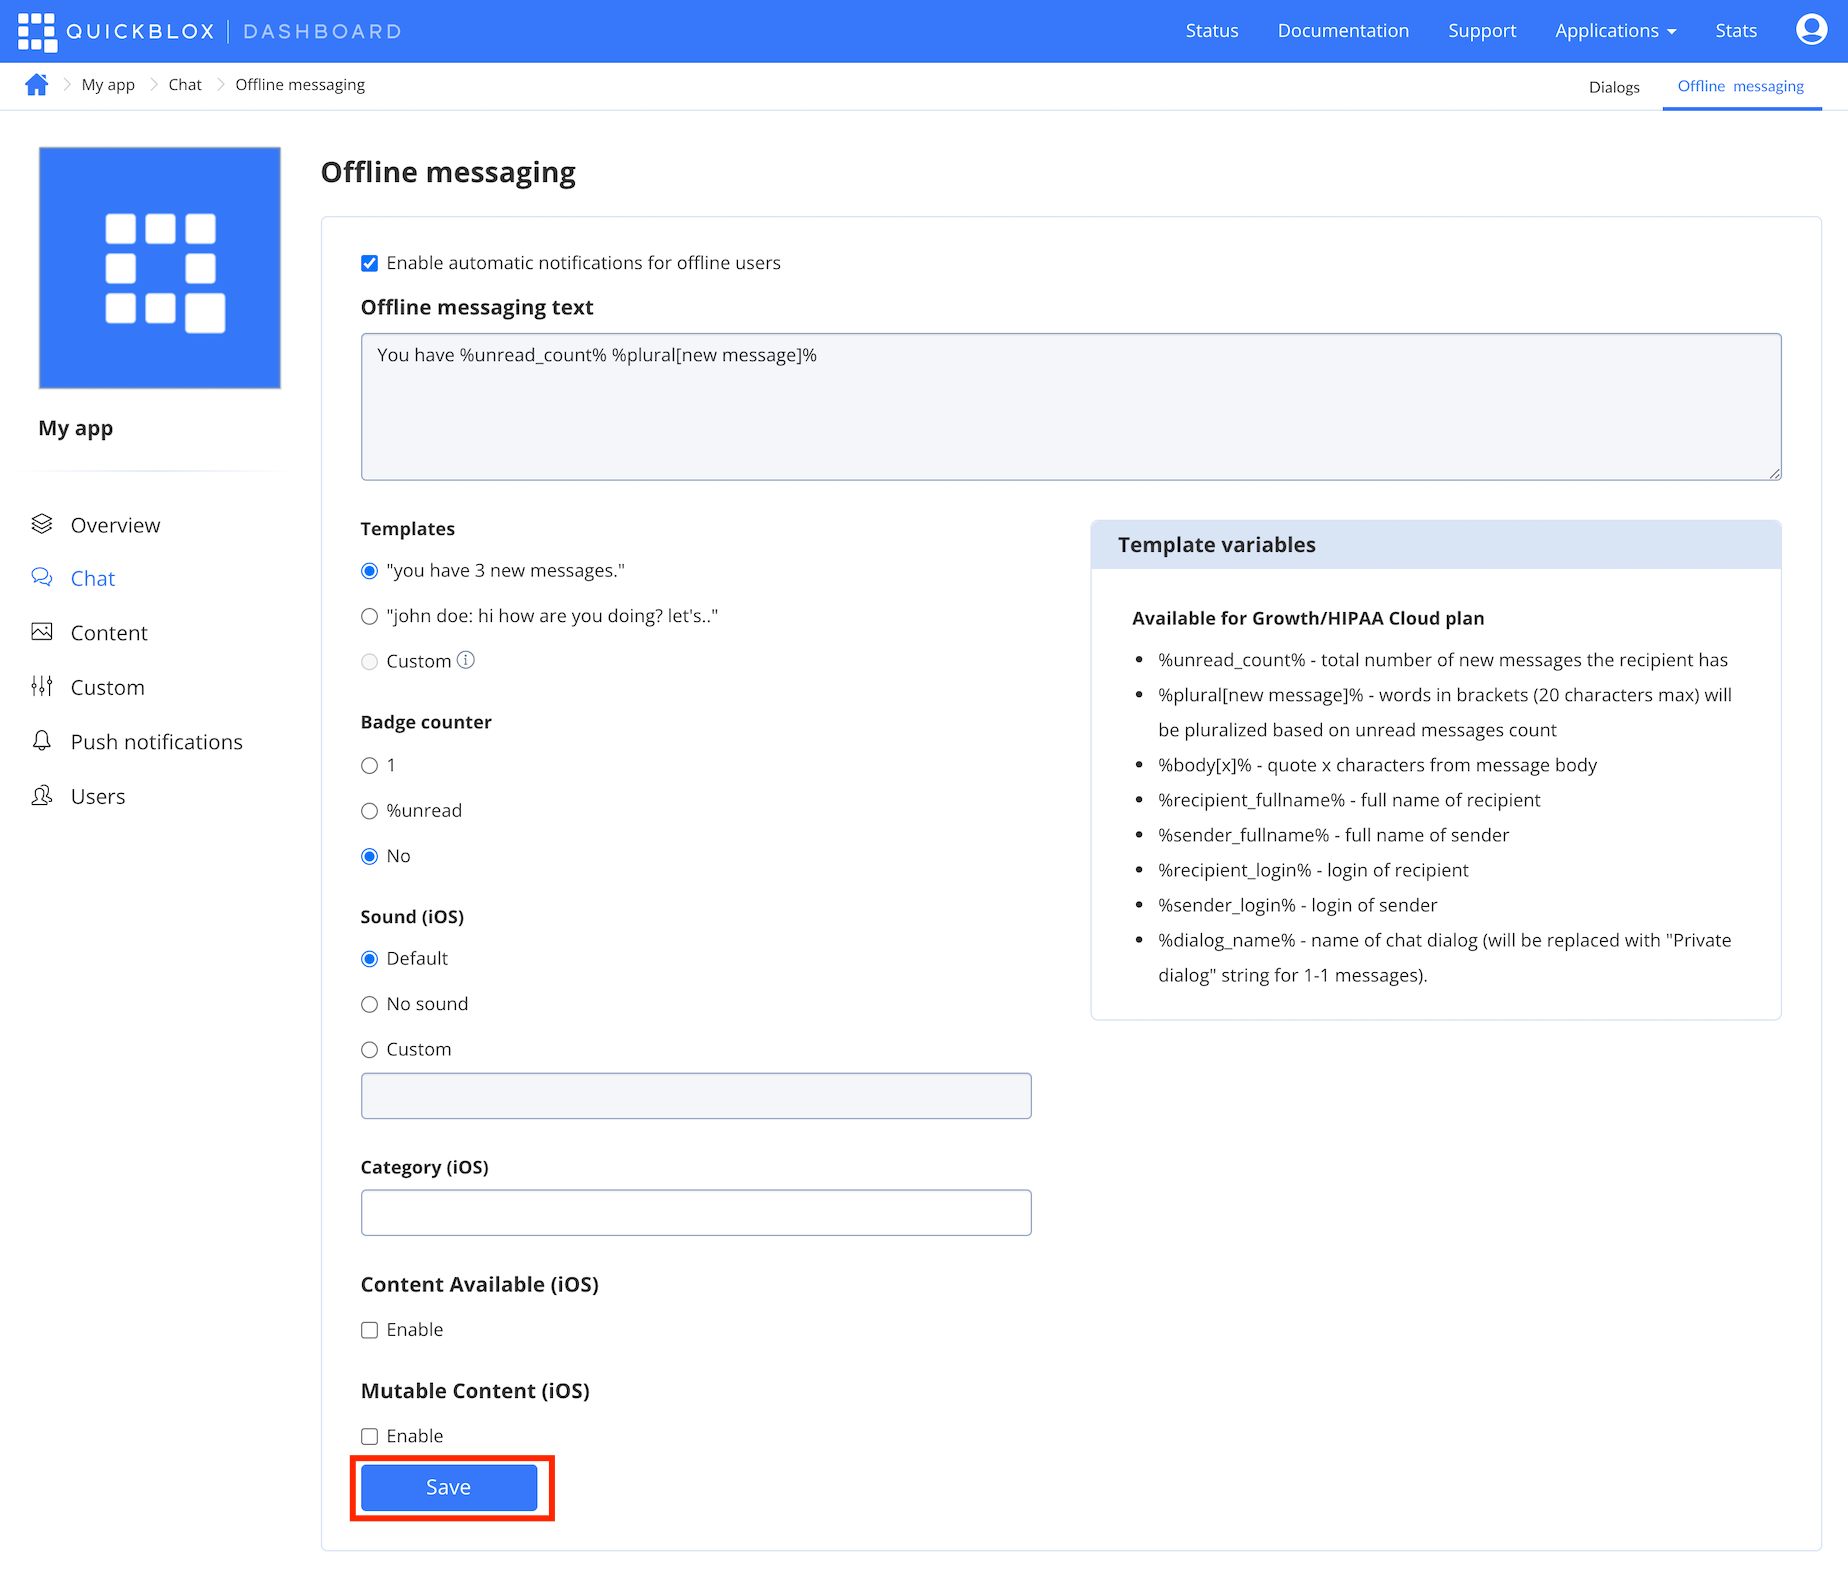
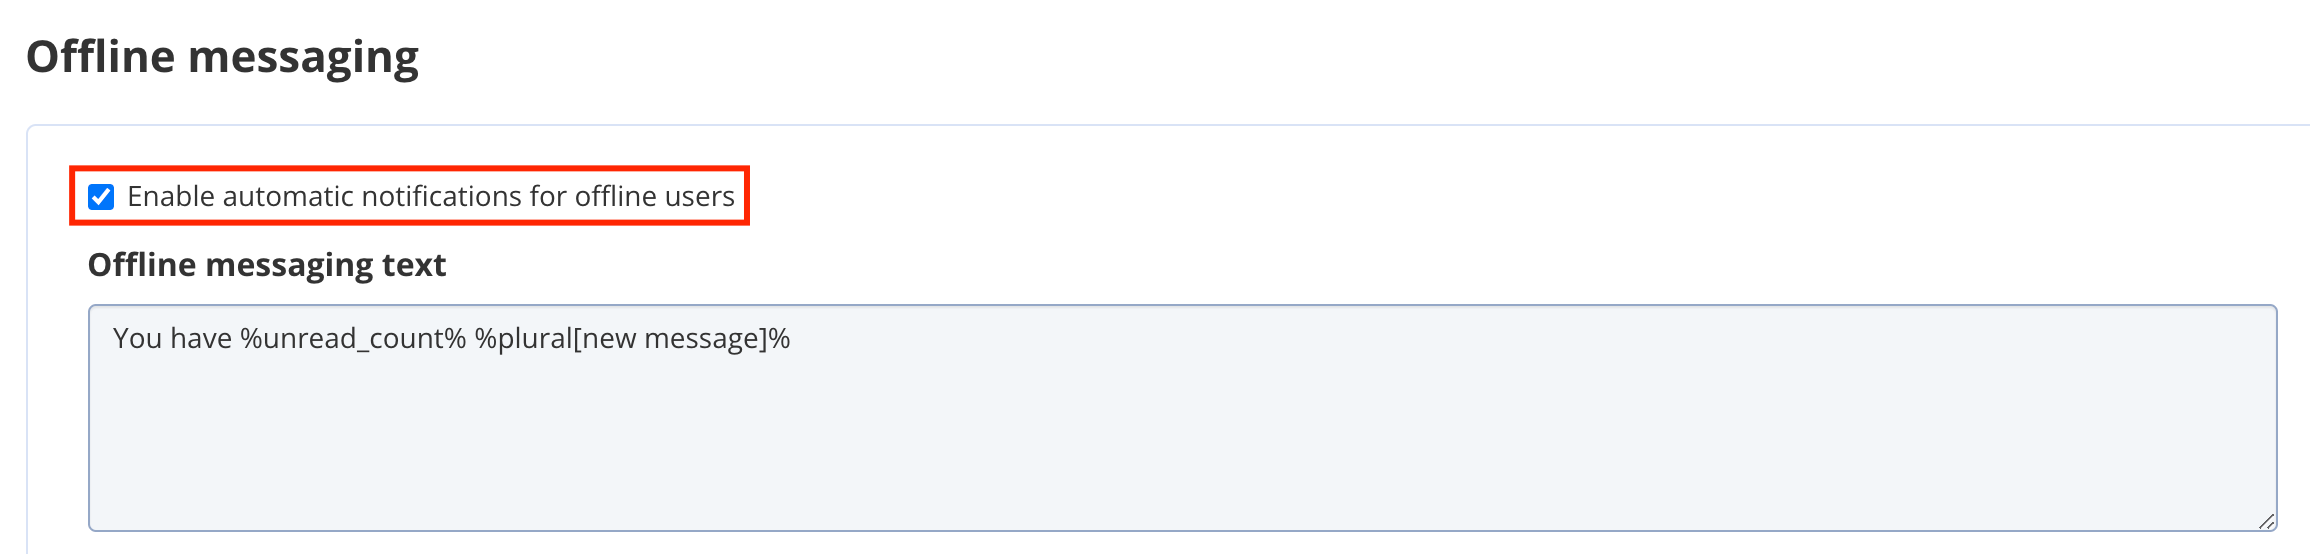
Enable offline messaging
Send notifications about new messages to the user when their app is not running by using offline messaging functionality. This functionality allows to customize automatic push notifications displayed on a user’s device when they are offline. In other words, if your opponent is offline when you are writing a message, they automatically receive a push notification. Enable offline messaging from the Dashboard as follows:- Navigate to the Dashboard => YOUR_APP => Chat => Offline messaging page to locate offline messaging settings.
- Check the Enable automatic push notifications for offline users if you want to receive push notifications from the server automatically.
Configure offline messaging template
You can configure an offline messaging template from the Dashboard as follows:- Navigate to the Dashboard => YOUR_APP => Chat => Offline messaging page to locate offline messaging settings.
- Choose the template in the Templates section.
Available for Growth/HIPAA Cloud/Enterprise planYou can set the custom template in the Offline messaging text section using the following template variables:
- %unread_count% - total number of new messages the recipient has
- %plural[new message]% - words in brackets (20 characters max) will be pluralized based on unread messages count
- %body[x]% - quote x characters from message body
- %recipient_fullname% - full name of recipient
- %sender_fullname% - full name of sender
- %recipient_login% - login of recipient
- %sender_login% - login of sender
- %dialog_name% - name of chat dialog (will be replaced with “Private dialog” string for 1-1 messages)
- Set the Badge counter to include counter info into your push message. Useful to include an unread counter that is the number of unread messages a user has.
- Set a push notification sound in the Sound section (for iOS only).
- Set the Category (iOS) field. Enter “actions” that should be presented in the app notification in various views (for iOS only).
- Enable the Content Available option to indicate that new content is available (for iOS only).
- Enable the Mutable content option to modify the content of newly delivered notifications before the user is alerted. Use a notification service app extension to be able to modify the content of the notification. If the option is enabled, the system passes the notification to the service app extension for the subsequent modification of the notification payload before the actual delivery (for iOS only).
- Click the Save button.